H-Class
169
Windows XP Driver and Port Installation (continued)
13
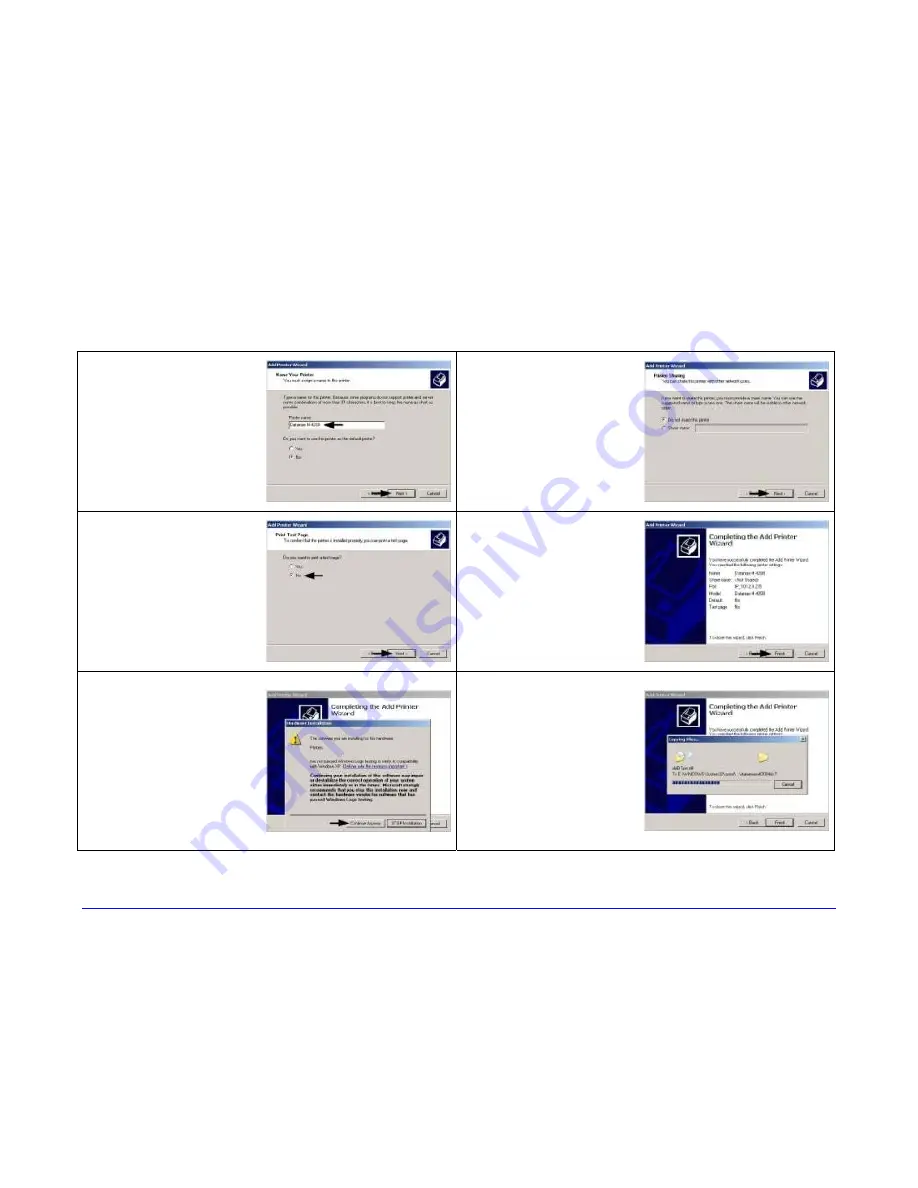
Name your printer
in the ‘Printer
name:’ field. Next
select whether or
not to set this
printer as your
default printer.
Then Click ‘Next’.
14
Select whether or
not to share this
printer on your
network. Then Click
‘Next’.
15
Select ‘No’ then
Click ‘Next’.
16
Confirm your
settings and then
click ‘Finish’.
17
If prompted with
the "Digital
Signature Not
Found" window,
click 'Continue
Anyway’ to
continue
installation.
18
Your computer will
now copy the
necessary files from
the CD-ROM.
The driver and port
installation is now
complete. The
printer can be
selected through
any Window’s
application.
Summary of Contents for H-4212
Page 1: ...Operator s Manual ...
Page 2: ......
Page 5: ......
Page 40: ...30 H Class ...
Page 84: ...74 H Class ...
Page 144: ...134 H Class ...
Page 148: ...138 H Class ...
Page 156: ...146 H Class ...
Page 160: ...150 H Class Network Status page TCP IP Configuration page ...
Page 162: ...152 H Class ...
Page 163: ...H Class 153 Printer Options Communications and Diagnostics pages ...
Page 164: ...154 H Class Network Print Options page ...
Page 165: ...H Class 155 Reset Network Parameters page Change Password page ...
Page 166: ...156 H Class ...
Page 180: ...170 H Class ...
Page 186: ...176 H Class ...


