background image

1

 SKORPIO™ X3


14 

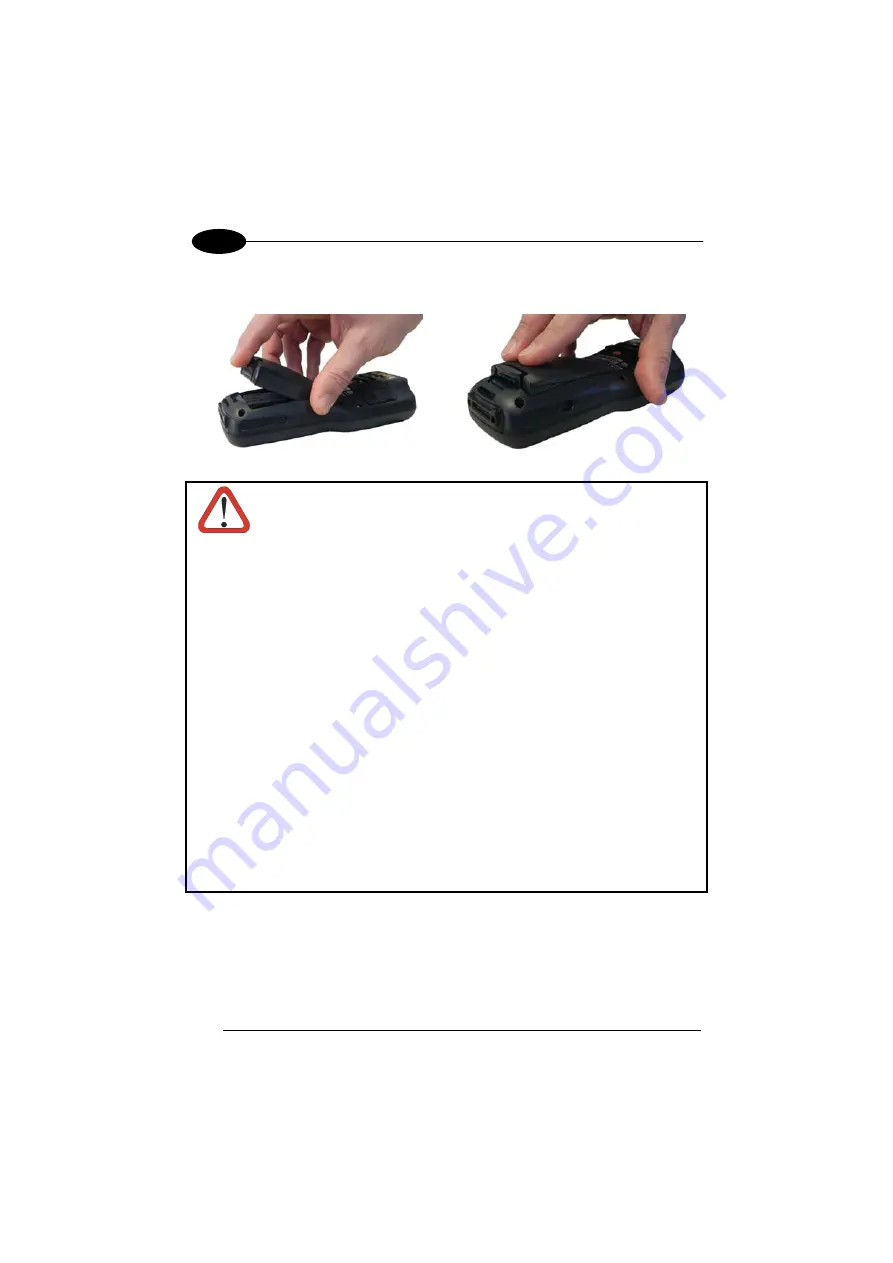
4.  Insert the battery's alignment lugs into the recesses, then press firmly until the 

battery latch clicks twice: 


WARNING 

Installing, charging and/or any other action should be done by 
authorized personnel and following this manual. 

The battery pack may get hot, explode, ignite, and/or cause serious 
injury if exposed to abusive conditions. 

If the battery pack is replaced with an improper type, there is risk of 
explosion. 

Do not place the battery pack in or near a fire or heat; do not place 
the battery pack in direct sunlight, or use or store the battery pack 
inside unventilated areas in hot weather; do not place the battery 
pack in microwave ovens, driers, high pressure containers, on 
induction cooking surfaces, or any similar heat producing device. 
Doing so may cause the battery pack to generate heat, explode or 
ignite. Using the battery pack in this manner may also result in a loss 
of performance and a shortened life expectancy. 

Use only a Datalogic Mobile approved power supply. The use of an 
alternative power supply will void the product warranty, may cause 
product damage and may cause heat, explode or ignite. 

The area in which the units are charged should be clear of debris 
and combustible materials or chemicals. 

Do not use the battery pack of this terminal to power devices other 
than this mobile computer. 

Summary of Contents for Skorpio X3

Page 1: ...mobile datalogic com Datalogic Mobile S r l Via S Vitalino 13 40012 Lippo di Calderara di Reno Bologna Italy Telephone 39 051 3147011 Fax 39 051 3147561 World wide Sales Network available from www mobile datalogic com contacts Skorpio X3 User s Manual ...

Page 2: ...ational laws Copying or altering of this document is prohibited without express written consent from Datalogic Mobile S r l Datalogic and the Datalogic logo are registered trademarks of Datalogic S p A in many countries including the U S A and the E U Skorpio and the Skorpio logo are trademarks of Datalogic Mobile S r l All other brand and product names mentioned herein are for identification purp...

Page 3: ... Connection to USB peripherals 20 3 3 RS232 Connection 22 3 4 WLAN Connection 23 3 5 WPAN Connections 25 3 6 Wireless and Radio Frequencies Warnings 26 4 USE AND FUNCTIONING 28 4 1 Startup 28 4 1 1 Using the Stylus 29 4 2 Windows Embedded Handheld Welcome Wizard 30 4 3 Data Capture 31 4 3 1 Laser Data Capture 32 4 3 2 Imager Data Capture 33 4 4 Description of the Keyboards 35 4 4 1 Full alphanumer...

Page 4: ... Administrative Options Admin tab 88 4 10 2 WebAppLock Options WebAppLoc tab 91 4 10 3 Status Icons Options Status Tab 93 4 10 4 Windows Controls 94 4 10 5 AppSelector Options AppSelect tab 96 4 11 AppSelector Application Selector 99 4 12 WebApplock Locked Web Browser 100 4 12 1 WebApplock Special Meta tags 102 4 13 Autostart 107 4 13 1 Installing CAB files 107 4 13 2 How AutoStart Uses Wceload 10...

Page 5: ...ety Rules 159 Power Supply 159 Laser Safety 160 LED Class 166 Radio Compliance 167 FCC Compliance 169 RF Exposure Information SAR 170 Industry Canada Compliance 171 SAR Compliance 171 Patents 172 WEEE Compliance 173 GLOSSARY 175 INDEX 179 ...

Page 6: ...le Slot Dock REFERENCE DOCUMENTATION For further information regarding Skorpio X3 refer to the SDK Help on Line SERVICES AND SUPPORT Datalogic provides several services as well as technical support through its website Log on to www adc datalogic com and click on the links indicated for further information including PRODUCTS Search through the links to arrive at your product page where you can down...

Page 7: ...an Key F Keyboard G Laser Safety Label H Loudspeaker I Micro USB Charging Port Power Only J Product Label K Reset Key under battery L MicroSD Card Slot under battery M Trigger button for use with the optional pistol trigger Remove protective film cover before use A E F D B C G H I J L K M ...

Page 8: ...1 viii N Data Capture Laser Output Window O HandyLink Connector host device N O ...

Page 9: ... green dot directly on the code where the operator usually tends to be looking Many features work together to facilitate easier and faster reading such as 1D laser and 2D imager bar code readers with Green Spot An inclined scan engine to allows the display to be seen while scanning bar codes with no need to turn the wrist awkwardly while scanning Skorpio X3 display is a TFT Transflective color LCD...

Page 10: ...e models are 942350004 SKORPIOX3 00A0LS 2N0 MEN0 Skorpio X3 with Bluetooth v2 0 802 11 a b g CCX V4 Std Laser w Green Spot Windows Embedded Handheld 6 5 256MB RAM 512MB Flash 28 Key Numeric 942350005 SKORPIOX3 00A0LS 2F0 MEN0 Skorpio X3 with Bluetooth v2 0 802 11 a b g CCX V4 Std Laser w Green Spot Windows Embedded Handheld 6 5 256MB RAM 512MB Flash 50 Key Full alphanumeric 942350008 SKORPIOX3 00A...

Page 11: ...ide 1 CD ROM Getting Started Disk 1 rechargeable standard battery pack 1 Windows Embedded Handheld End User License Agreement 1 Wavelink Avalanche Insert 1 terminal emulation overlay Any other packages will contain the accessories necessary for the Skorpio X3 connection to the host computer and to the network the cradle one or more connection cables Remove all the components from their packaging c...

Page 12: ...1 SKORPIO X3 4 1 NOTE Rechargeable battery packs are not initially charged Therefore the first operation to perform is to charge them See section 2 1 ...

Page 13: ...e Skorpio X3 supports microSD memory cards To access the microSD card slot and insert the card proceed as follows 1 Turn off the Skorpio X3 2 Pull the battery latch down and remove the battery pack 3 Shift the cardholder upwards and then pull it up ...

Page 14: ...SD card with the written part upward 5 Lock the card into place by pushing the cardholder down and then shifting it downwards 6 Insert the battery s alignment lugs into the recesses then press firmly until the battery latch clicks twice ...

Page 15: ...microprocessors in the Skorpio X3 or the microSD card itself Proper ESD precautions include but are not limited to working on an ESD mat and ensuring that the operator is properly grounded Do not force the card If you feel resistance remove the card check the orientation and reinsert it Do not use the microSD card slot for any other accessories It is highly recommended that users latch the card ca...

Page 16: ...1381 Power Supply Dock PWR Plug 2 1mm Cables 94A051020 Cable for dock PC RS232 communication 94A051968 Cable Micro USB Client 94A051969 Cable Micro USB Host 94A051970 Cable USB HandyLink Client 94A051971 Cable USB HandyLink Host 94A051972 Cable RS232 HandyLink Client Various 94ACC1230 Swivel for Functional Case 10pcs 94ACC0044 Stylus Pen with Tether 94ACC1371 Module Ethernet Single Slot Dock 94ACC...

Page 17: ...INTRODUCTION 9 1 NOTE Use only a Datalogic Mobile approved power supply and cables Use of an alternative power supply will invalidate any approval given to this device and may be dangerous ...

Page 18: ...as the frequency of barcode scanning RF usage battery life storage environmental conditions etc The battery icon on the Taskbar indicates when the battery pack is low You may recharge your battery pack by connecting a standard Micro USB wall charger directly to the Skorpio X3 Micro USB charging port The Micro USB port can also be used to charge the Skorpio X3 battery pack from any self powered USB...

Page 19: ...four slot battery charger NOTE It s recommended to charge batteries before first use CAUTION Risk of explosion if battery is replaced by an incorrective type Dispose of used batteries according to the instructions CAUTION Il y a risque d explosion si la batterie est remplacée par une batterie de type incorrect Mettre au rebut les batteris usagées confor mément aux instructions CAUTION Avoid storin...

Page 20: ...rged at an ambient temperature between 0 35º C to achieve the maximum charging rate Never charge the main device or spare batteries in a closed space where excessive heat can build up NOTE The battery level may display incorrectly for several minutes after the Skorpio X3 is disconnected from its charger if the charging cycle is not completed NOTE The Skorpio X3 may get warm during charging this is...

Page 21: ...INTENANCE 13 2 2 2 REPLACING THE BATTERY PACK To correctly replace the battery pack proceed as follows 1 Turn off the Skorpio X3 2 Pull the battery latch down as indicated in the figure below 3 Remove the battery pack ...

Page 22: ...tery pack inside unventilated areas in hot weather do not place the battery pack in microwave ovens driers high pressure containers on induction cooking surfaces or any similar heat producing device Doing so may cause the battery pack to generate heat explode or ignite Using the battery pack in this manner may also result in a loss of performance and a shortened life expectancy Use only a Datalogi...

Page 23: ...isassemble or modify i e bend crush or deform the battery pack The battery pack contains safety and protection devices which if damaged may cause the battery pack to generate heat explode or ignite In case of leakage of liquid from the battery avoid contact with skin or eyes If contact occurs immediately flush the affected area with water and contact a doctor Do not solder directly onto the batter...

Page 24: ... the battery is not sufficiently charged the Skorpio X3 will not turn on when the ON OFF Power button is pressed In this case either substitute a sufficiently charged battery insert the Skorpio X3 into a powered cradle or plug it into a wall charger NOTE To maximize battery life turn off radios when they are not needed ...

Page 25: ...BATTERIES AND MAINTENANCE 17 2 2 3 CLEANING THE MOBILE COMPUTER Periodically clean the Skorpio X3 with a slightly dampened cloth Do not use alcohol corrosive products or solvents ...

Page 26: ...Datalogic HandyLink cable 94A051970 to directly connect the Skorpio X3 to a host computer to transfer data through the USB interface Key A Host computer C Skorpio X3 B 94A051970 HandyLink USB Client Cable NOTE The HandyLink cable complies to the USB 1 1 standard A B C ...

Page 27: ...dle Key A Host computer C Skorpio X3 Single Slot Dock B 94A051968 Micro USB Client Cable D 94ACC1381 Power Adapter NOTE Connection through the cradle complies to 1 1 USB standard NOTE The actual data transfer speed can be appreciably lower than the maximum theoretical speed CAUTION Don t insert the wall charger into the Micro USB port when the Skorpio X3 is inserted into the dock B D C A ...

Page 28: ...For all these devices maximum current withdrawal must be below 100mA Key A Keyboard with USB interface C 94A051971 HandyLink Micro USB Host Cable B Skorpio X3 Key A USB hard drive external memory source C 94A051971 HandyLink Micro USB Host Cable B Skorpio X3 D Standard A to Micro A USB Cable A standard USB cable is needed only if the USB hard driver or flash memory device does not include its own ...

Page 29: ... Dock E 94ACC1381 Power Adapter C 94A051969 Micro USB Host Cable NOTE Skorpio X3 works with most of mentioned USB peripherals Datalogic can not guarantee the operations of Skorpio X3 with all devices on the market NOTE Connection is compliant to 1 1 USB standard NOTE The actual data transfer speed can be appreciably lower than the maximum theoretical speed A standard USB cable is needed only if th...

Page 30: ...B 94A051972 HandyLink Micro RS232 Client Cable The Single Slot Dock can be connected to the Host by means of a standard null modem cable such as Datalogic 94A051020 CAB 427 for 9 pin connections Once the Host has been turned on insert the Skorpio X3 mobile computer into the cradle Key A Host Computer C Skorpio X3 Single Slot Dock B 94A051020 CAB 427 RS232 Null Modem Cable D 94ACC1381 Power Adapter...

Page 31: ...twork For models using the 802 11 a b g radio you can find information about the applet for radio configuration http www summitdata com SCU htm To launch this utility you can tap the specific icon if it s visible on the taskbar or you can select the menu item Start Programs Summit and tap the SCU icon Key A Skorpio X3 B Access point C Host Application Server A B C A ...

Page 32: ... depending on the radio power mode and security protocol selected it may take up to 30 seconds for the 802 11 a b g radio driver to re associate the radio to the network NOTE Area coverage and radio performance may vary due to environmental conditions access points types or interference caused by other devices microwave ovens radio transmitters etc NOTE In case of heavy usage the Skorpio X3 could ...

Page 33: ...ve Bluetooth working the module must be powered on using the SCU see par 4 6 6 and perform the Discovery procedure see par 4 7 2 NOTE Suspending the terminal powers off the Bluetooth radio and drops the piconet Bluetooth connection When the terminal resumes it takes approximately 10 seconds for the Bluetooth radio driver to re initialize the radio NOTE Area coverage and Bluetooth radio performance...

Page 34: ...e than twenty five 25 cm from their pacemaker and or any other medical device Should not carry this device in a breast pocket Should keep the device at the opposite side of the pacemaker and or any other medical device Should turn this device OFF or move it immediately AWAY if there is any reason to suspect that interference is taking place Should ALWAYS read pacemaker or any other medical device ...

Page 35: ...ipment is improperly installed and the air bag inflates serious injury could result WARNING Turn off the device when in any area with a potentially explosive atmosphere Observe restrictions and follow closely any laws regulations warnings and best practices on the use of radio equipment near fuel storage areas or distribution fuel areas chemical plants or where some operation involves use of explo...

Page 36: ...e the ON OFF key to turn the mobile computer on and off As soon as the mobile computer is on the Windows Embedded Handheld 6 5 desktop configuration will appear on the screen Wait a few seconds before starting any activity so that the mobile computer completes its startup procedure Today Screen Start Menu Use the stylus par 4 1 1 as suggested to select icons and options The mobile computer goes in...

Page 37: ...able for that item On the pop up menu that appears tap the action you want to perform To recalibrate the touch screen use the Stylus applet see par 4 6 7 CAUTION Use only original Datalogic styluses supplied with the product itself In harsh applications use of screen protectors should be taken into consideration in order to extend the touch screen operating life To prevent damage to the screen do ...

Page 38: ... clean boot or following a registry restore to default values the mobile computer startup see par 4 1 is preceded by the Welcome Wizard Welcome Wizard Screen The Welcome Wizard allows the user to calibrate the touch screen see par 4 6 7 and to configure an email account and a password to protect the terminal Touch Screen Calibration Screen ...

Page 39: ...USE AND FUNCTIONING 31 4 4 3 DATA CAPTURE To capture data first of all tap Start Settings System Decoding To configure and enable data capture parameters refer to par 4 6 1 ...

Page 40: ...or the pistol trigger The lighted band emitted by the laser must completely cross the barcode as shown in the figure below If the scan has taken place correctly the Good Read LED glows green as long as the user holds the trigger the Good Read Beep emits an acoustic signal the Green Spot projects a green spot onto the bar code image It is enabled by default but can be silenced ...

Page 41: ...he code and press the SCAN Key or the pistol trigger The Skorpio X3 Imager uses an intelligent aiming system pattern similar to those on cameras indicating the field of view which should be positioned over the code Aiming System If the aiming system pattern is centered over the entire symbology as shown in the following figure either wait for the timeout or release the Scan key or the trigger to c...

Page 42: ... be smaller when the Skorpio X3 Imager is closer to the code and larger when it is farther from the code Symbologies with smaller bars or elements mil size should be read closer to the unit Symbologies with larger bars or elements mil size should be read farther from the unit See par 5 1 for further details If the scan has taken place correctly the Good Read LED glows green until the user releases...

Page 43: ...PTION OF THE KEYBOARDS The Skorpio X3 comes with three different keyboards a full alphanumeric keyboard having 50 keys an alphanumeric keyboard having 38 keys and a numeric keyboard having 28 keys 4 4 1 Full alphanumeric Keyboard 50 Keys ...

Page 44: ...ter or function printed in yellow above the key Blue modifier one shot key when pressed before a standard key it enables the character or function printed in blue above the key The ON OFF Power button powers the Skorpio X3 ON or OFF It is placed on the upper left side of the terminal After a Blue modifier key press the blue arrows allow moving forwards or backwards within the Internet Explorer bro...

Page 45: ...USE AND FUNCTIONING 37 4 4 4 2 Numeric Keyboard 28 Keys ...

Page 46: ...ggle key when pressed before a standard key it enables the character or function printed in yellow above the key Blue modifier one shot key when pressed before a standard key it enables the character or function printed in blue above the key The ON OFF Power button powers the Skorpio X3 ON or OFF It is placed on the upper left side of the terminal After a Blue modifier key press the blue arrows al...

Page 47: ...key 0 excluded and the ESC key share the following behavior scheme A Function of the key when directly pressed B Modified by the Yellow key repeated presses cycle through the letters shown on the keyboard overlay for each key The letter is entered if you wait for a short timeout A B ...

Page 48: ... Terminal Emulation Overlay Insertion To insert the terminal emulation overlay proceed as follows 1 Remove the overlay using a screwdriver 2 Insert the terminal emulation overlay first the upper side 3 Fix the overlay with the screwdriver ...

Page 49: ...served The Registry is restored from persistent memory A clean boot restores the Skorpio X3 to a clean configuration both the Registry and the file system returns to a clean status that conforms to factory default Warm Boot To perform a warm boot press and hold the following keys simultaneously Cold Boot To perform a cold boot do the following steps 1 Turn off the Skorpio X3 by pressing the ON OFF...

Page 50: ...ss and hold down the Esc 0 keys simultaneously prompty after resetting A dialog box will appear asking for confirmation Press the Enter Key Warm Boot Cold Boot Clean Boot Registry Restored from flash Restored from flash Clean configuration no user config File System Preserved Preserved Clean Installation no user files ...

Page 51: ... Charging Status left side Green It is solid once the charging process has been completed full charge Red It is solid while charging Blinking Red It blinks in case of charge fault Blinking Amber It blinks when the device raises a notification to the user Keyboard Status center Off Keyboard in primary Solid Yellow Yellow alternate key mode Solid Blue Blue alternate key mode Pink CapsLock enabled Th...

Page 52: ...l the keyboard function and the decoding status Windows Embedded Handheld Taskbar ICONS DESCRIPTION Zooms the screen Opens the Wireless Manager see par 4 6 6 Displays the system battery status Allows to set the volume of screen taps Opens Clock Alarms application It allows to set date time and alarms ...

Page 53: ...L PANEL From the Start menu tap Settings The Control Panel is split into three sections Personal System Connections Control panel applets are displayed as icons each icon corresponds to one applet Windows Embedded Handheld Control Panel ...

Page 54: ...l Configuration pages and multiple Barcode symbology pages DECODING CONFIGURATION PAGES Select the desired configuration from the options shown in the figure below and the other Decoding Properties figures on the following pages Select General 1D Bar Code or 2D Bar Code then use the menu or tap the left and right arrow keys to navigate the different pages of the Decoding utility The menu options w...

Page 55: ...eral Audio Use it to set volume tone duration and number of various types of beeps Good Read From the Decoding Properties page tap Configure General Good Read Use it to enable Good Read indications the use of Green Spot and a to set the decoding timeout for decoding labels ...

Page 56: ... tap Configure General Formatting Use it to configure prefix suffix and data separator character strings General Options From the Decoding menu tap Configure General General Options Select from Label Programming Enable Symbology IDs and Group Separator Replacement ...

Page 57: ...Decoding Properties page tap Configure General Decoding Options Use it to configure the User ID for symbologies Redundancy and Aggressive Decoding if supported by the decoding module Select a symbology to view or change the available properties settings ...

Page 58: ...operties page tap Configure General Spot Beam It allows enabling and configuration of Spot Beam and triggering modes It is only available on devices equipped with laser and advanced long range laser decoding modules that support the Spot Beam Feature ...

Page 59: ...ager Options From the Decoding Properties page tap Configure General Imager Options It configures illumination target beam and Pick List mode and triggering modes It is only available on devices equipped with 2D decoding engines ...

Page 60: ...1 SKORPIO X3 52 4 Devices From the Decoding Properties page tap Configure General Devices Use it to enable or disable the keyboard wedge for Barcode scanner ...

Page 61: ...te the different pages of the barcode symbology pages Each barcode symbology opens to its own page as shown in the figure below Refer to the sample symbology control panels for examples of the types of fields and options you can modify Codabar Select Enable Min Max Lengths Enable Checksum Send Checksum Send Start Stop Convert to CLSI and Wide Gaps ...

Page 62: ...and or other available default settings Choose from Factory Defaults Minimum Settings Maximum Settings Save New Settings Revert to Saved Settings The settings are saved when you tap Yes When open Decoding Properties acts as a simple barcode test tool that provides the Data decoded and the Data Type of the barcode scanned ...

Page 63: ...stomize the program hardware buttons to launch your most used applications Under Select a button tap the button you want to assign a program to and then select a program from Assign a program To configure the way the up down control repeats use the Up Down Control applet Start Settings Personal Buttons Up Down Control ...

Page 64: ...efault applications To customize one of these buttons and assign it to a different application you first need to disable it Tap Start Settings System DL Buttons to display the DL Buttons window Select the button you want to disable Select the function None and the click OK To remove the disabled button select it and click Delete ...

Page 65: ...USE AND FUNCTIONING 57 4 A dialogue box appears asking for confirmation Click Yes To add the button back click New and write the name of the button on the box that appears ...

Page 66: ...1 SKORPIO X3 58 4 To assign a new application to the button select the function and then click OK To restore the old settings do a clean boot ...

Page 67: ...FUNCTIONING 59 4 4 6 4 Triggers Triggers are special customizable buttons that are mapped by default by DL Mobile Also they can be set as wakeup buttons TRIGGER APPLICATION Scan Bar Code Pistol Trigger Bar Code ...

Page 68: ...n assigned shortcut key specified in the DL Buttons tab refer to par 4 6 3 When the assigned button is pressed the dialog shown below will be displayed NOTE The Esc key can be used to close the Application Switcher Press the assigned button to open the application switcher Press the assigned button to cycle through the running applications when the dialog is open Press Enter to switch to the selec...

Page 69: ...sort of Control Panel for wireless connections From here it s possible to turn on or off bluetooth and radio modules Open the Wireless Manager by tapping Start Settings Connections Wireless Manager or by tapping the connectivity icon on the taskbar see par 4 5 2 The following window will appear ...

Page 70: ...62 4 Summit Client Utility SCU Wireless networking has a customized control Summit Client Utility SCU specific to the radio From the Start menu tap Summit SCU The SCU will open to the Main tab Summit Client Utility ...

Page 71: ... create a new profile tap the Profile tab Information about the wireless network can be entered directly in the profile tab or by pressing Scan when the desired network ESSID is in range 2 At the Scan screen select the desired SSID ...

Page 72: ...ity parameters for your network For more detailed settings specific to your installation please contact your wireless network administrator 5 When finished click Commit to save your settings Return to the Main tab if you have not previously selected Commit you will be prompted to save your changes ...

Page 73: ...ust created If you used the scan button the desired profile will have the same name as the ESSID Use the Status tab to check connectivity to the network More detailed information about the applet for radio configuration can be found at http www summitdata com SCU htm ...

Page 74: ...1 Select Start Settings System Screen to open the Screen Settings dialog as shown in the figure below 2 Tap Align Screen to open the Calibration screen shown in the figure below 3 Carefully press and briefly hold stylus on the center of the target Repeat as the target moves around the screen 4 By completing the calibration procedure you implicitly accept the new calibration settings New calibratio...

Page 75: ...inal a Welcome Wizard with Stylus Calibration comes up if valid calibration settings are not available This happens in the following circumstances 1 At the first startup of the terminal 2 After any cold boot if the user skipped stylus calibration earlier 3 After a Clean Boot ...

Page 76: ...olume Sounds Audio From the Start Menu tap Settings System Audio The audio control panel can be used to independently set the playback or recording volume for different types of audio inputs and outputs such as a headset powered mobile dock or the internal speakers and microphone Audio Windows ...

Page 77: ...D FUNCTIONING 69 4 Sounds Notifications From the Start Menu tap Settings Sounds and Notifications The Volume Sounds applet configures audio features of all speakers and headphones Sounds Tab Notifications Tab ...

Page 78: ...1 SKORPIO X3 70 4 To set the Bluetooth headset volume you can also tap Start Settings System Bluetooth Manager Connections and select the headset The following window will appear ...

Page 79: ...oft ActiveSync You can establish a connection to your Skorpio X3 through the following interfaces USB either directly or through the Single Dock RS232 either directly or through the Single Dock Bluetooth see par 4 7 2 To establish a partnership between the Skorpio X3 and a host PC start Windows Mobile Device Center and follow the steps below 1 Connect the Skorpio X3 to the host PC Windows Mobile D...

Page 80: ...o wp6 sync prepare to sync windows phone 6 5 with my computer aspx NOTE When a microSD card is inserted Skorpio X3 allows a mass storage data connection to a host PC This functionality can be enabled through the Control Panel When doing so the microSD card is not available to the Skorpio X3 An ActiveSync connection is not possible when this feature is enabled ...

Page 81: ...ble and within close range 1 Open the Bluetooth control panel by tapping Start Settings System Bluetooth Manager 2 Search for available Bluetooth devices by tapping the button for the type of device you want Printer Serial or All or tap Discovery Discover to skip this step The Skorpio X3 will search for Bluetooth devices within range NOTE If you attempt to set up a connection when the Bluetooth ra...

Page 82: ... displayed in the Discovery tab You can set up a connection to a device in the list by selecting the device and then tapping the Connect button To create a pairing 1 Select a service 2 Configure any encryption authentication or virtual port options required by the service selected ...

Page 83: ...Interface Device HID Keyboard Serial Personal Area Network PAN Modem Headset Handsfree Virtual Port allows you to specify the incoming port which is used to communicate serially with an incoming device just as if it were a physical COM port This option is available only if you have selected a Printer or Serial service ...

Page 84: ...oth control panel to apply or modify those settings 1 To require Authentication check the checkbox then tap OK 2 If required the Authentication Request dialog will then open requesting that you enter a PIN Use the Input Panel or the keyboard to type the PIN 3 Tap OK to complete ...

Page 85: ...d from another device Once you have set up a Pairing you can view the settings by double tapping its name from the Connections tab Tap the arrow to change the Virtual Port or Delete to remove the device pairing Tap Sync to initiate a Sync available only if the service is an ActiveSync connection ...

Page 86: ...the two devices are within close range and that both Bluetooth enabled devices are discoverable 1 Tap Start Settings System Bluetooth Manager to open the Bluetooth control panel 2 Tap Settings The Settings tab allows you to enable or disable the Bluetooth radio and specify settings for Incoming Connections ...

Page 87: ...u re going to be attaching a serial device i e a scanner to the Skorpio X3 use the Port control to select a virtual COM port to use for the connection 4 Tap Find Me if you want to make the Skorpio X3 visible to other Bluetooth devices for 60 seconds allowing them to set up a connection ...

Page 88: ...1 SKORPIO X3 80 4 NOTE By default Bluetooth is turned off If you turn it on and then turn off your device Bluetooth also turns off When you turn on your device again Bluetooth turns on automatically ...

Page 89: ...ces to update use the Datalogic Firmware Utility DFU described below to install or update the firmware using an ActiveSync connection DFU can also be used to restore the firmware onto a device that has become corrupted see par 4 8 4 The following sections provide procedures for the retrieval and installation of the most current firmware image onto a Datalogic device 4 8 1 Retrieving a Firmware Ima...

Page 90: ...stalled on the host PC To install the Datalogic Firmware Utility complete the following steps on the PC 1 Insert the CD ROM shipped with your device into the PC and click on the link to install Datalogic Firmware Utility OR Go to the Datalogic Mobile website and download the most current version of the Datalogic Firmware Utility Unzip the file then double click to run DFU_Setup exe Click OK to con...

Page 91: ... 1 Go to Start Programs DFU Datalogic Firmware Utility 2 Verify that ActiveSync is selected by clicking Communications ActiveSync 3 Click browse and navigate to the location where you saved the firmware file for your terminal 4 Select the current wmg file and click Open 5 Click Update 6 DFU will compare the selected firmware image with the firmware already loaded on the device if the images are di...

Page 92: ... following steps 1 On the PC click Start Programs DFU Datalogic Firmware Utility 2 From the Communications menu select WMDC ActiveSync 3 Click browse and navigate to the file location 4 Select the current wmg file and click Open 5 Verify that the device is turned on Insert the device into a powered dock connected to the host computer 6 Click Update 7 DFU will restore the firmware on your device ...

Page 93: ...The firmware image of the device can take as long as 12 minutes to download using a USB connection 22 minutes to download using a serial connection with 115K baud rate 130 minutes to download using a serial connection with 19 2K baud rate 8 After the firmware has been restored your device will automatically reset ...

Page 94: ...vice through ActiveSync and then click on the Get from Device icon to receive the device s current configuration Once loaded the Configuration tree on the left side of the window is used to navigate the device s configuration The right side of the window is a work area where the values of different parameters may be set for each branch of the configuration tree Click on the parameter group branch ...

Page 95: ...ery mechanisms Create quick access hot keys and configure trigger actions To open the DDU for the first time tap Start Settings System Datalogic Desktop Utility or Start Device tools Datalogic Desktop Utility You can also get into DDU by pressing Alt 6 You can use DL Buttons to associate specific keys such as F1 F10 with specific applications see par 4 6 3 The Alt 6 is the button initially assigne...

Page 96: ...cify a password when this utility is launched By default the password is 1234 A password can consist of all standard keyboard characters Re Enter Password Carefully re enter the password in the second text box Set Password Select tap Set Password to enable the password To change or remove the password enter a new value re enter the new value and select tap Set Password Set Defaults Select tap Set ...

Page 97: ...Select tap OK to close the Set Password Confirmation dialog NOTE You must select tap Set Password prior to exiting DDU in order to store and activate your new password It is not necessary to select Enable Datalogic Desktop CAUTION If you select tap Set Defaults it will remove all custom settings and restore all the factory default settings except a previously set password Changing a Password To ch...

Page 98: ...time you open the Datalogic Desktop Utility the DDU Password dialog box opens This dialog box will only open if a password was defined 1 Type in your password using either the keypad on the unit or using the stylus on the soft input panel SIP If you enter an incorrect password the system will prompt you to input the cor rect one 2 Select tap OK to verify the password Or tap X to cancel ...

Page 99: ...fied error page with instructions on how to recover from the problem WebAppLock Configuration Tab WebAppLock Window Features Error Redirection options The Error Type pull down list displays available Error Types Error Type 400 Invalid Syntax 403 Request Forbidden 404 Object Not Found 406 No Response Format 410 Page Doesn t Exist 500 Internal Server Error 501 Server Can t Do That Generic Error Netw...

Page 100: ...le the status icons view see par 4 10 3 Trap Keys When checked all key presses will be trapped by WebAppLock to prevent the user from accessing other parts of the system DL Buttons keys will not work in WebAppLock when this box is checked When unchecked all system key presses including DL Buttons keys will work ...

Page 101: ...re the view of some status icons that are used in WebAppLock and in Application Selector to display the status of wi fi radio battery and GSM Status Icons Options Set Status Icon Defaults Restores the status icons factory settings Icon Size Sets the status icons size Icon Location Selects the preferred location for each status icon ...

Page 102: ...rols to allow or restrict access to Windows system functions You can disable normal Windows functions such as the taskbar leaving nothing but a blank workspace This allows applications to be run on the full screen and prevents users from accidental or unauthorized use of the taskbar Internet Explorer and any other resident applications ...

Page 103: ...he Start Button is displayed or not This option works only when Task Bar Enabled is checked Windows Wifi Error Dialog This control only takes effects in WebAppLock and Internet Explorer When checked the device will display a warning dialog when the WiFi connected device moves out of range of an access point and the user attempts to navigate to a web page This dialog box allows the user to reconfig...

Page 104: ...isable the application selector When this is enabled the Application Selector replaces the desktop and allows only authorized use of applications Authorized Applications This is a list of applications that the user may access Application Selector Commands New Select tap New to create a new application entry Edit Select tap Edit to edit the selected entry Del Select tap Del to delete the selected e...

Page 105: ...y when the Application Selector starts up COMMAND DESCRIPTION Application Title Type the name of the application in this textbox in the way you wish it to appear for the user Executable Displays the path for the executable file which you want to run Browse Select tap to browse for the desired executable file The results of this search are placed in the Executable textbox Arguments Type any command...

Page 106: ...orce this application to auto start when the Application Selector starts up Applications will be started in the order listed in the authorized application list Delay Enter a delay duration in seconds in the combo box This option delays auto start of application s to allow drivers to load prior to starting applications OK Select tap OK to add save changes X Select tap X to cancel the creation of th...

Page 107: ...ot The Application Selector can replace the desktop and limit the user to the specified list of applications By default the Application Selector comes with the WebAppLock preset The administrator can customize this list as shown in chapter 4 10 5 To run an application tap on its name To exit from Application Selector press ALT 6 uncheck the Enable Application Selector check box on the AppSelect Ta...

Page 108: ...om exiting the web application website set by the administrator NOTE Zoom In and Zoom Out will only affect screen text and not bitmaps If the taskbar has been disabled the Settings menu is not displayed However the user can still navigate within the web application by using the following keyboard shortcuts Home Ctrl 7 Refresh Ctrl 8 Cancel Ctrl 9 Exit Ctrl 0 ...

Page 109: ...s T1 optional parameter which sets the initial text size to 1 on a scale of 0 to 4 Currently does nothing The value can later be adjusted when not in full screen mode using the Font Size and Font Size menu options T2 optional parameter which sets the initial text size to 2 on a scale of 0 to 4 Default when not set is 1 The value can later be adjusted when not in full screen mode using the Font Siz...

Page 110: ...must be complete within the first 15K of the web page The Datalogic WebAppLock defines some special meta tags that allows the web application to interact with the device In particular the special meta tags allow to enable disable the scan engine triggers enable disable specific codes groups in the scan engine easily handle the keys pressing The trigger decoding and DL_Keys meta tags stay in scope ...

Page 111: ...ion the following WebAppLock specific error numbers are returned Error Number Error Condition 1000 WiFi is disconnected 2000 Failed to open internet connection with WiFi 3000 Failed to connect to server 4000 Failed to open page on server 5000 Failed to send query to page on server 6000 Failed to receive query from page on server 7000 Failed to find file on device Warning Error redirection from the...

Page 112: ...rResume Meta tag DL_OnPowerResume Invokes the specified javascript function upon power resumption on the device Content The URL to the JavaScript function to be called upon resume Example meta http equiv DL_OnPowerResume content Javascript PowerUp Reboot Warm boot device Meta tag DL_Reboot Warm boot device Content OnPageLoad Warm boot immediately upon page load In future might have more content op...

Page 113: ...de_CODABAR DL_Code_93 DL_Code_UPCA DL_Code_UPCE DL_Code_EAN13 DL_Code_EAN8 DL_Code_MSI DL_Code_MSR DL_Code_GS1_14 DL_Code_GS1_LIMIT DL_Code_GS1_EXP DL_Code_16K DL_Code_49 DL_Code_PDF417 DL_Code_DATAMATRIX DL_Code_MAXICODE DL_Code_TRIOPTIC DL_Code_PHARMA39 DL_Code_RFID DL_Code_MICROPDF417 DL_Code_COMPOSITE DL_Code_QRCODE DL_Code_AZTEC DL_Code_POSTAL Some examples meta http equiv DL_Code_39 content ...

Page 114: ... past the page they are defined in hence the existence of the DL_Clear meta tag that allows to clear all the settings and statuses Scanning Metatags DL_Scan Captures scan results and sends barcode tag value to a javascript function on the web page If the content value is a javascript function the device will be taken out of keyboard wedge mode and start listening for scan events A scanned barcode ...

Page 115: ...h line with the specified command line arguments It will take into account any AutoStart options at the beginning of the line Upon a Cold Boot AutoStart installs all the CAB files located in the FlashDisk CAB folder If the CAB folder does not exist no CAB files will be installed AutoStart will then run the Autostart ini from the FlashDisk directory executing each line with the specified command li...

Page 116: ...e device CAB files are installed by AutoStart using the Wceload exe application The following table shows available command line option Option Description noui Specifies that you will not be prompted for any input during the installation If the CAB file is signed any responses will automatically be answered Yes If the CAB is unsigned then any responses will be answered No silent Suppresses dialog ...

Page 117: ...laced in the AutoStart folder with other CAB files intended for installation on the next reboot 4 13 4 Autostart ini NOTE A file named PreAuto ini can also be created in addition to or instead of Autostart ini PreAuto ini is executed before CAB files in the FlashDisk Cab folder are installed Autostart ini is executed after CAB files in the FlashDisk Cab folder are installed The format for the PreA...

Page 118: ...h component of the line in the Autostart ini If the executable path is in a folder that contains spaces in the name quotes are required to distinguish what the actual executable name is The following is an example of this Program Files ScannerApp exe run valid Program Files ScannerApp exe run invalid The second line is an invalid line because there is no way to distinguish the executable from the ...

Page 119: ...tions elsewhere it is ignored Do not wait on line completion This will cause the line to execute and immediately move onto the next line Query Request user confirmation when running the executable This will halt parsing the Autostart ini until the confirmation is answered This is intended for debugging the Autostart ini file Execute only on Cold Reset Execute only after a warm boot Cold Reset Only...

Page 120: ...the current line to complete execution Query Option The query option is intended for use when debugging the autostart ini When a line with this option is executed the following dialog will appear with the specified executable and command line arguments The populated fields shown in the AutoStart Execute Query are described the next table Field Description Line Number This is the line number in the...

Page 121: ...e used to surround the given field and make it very clear what the value of the field is The following table describes the results of each choice Button Action Yes The current line will execute No The current line will not execute AutoStart will continue parsing the Autostart ini Cancel The current line will not execute and AutoStart will discontinue parsing the Autostart ini ...

Page 122: ...te Program with the argument Files App exe Program Files App exe run invalid This will execute Program with the argument Files App exe run Program Files App exe run This will execute the program Program Files App exe with the argument run Windows Pword exe This will confirm the execution of Windows Pword exe If the execution is confirmed AutoStart will immediately process the next line Program Fil...

Page 123: ...ull alphanumeric 50keys alpha numeric 38keys Dimmable backlight OPERATING TEMPERATURE 10º 50ºC 14º to 122ºF STORAGE TEMPERATURE 20º 70ºC 4º to 158ºF HUMIDITY 95 non condensing for temperatures 40 C DROP RESISTANCE Withstands drops from 1 5 m 5 ft onto concrete ENVIROMENTAL SEALING IP64 standard for water and dust resistance ESD PROTECTION 4 KV contact discharge 8 KV air discharge Skorpio X3 includ...

Page 124: ...le battery pack with rechargeable Li ion batteries 3 7 V 3000 5200 mAh 11 10 19 24 Watt hours micro USB power adapter for direct charge and power supply COMMUNICATIONS INTERFACES HandyLink connector Integrated RS232 up to 115 2 Kbps USB 1 1 Client USB 1 1 Host LOCAL AREA NETWORK LAN Summit IEEE 802 11a b g Frequency range Country dependent typically 2 4 and 5 2 GHz CCX v4 Security PERSONAL AREA NE...

Page 125: ...une 24 2007 IMAGER CHARACTERISTICS SCANNING RATE 60 frames sec maximum OPTICAL RESOLUTION Linear codes 4 mils 2D codes 5 mils AIMING LASER VLD wavelength 640 660 nm BAR CODES UPC EAN 2 of 5 family Code 39 Codabar Code 128 GS1 128 Code 93 MSI PDF417 MicroPDF417 Data Matrix QR Code GS1 DataBar family Aztec Code MaxiCode Pharmacode 39 Trioptic Composite US POSTNET US PLANET USPS Intelligent Mail Roya...

Page 126: ...eed Reading Diagram measured from the device nose 10 skew angle 100 200 300 400 0 200 100 300 400 mm 0 13 mm 5 mils 0 19 mm 7 5 mils 1 4 mm 55 mils 0 25 mm 10 mils 0 33 mm 13 mils 0 50 mm 20 mils 1 00 mm 40 mils 0 100 300 200 400 500 600 700 800 900 mm 0 38 mm 15 mils ...

Page 127: ... Reading Diagram Measured from the device nose 10 skew angle 50 100 150 200 0 100 50 150 200 mm 0 50 150 100 200 250 300 350 400 450 500 mm 5 0 mil PDF417 6 67 mil PDF417 7 5 mil Code 39 10 mil PDF417 13 mil UPC A 15 mil PDF417 5 0 mil Code 39 20 mil Code 39 ...

Page 128: ...1 SKORPIO X3 120 6 6 TEST CODES High Density Codes 0 25 mm 10 mils Code 39 17162H 17162 2 5 Interleaved Ë 8NduÌ 0123456784 Code 128 ÌtestwÎ test 80 EAN 13 x 0B2DE5 KKKKLM 80 EAN 8 6450 TRMN ...

Page 129: ...TEST CODES 121 6 Medium Density Codes 0 38 mm 15 mils Code 39 17162H 17162 Interleaved 2 5 Ë 8NduÌ 0123456784 Code 128 ÌtestwÎ test 100 EAN 13 x 0B2DE5 KKKKLM 100 EAN 8 6450 TRMN ...

Page 130: ...1 SKORPIO X3 122 6 Low Density Codes 0 50 mm 20 mils Code 39 17162H 17162 Interleaved 2 5 Ë 8NduÌ 0123456784 Code 128 ÌtestwÎ test 120 EAN 13 x 0B2DE5 KKKKLM 120 EAN 8 6450 TRMN ...

Page 131: ...TEST CODES 123 6 2D Codes Datamatrix ECC200 Example Inverse Datamatrix ECC200 Example ...

Page 132: ...he parameter on and 0 turns it off Acceptable Input gives the settings or range of settings for each code parameter Defaults indicates how the parameter is set when the predefined default FF39 FF3A or FF3B is selected Minimum FF39 turns every on off parameter off and sets all minimum and Maximum Label Lengths to the lowest values Maximum FF3A turns every on off parameter on sets all Minimum Label ...

Page 133: ...tory FF3B This is the default parameter settings that was installed at the factory This default set will work for most applications Defaults Registry FF3C This restores all parameter settings to the values that exist in the Registry This is useful for restoring parameters to a known working set of values which have been saved using code parameter FF3F Exit and Restore FF3D Stops a label programmin...

Page 134: ... Checksum Instructs the terminal to include the checksum in the label transmission 0303 On or Off Off Off Off Send Start Stop Instructs the decoder to transmit the decoded start and stop characters of Codabar labels The start and stop characters will both be translated as A B C or D 0305 On or Off Off On Off Convert to CLSI Restricts the Codabar decoder to only read labels that conforms to CLSI sp...

Page 135: ...abel Length should be greater than or equal to Minimum Label Length 0321 01 50 01 50 20 Read Verification Sets the number of times a label must be read before it is transmitted 0322 01 04 01 02 01 User ID Specifies the symbology identifier if any that is sent when parameter Send Code ID Index 0025 is set to 3 ASCII code zero null is used to indicate that an identifier is not to be sent for the sym...

Page 136: ...acter set by replacing various encoded ASCII characters with their corresponding 0105 On or Off Off On On Minimum Label Length Set the minimum label length to be less than or equal to maximum label length 0120 01 50 01 01 01 Maximum Label Length This feature specifies the maximum allowable length of a Code 39 label The length includes check and data characters Maximum Label Length should be greate...

Page 137: ...al to include the checksum in the label transmission 0112 On or Off Off Off Off Send Start Stop Instructs terminals to prefix a Pharmacode 39 label with an A prior to transmission 0113 On or Off Off On Off User ID Specifies the symbology identifier if any that is sent by the decoder when parameter Send Code ID Index 0025 is set to 3 ASCII code zero null is used to indicate that an identifier is no...

Page 138: ...sive decoding algorithms to be used in order to scan hard to read labels 0109 On or Off Off On Off Read Verification Sets the number of times a label must be read before it is transmitted 0124 01 04 01 02 01 User ID Specifies the symbology identifier if any that is sent when parameter Send Code ID Index 0025 is set to 3 ASCII code zero null is used to indicate that an identifier is not to be sent ...

Page 139: ...ximum label length 0420 01 50 01 01 02 Maximum Label Length This feature specifies the maximum allowable length of a Code 93 label The length includes check and data characters Maximum Label Length should be greater than or equal to Minimum Label Length 0421 01 50 01 50 20 Read Verification Sets the number of times a label must be read before it is transmitted 0422 01 04 01 02 01 User ID Specifies...

Page 140: ...ed ASCII characters as defined by the latest Code 128 symbology specification 040F On or Off Off On On Minimum Label Length Set the minimum label length to be less than or equal to maximum label length 0424 01 80 01 01 02 Maximum Label Length This feature specifies the maximum allowable length of a Code 128 label The length includes check and data characters Maximum Label Length should be greater ...

Page 141: ...he check digit per ISBN guidelines to the end of the label 0514 On or Off Off Off Off Convert EAN 13 to ISSN This instructs the decoder to identify ISSN labels and append the check digit per ISSN guidelines to the end of the label 0515 On or Off Off Off Off Enable EAN 4 Digit Price Weight Check Digit Requires the use of a 4 digit price weight check digit to verify a bar code 0516 On or Off Off Off...

Page 142: ...nclude the check digit in the label transmission 051A On or Off Off On Off Convert EAN 8 to EAN 13 Instructs the decoder to expand EAN 8 labels to their EAN 13 equivalents Any EAN 13 parameters will then apply to the result 051B On or Off Off On Off Read Verification Sets the number of times a label must be read before it is transmitted 0526 01 04 01 02 01 User ID Specifies the symbology identifie...

Page 143: ...Send System Digit Includes the system digit in the label transmission For UPC A the system digit is always zero 0503 On or Off Off On On Convert UPC A to EAN 13 Instructs the decoder to expand UPC A labels to their EAN 13 equivalents Any EAN 13 parameters will then apply to the result 0504 On or Off Off On Off Read Verification Sets the number of times a label must be read before it is transmitted...

Page 144: ...Off On Off Send System Digit This instructs the decoder to include the system digit in the label transmission For UPC E the system digit is zero 050B On or Off Off On Off Convert UPC E to UPC A Instructs the decoder to expand UPC E labels to their UPC A equivalents Any UPC A parameters will then apply to the result 050C On or Off Off On Off Read Verification Sets the number of times a label must b...

Page 145: ...e 5 Digit Extensions Requires a 5 digit extension supplemental label to be verified for a successful decode of a label 051D On or Off Off On Off Require Extensions Instructs the decoder to require any enabled UPC EAN extensions supplemental labels to be with a label in order for a scan to be successful 051F On or Off Off On Off Read Verification Sets the number of times an extension supplemental l...

Page 146: ...the checksum in the label transmission 0213 On or Off Off Off Off Enable Case Code Restricts Interleaved 2 of 5 label lengths to only 6 and 14 data characters Enabling this parameter overrides the minimum and maximum length values 0214 On or Off Off Off Off Minimum Label Length Set the minimum label length to be less than or equal to maximum label length 0228 02 50 02 02 06 Maximum Label Length Th...

Page 147: ... Laser 2D Imager User ID Specifies the symbology identifier if any that is sent by the decoder when parameter Send Code ID Index 0025 is set to 3 ASCII code zero null is used to indicate that an identifier is not to be sent for the symbology 022B Any single ASCII character 00 Off B B B ...

Page 148: ...to recognize labels that are printed using only two bars for start stop characters 0204 On or Off Off Off Off Minimum Label Length Set the minimum label length to be less than or equal to maximum label length 0220 01 50 01 01 06 Maximum Label Length This feature specifies the maximum allowable length of a Standard 2 of 5 label The length includes check and data characters Maximum Label Length shou...

Page 149: ...0B On or Off Off Off Off Minimum Label Length Set the minimum label length to be less than or equal to maximum label length 0224 01 50 01 01 06 Maximum Label Length This feature specifies the maximum allowable length of a Matrix 2 of 5 label The length includes check and data characters Maximum Label Length should be greater than or equal to Minimum Label Length 0225 01 50 01 50 10 Read Verificati...

Page 150: ...to interpret any second MSI check digit as modulo 11 instead of modulo 10 060C On or Off Off Off Off Minimum Label Length Set the minimum label length to be less than or equal to maximum label length 0624 01 15 01 01 04 Maximum Label Length This feature specifies the maximum allowable length of an MSI label The length includes check and data characters Maximum Label Length should be greater than o...

Page 151: ... Off Off On On Convert to GS1 128 Instructs the decoder to transmit the label data as one or more GS1 128 labels 0804 On or Off Off On Off NOTE If GS1 DataBar 14 GS1 DataBar Expanded GS1 DataBar Limited or GS1 DataBar Composite symbologies are enabled for GS1 128 then that setting is also enabled for all other GS1 DataBar symbologies For the 2D Imager GS1 DataBar Expanded s User ID is used for GS1...

Page 152: ...t to GS1 128 Instructs the decoder to transmit the label data as one or more GS1 128 labels The transmission will use the UCC 128 AIM identifier 080C On or Off Off On Off NOTE If GS1 DataBar 14 GS1 DataBar Expanded GS1 DataBar Limited or GS1 DataBar Composite symbologies are enabled for GS1 128 then that setting is also enabled for all other GS1 DataBar symbologies For the 2D Imager GS1 DataBar Ex...

Page 153: ...nimum bar code label length to be less than or equal to maximum label length 0824 1 74 01 01 01 Maximum This feature specifies the maximum allowable length of a label The length includes check and data characters if applicable Maximum Label Length should be greater than or equal to Minimum Label Length 0825 1 74 01 74 74 User Code ID Specifies the symbology identifier if any that is sent when para...

Page 154: ... label length 0B2C 1 3750 1 1 1 Aztec Code Maximum This feature specifies the maximum allowable length of a label The length includes check and data characters if applicable Maximum Label Length should be greater than or equal to Minimum Label Length 0B2D 1 3750 1 3750 3750 Aztec Code User ID Specifies the symbology identifier if any that is sent when parameter Send Code ID Index 0025 is set to 3 ...

Page 155: ...h 0B20 1 1500 1 1 1 Data Matrix Maximum This feature specifies the maximum allowable length of a label The length includes check and data characters if applicable Maximum Label Length should be greater than or equal to Minimum Label Length 0B21 1 1500 1 1500 1500 Data Matrix User ID Specifies the symbology identifier if any that is sent when parameter Send Code ID Index 0025 is set to 3 ASCII code...

Page 156: ...ngth 0A28 1 2435 1 1 1 Composite Maximum This feature specifies the maximum allowable length of a label The length includes check and data characters if applicable Maximum Label Length should be greater than or equal to Minimum Label Length 0A29 1 2435 1 2435 2435 Composite User ID Specifies the symbology identifier if any that is sent when parameter Send Code ID Index 0025 is set to 3 ASCII code ...

Page 157: ...th 0B24 1 138 1 1 1 MaxiCode Maximum This feature specifies the maximum allowable length of a label The length includes check and data characters if applicable Maximum Label Length should be greater than or equal to Minimum Label Length 0B25 1 138 1 138 138 MaxiCode User ID Specifies the symbology identifier if any that is sent when parameter Send Code ID Index 0025 is set to 3 ASCII code zero nul...

Page 158: ... 1 2710 1 1 1 PDF417 Maximum This feature specifies the maximum allowable length of a label The length includes check and data characters if applicable Maximum Label Length should be greater than or equal to Minimum Label Length 0A21 1 2710 1 2710 2710 PDF417 User Code ID Specifies the symbology identifier if any that is sent when parameter Send Code ID Index 0025 is set to 3 ASCII code zero null ...

Page 159: ...h 0A24 1 366 1 1 1 MicroPDF417 Maximum This feature specifies the maximum allowable length of a label The length includes check and data characters if applicable Maximum Label Length should be greater than or equal to Minimum Label Length 0A25 1 366 1 366 366 MicroPDF417 User Code ID Specifies the symbology identifier if any that is sent when parameter Send Code ID Index 0025 is set to 3 ASCII cod...

Page 160: ... specifies the maximum allowable length of a label The length includes check and data characters if applicable Maximum Label Length should be greater than or equal to Minimum Label Length 0B29 1 3500 1 3500 3500 QR Code User ID Specifies the symbology identifier if any that is sent when parameter Send Code ID Index 0025 is set to 3 ASCII code zero null is used to indicate that an identifier is not...

Page 161: ...logy 0913 On or Off Off On On UPU FICS Enable Enables disables UPU FICS symbology 0914 On or Off Off On Off Royal Mail Enable Enables disables Royal Mail symbology 0915 On or Off Off On On Royal Mail Send Chk Transmit Royal Mail symbology check digits 0916 On or Off Off On Off Australian Postal Enable Enables disables Australian Postal symbology 0917 On or Off Off On Off KIX Enable Enables disable...

Page 162: ...0008 On or Off On On On Imager Aim Mode Toggles between two different operating modes for the targeting beam Concurrent Off The targeting beam is turned on at the same time as an enabled illumination beam Release Scan On turns off the targeting pattern after trigger release 0009 On or Off On On On Enable Aiming Beam Enable the use of a target beam and enables Pick List Mode which decodes only the ...

Page 163: ...e label ID data 2 AIM identifier before label ID modifier data 3 User defined identifier before label ID data 4 DLM identifier after label data ID 5 AIM identifier after label data ID modifier 6 User defined identifier after label data ID 00 01 00 Label Prefix Character string sent immediately prior to symbology identifier 0 None 0026 A string of Unicode characters NUL NUL NUL Label Suffix Charact...

Page 164: ... from the label data The min max length checks made for each symbology are made before any characters are removed Characters in the code ID prefix suffix or separator will not be removed 0018 On or Off Off Off Off Group Separator Substitution Each occurrence of the GS character ASCII code 0x1D in the label data will be substituted for the character defined by this parameter The value 0 NUL is cons...

Page 165: ...p 1 2 500 ms 40 10000 ms 20 20 20 Beeper Volume Defines the volume of decoding sounds FF20 0 to 7 Soft to Loud 8 lowers the volume by 1 9 raises the volume by 1 7 7 7 Long Range Spot Enable Enable the use of a spot beam if detected 0001 On or Off Off Off Off Long Range Release Time Maximum time laser is on after trigger release using Release Scan spot beam mode 0024 1 5 2 2 2 Target Release Time M...

Page 166: ...atrix v UPC E E Code 93 L Composite s EAN 8 G MSI H MaxiCode w EAN 13 M Trioptic X PDF417 s Code 39 C Pharmacode 39 Y MicroPDF417 a Codabar I GS1 DataBar 14 P QR Code c Code 128 K GS1 DataBar Limited Q Postal Codes f Interleaved 2 of 5 B GS1 DataBar Expanded R Standard 2 of 5 F Aztec Code d ...

Page 167: ...r Any tampering will invalidate the warranty When replacing the battery pack or at the end of the operative life of the Skorpio X3 mobile computer disposal must be performed in compliance with the laws in force Before using the devices and the battery packs read chap 2 Do not submerge the Skorpio X3 in liquid products For further information refer to this manual and to the Datalogic Mobile web sit...

Page 168: ...AFETY The laser light is visible to the human eye and is emitted from the window indicated in the figure This information applies to both the Skorpio X3 models with laser and Imager Aiming System Laser output window ...

Page 169: ...igura LUCE LASER NON FISSARE IL FASCIO APPARECCHIO LASER DI CLASSE 2 MASSIMA POTENZA DI USCITA 1 mW LUNGHEZZA D ONDA EMESSA 630 680 nm CONFORME A EN 60825 1 2007 LASERSTRAHLUNG NICHT IN DER STRAHL BLINKEN PRODUKT DER LASERKLASSE 2 MAXIMALE AUSGANGLEISTUNG 1 mW WELLENLÄNGE 630 680 nm ENTSPR EN 60825 1 2007 RAYON LASER EVITER DE REGARDER LE RAYON APPAREIL LASER DE CLASSE 2 MAXIMUM PUISSANCE DE SORTI...

Page 170: ...y result in exposure to hazardous visible laser light The product utilizes a low power laser diode Although staring directly at the laser beam momentarily causes no known biological damage avoid staring at the beam as one would with any very strong light source such as the sun Avoid shining laser light into any person s eye even through reflective surfaces such as mirrors etc CAUTION Use of optica...

Page 171: ...r così come si eviterebbe qualsiasi altra sorgente di luminosità intensa ad esempio il sole Evitare inoltre di dirigere il raggio laser negli occhi di un osservatore anche attraverso superfici riflettenti come gli specchi ATTENZIONE L uso di strumenti ottici assieme allo scanner può aumentare il pericolo di danno agli occhi Tali strumenti ottici includono cannocchiali microscopi occhiali e lenti d...

Page 172: ... Beobachters noch gegen reflektierende Oberflächen zu richten ACHTUNG Die Verwendung von Optiksystemen mit diesem Scanner erhöht die Gefahr einer Augenbeschädigung Zu optischen Instrumenten gehören unter anderem Ferngläser Mikroskope Brillen und Vergrößerungsgläser FRANÇAIS Les informations suivantes sont fournies selon les règles fixées par les autorités internationales et se réfèrent à une corre...

Page 173: ...nformaciones siguientes son presentadas en conformidad con las disposiciones de las autoridades internacionales y se refieren al uso correcto del terminal NORMATIVAS ESTÁNDAR PARA LA SEGURIDAD LÁSER Este aparato resulta conforme a las normativas vigentes de seguridad láser a la fecha de producción CDRH 21 CFR 1040 Sección J y EN 60825 1 2007 No es necesario abrir el aparato para la instalación la ...

Page 174: ...s eviten de dirigir el rayo láser hacia los ojos de un observador también a través de superficies reflectantes como los espejos ATENCIÓN El uso de sistemas ópticos con el escáner aumentará el riesgo de daños oculares Los instrumentos ópticos incluyen binoculares microscopios lentes y lupas LED CLASS LED illuminator integrated in the Skorpio X3 models with SE 4500 imager engine are compliant with e...

Page 175: ...ctrum authorities of the specific country in which the installation takes place Be absolutely sure that the system frequencies are correctly set to be compliant with the spectrum requirements of the country The Radio modules used in this product automatically adapt to the frequencies set by the system and do not require any parameter settings ...

Page 176: ... l autorité compétente en la gestion des appareils à radio fréquence de votre pays pour vérifier d éventuelles restrictions ou licences Pour tout renseignement vous pouvez vous adresser au site web http ec europa eu DEUTSCH Wenden Sie sich an die für Radiofrequenzgeräte zuständige Behörde Ihres Landes um zu prüfen ob es Einschränkungen gibt oder eine Lizenz erforderlich ist Weitere Informationen f...

Page 177: ...etermined by turning the equipment off and on the user is encouraged to try to correct the interference by one or more of the following measures Reorient or relocate the receiving antenna Increase the separation between the equipment and receiver Connect the equipment into an outlet on a circuit different from that to which the receiver is connected Consult the dealer or an experienced radio TV te...

Page 178: ...below the maximum value This is because the device is designed to operate at multiple power levels so as to use only the poser required to reach the network In general the closer you are to a wireless base station antenna the lower the power output While there may be differences between the SAR levels of various devices and at various positions they all meet the government requirement The FCC has ...

Page 179: ...st conforme aux CNR d Industrie Canada applicables aux appareils radio exempts de licence L exploitation est autorisée aux deux conditions suivantes 1 l appareil ne doit pas produire de brouillage et 2 l utilisateur de l appareil doit accepter tout brouillage radioélectrique subi même si le brouillage est susceptible d en compromettre le fonctionnement The device for the band 5150 5250 MHz is only...

Page 180: ...Pat 5 311 000 5 440 110 5 481 098 5 493 108 5 686 716 5 992 740 6 412 698 B2 6 415 978 B1 6 454 168 B1 6 478 224 B1 6 513 714 B1 6 561 427 B2 6 585 157 B2 6 808 114 B1 6 997 385 B2 7 108 170 B2 7 387 246 B2 European Pat 681 257 B1 789 315 B1 1 128 315 B1 1 396 811 B1 1 413 971 B1 Additional patents pending ...

Page 181: ...ontattare il Fornitore dal quale è stata acquistata l apparecchiatura o consultare la sezione dedicata sul sito http www adc datalogic com Information for the user in accordance with the European Commission Directive 2002 96 EC At the end of its useful life the product marked with the crossed out wheeled wastebin must be disposed of separately from urban waste Disposing of the product according to...

Page 182: ...os urbanos Eliminar este producto de accuerdo con la Directiva permite de evitar posibles consecuencias negativas para el medio ambiente y la salud derivadas de una eliminación inadecuada recuperar los materiales obteniendo así un ahorro importante de energía y recursos Para obtener una información más detallada sobre la eliminación por favor póngase en contacto con el proveedor donde lo compró o ...

Page 183: ... symbol consists of a leading margin start character data or message character check character if any stop character and trailing margin Within this framework each recognizable symbology uses its own unique format Baud Rate A measure for data transmission speed Bit Binary digit One bit is the basic unit of binary information Generally eight consecutive bits compose one byte of data The pattern of ...

Page 184: ...the 802 3 standard Ethernet is used to connect computers in a company or home network as well as to connect a single computer to a cable modem or DSL modem for Internet access Firmware Firmware is a software program or set of instructions programmed on a hardware device It provides the necessary instructions for how the device communicates with the other computer hardware Firmware is typically sto...

Page 185: ... through serial cable is used together with a null modem adapter The adapter contains the necessary crosslinks between the signals One shot key Pressing a one shot key actives the state The state remains active until any other key is pressed If you hold down a one shot state key and you press another key the state will remain active until you release the one shot key Pairing A Bluetooth pairing oc...

Page 186: ...mputer and telecommunications companies supports data transfer speeds up to 12 megabits per second multiple data streams and up to 127 peripherals WLAN A Wireless Local Area Network links devices via a wireless distribution method typically spread spectrum or OFDM radio and usually provides a connection through an access point to the wider internet This gives users the mobility to move around with...

Page 187: ... Utility 86 Datalogic Desktop Utility 87 Datalogic Firmware Utility 81 Decoding Parameters 124 Description of the Keyboards 35 F FCC Compliance 169 G General View vii Glossary 175 I Industry Canada Compliance 171 L Laser Safety 160 LED Class 166 LED Status 43 M microSD Card Insertion 5 P Package Contents 3 Patents 172 Power Supply 159 R Radio Compliance 167 Reading Diagrams 118 References vi Repla...

Page 188: ...40 Test Codes 120 Title Bar 44 U Using the Stylus 29 W WEEE Compliance 173 Windows Connections 71 Windows Embedded Handheld Welcome Wizard 30 Windows Mobile Device Center 71 Wireless and Radio Frequencies Warnings 26 Wireless Communications 61 ...

Page 189: ...uf daß das Produkt den folgenden Normen entspricht Esta declaración se basa en el cumplimiento de los productos con la siguientes normas EN 55022 2006 CLASS B ITE SEPTEMBER 2006 AMENDMENT A1 2007 INFORMATION TECHNOLOGY EQUIPMENT RADIO DISTURBANCE CHARACTERISTICS LIMITS AND METHODS OF MEASUREMENTS EN 55024 1998 AMENDMENT A1 2001 AMENDMENT A2 2003 INFORMATION TECHNOLOGY EQUIPMENT IMMUNITY CHARACTERI...

Page 190: ...TICLE 3 2 OF THE R TTE DIRECTIVE EN 60950 1 2006 AMENDMENT A1 2010 INFORMATION TECHNOLOGY EQUIPMENT SAFETY PART 1 GENERAL REQUIREMENTS EN 62311 2008 ASSESSMENT OF ELECTRONIC AND ELECTRICAL EQUIPMENT RELATED TO HUMAN EXPOSURE RESTRICTIONS FOR ELECTROMAGNETIC FIELDS 0 HZ 300 GHZ Lippo di Calderara May 25th 2012 Ruggero Cacioppo Quality Reliability MGR Europe ...

Page 191: ...mobile datalogic com Datalogic Mobile S r l Via S Vitalino 13 40012 Lippo di Calderara di Reno Bologna Italy Telephone 39 051 3147011 Fax 39 051 3147561 World wide Sales Network available from www mobile datalogic com contacts Skorpio X3 User s Manual ...

Reviews: