27
Copying a Drill, Step-by-Step
These instructions are meant to be a guide for creating a copy of a drill. It is assumed that you
have been able to identify and record the angles and other features of your pattern drill, through
whatever means are available to you. For some, this may be a drill identification system or an
old school drill microscope. Others may be limited to using a 10X loupe and guesswork. The
important thing to remember is whether high-tech or no-tech, it will work if you learn enough
about drills and the XPS-16+.
1.
Lock in what you know, and then forget it.
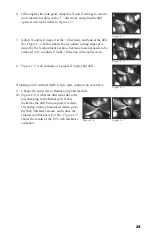
a. The first icon at the top left of the screen is used to adjust included point
angle. Using either a protractor or a microscope, determine this number,
enter it and save it.
Tip:
If it’s an adjustable protractor, it can be used to measure the other
angles
.
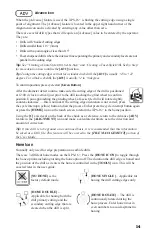
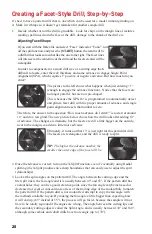
b. The second icon from the left is for adjusting material take-off (how much
of the drill is ground away).
MID
Material Take Off is a good place to start;
Material Take Off can be changed later if needed.
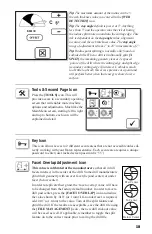
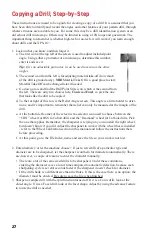
c. Go down a row and find the Drill Point Style icon, which is the second from
the left. There are only two choices here,
Conic
and
Facet
, so pick the one
that looks like the drill to be copied.
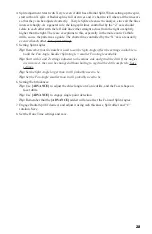
d. To the far right of this row is the Relief Angle screen. This angle is a little harder to deter-
mine, and it’s important to remember that relief can only be measured at the margin of the
drill.
e. At the bottom left corner of the screen is the selector icon used to choose between the
“CBN” wheel for HSS to Cobalt drills and the “Diamond” wheel for Carbide drills. Pick
the one that applies. Remember, the sharpener is relying on you to install the right wheel,
but doesn’t know if you did. Adjust the sharpener to work with the wheel that is installed
- refer to the Wheel Calibration section in this manual and follow the instructions there
before proceeding.
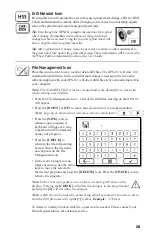
f. At this point, go to the File Index, name and save the file so your work is not lost.
2.
Enter diameter/ or let the machine choose? If just a few drills of a particular type and
diameter are to be sharpened, let the sharpener scan them for diameter automatically. There
are, however, a couple of reasons to enter the diameter manually.
• There are a lot of the same sized drills to be sharpened. Under these conditions,
entering the diameter saves a lot of time compared to automatic detection, because each
sharpening cycle is several seconds faster if the sharpener doesn’t check for diameter.
•
If the drill shank is a different size than the flutes. If this is the case there is no option; the
diameter must be entered.
Be sure to save the file when finished
.
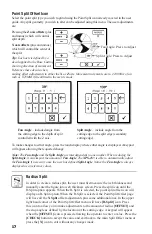
3. Sharpen a sample drill with the split function turned off. If it is a Conic drill, look at the
chisel angle. If it is a Facet drill, look at the facet shape. Adjust by using the advance feature
to rotate the drill as needed.
Summary of Contents for XPS-16+
Page 1: ...Operating Instructions XPS 16 CNC Drill Grinder and Sharpener ...
Page 2: ......
Page 40: ...37 Notes ...
Page 41: ...38 ...


