


PORTABLE COLL-O-CRIMP® Model T-400-1 Set up and operating instructions
9 | PORTABLE COLL-O-CRIMP® Model T-400-1 Set up and operating instructions | 2022.10.
AQ430855066686en-000101
Operation Instructions
1.
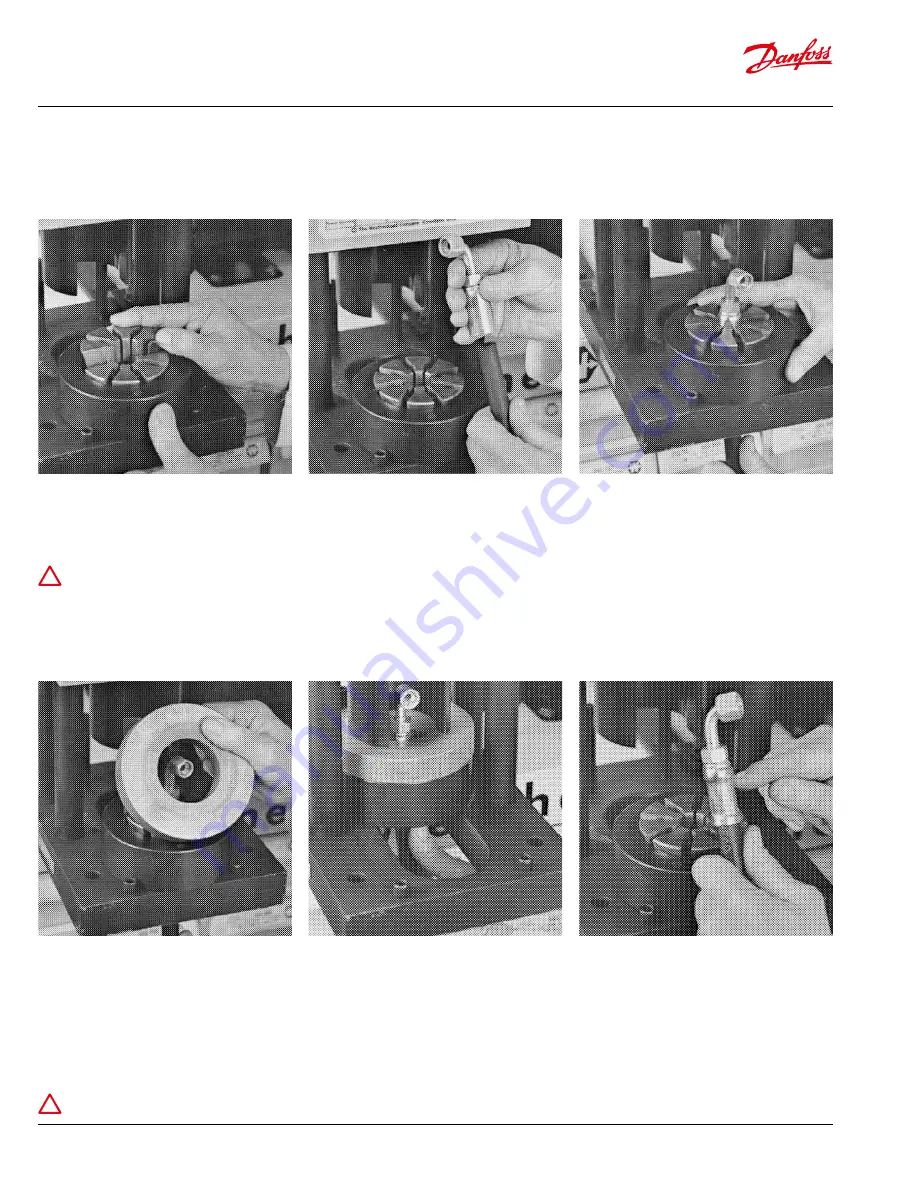
Place die ring T-400-8 on base plate against
front stops.
2.
Insert properly sized matched collet halves
into the die ring. See chart on press.
!
NOTE
For initial use, lubricate the tapered
cone seat with lubriplate grease or equivalent
premium grade pressure grease.
!
CAUTION
: Always hold the hose assembly in place from below throughout the crimping operation.
3.
Place proper size Coll-O-Crimp hose end on
hose. Be sure hose is bottomed in hose end.
Reference Figure A, page 10.
4.
Insert hose assembly from below between
collet halves. Align the dimples on the hose
end collar with the top of the collet. When
using 757 Series ends, the collar should be
flush with the top of the collet.*
5.
Reference page 10, Figure B. Place
appropriate side of spacer ring on top of
collet with uncrimped hose assembly held in
place.
6.
Slide entire assembly back against rear
locating stops.
7.
Activate pump to crimp hose end to hose.
When spacer ring contacts die ring, crimping
is complete. Release the electric switch to
retract pusher. Slide entire assembly forward
and remove spacer ring.
8.
Remove factory quality crimped hose
assembly and visually inspect the crimped
end. The crimp on the collar should be
located ± 1/16” from the dimples or ridges.
9.
To insure a proper crimp has been
completed, measure the nominal crimp
diameter as shown on page 10, Figure C.
Summary of Contents for Weatherhead Coll-0-Crimp T-400-1
Page 1: ......


