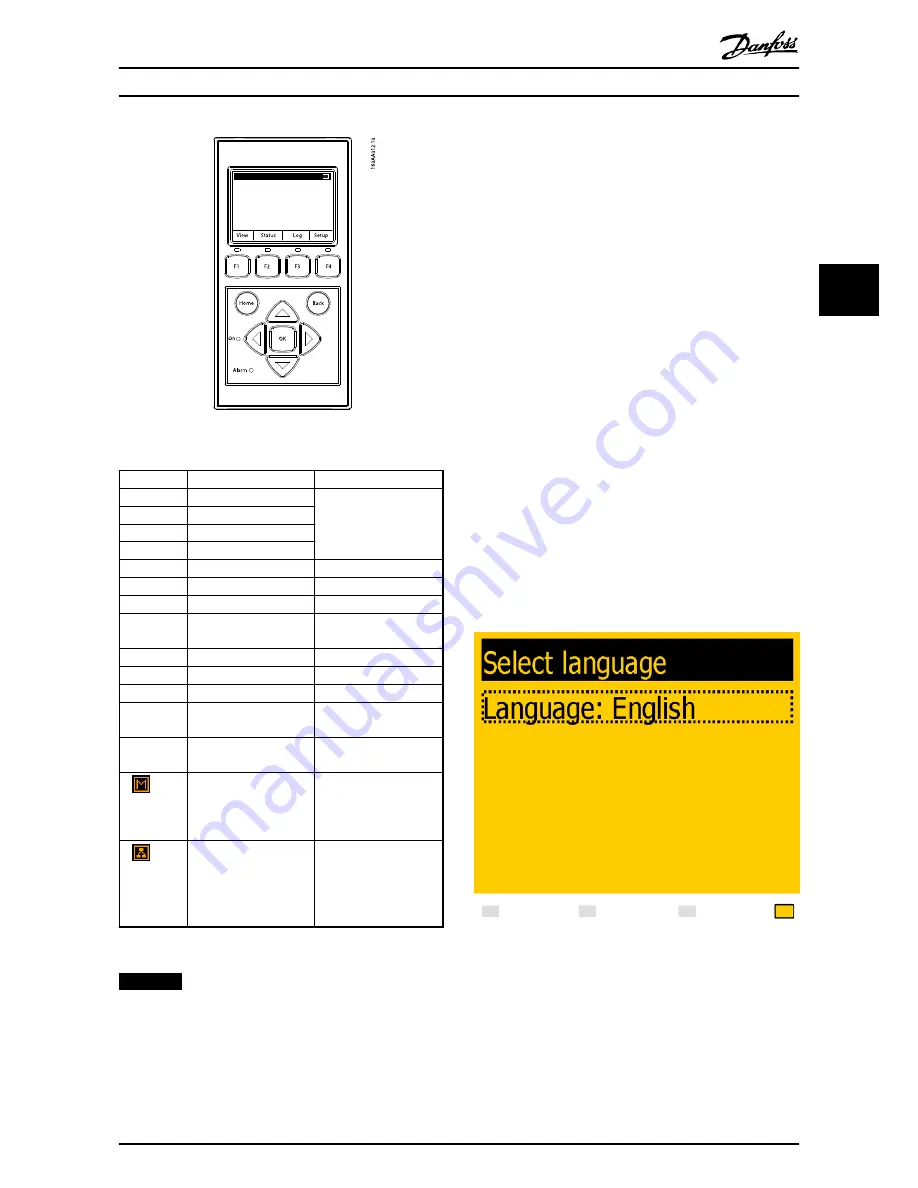
Illustration 3.1 Overview of Display Buttons and Functionality
Key
Function
LED
F1
View 1/View 2 - Screen
When keys F1-F4 are
selected, the LED above
the key will light up
F2
Status Menu
F3
Production Log Menu
F4
Setup Menu
Home
Return to View Screen
OK
Enter/select
Arrow up
A step up/increase value
Arrow
Down
A step down/decrease
value
Arrow Right
Moves cursor right
Arrow Left
Moves cursor left
Back
Return/de-select
On - Green
LED
On/flashing = On grid/
Connecting
Alarm - Red
LED
Flashing = Fail safe
The inverter is
configured as master.
This icon appears in the
top right corner.
The inverter is a
follower, connected to a
master. This icon
appears in the top right
corner.
Table 3.1 Overview of Display Buttons and Functionality
NOTICE
The contrast level of the display can be altered by
pressing the arrow up/down button while holding down
the F1 button.
The menu structure is divided into 4 main sections:
1.
View
- presents a short list of information, read
only.
2.
Status
- shows inverter parameter readings, read
only.
3.
Log
- shows logged data.
4.
Setup
- shows configurable parameters, read/
write.
See the following sections for more detailed information.
3.2.1 Initial Setup via Display
The inverter is shipped with a predefined set of settings
for different grids. All grid-specific limits are stored in the
inverter and must be selected at installation. It is always
possible to see the applied grid limits in the display.
After installation, check all cables and then close the
inverter.
Turn on AC at the mains switch.
IP address can be found in the display during commis-
sioning.
When prompted by the display select language. This
selection has no influence on the operating parameters of
the inverter and is not a grid code selection.
Illustration 3.2 Select Language
The language is set to English at initial start-up. To change
this setting press the [OK] button. Press [
▼
] to scroll down
through the languages. Select language by pressing [OK].
Initial Setup and Start
L00410568-02_02 / Rev. date: 2013-12-10
17
3
3


