


FLR3-100 Installation Quick Guide
13 June 2017
DD2291475
Rev 06
201 Daktronics Drive Brookings, SD 57006
www.daktronics.com/support
800.325.8766
Page 2 of 4
Mating the Key Fob With the Display
Follow these steps to mate
the display with the FLR3-100
key fob. If these steps are not
completed, the display will
not recognize or respond to
the key fob.
1. Turn power on to the
display.
2. While display is booting
up, or within 5 minutes,
press and hold -1 and +1
buttons until the decimal
flashes 3 times. Refer to
3. Once the decimal point
flashes 3 times, release the
buttons.
Setting the Display Line Numbers
Follow these steps to map the line number for each display. It is important that each display is set for the
correct line number for it to show the correct price.
1. Make sure the display is turned on.
2. Press and hold the -2 and +2 buttons on the key fob until the host display face begins to dim and
brighten or the decimal begins to flash. This takes about five seconds.
3.
While the display slowly flashes, press the +2 button until the appropriate line number is shown on the
display (L01, L02, etc).
4.
Once the line number is set, press and hold the -2 and +2 buttons until the next display face begins
to slowly flash.
5. Repeat these steps until all display faces have been correctly mapped.
6.
Exit configuration mode by pressing and holding the -2 and +2 buttons until the displays show prices
and they no longer flash; about five seconds.
LL-2855 REV00
CONFIG
ADDR
SYNC
4
3
2
LINE
1
TEST
1 2 3 4 5 6 7 8 9 0
ON
1 2 3 4 5 6 7 8 9 0
ON
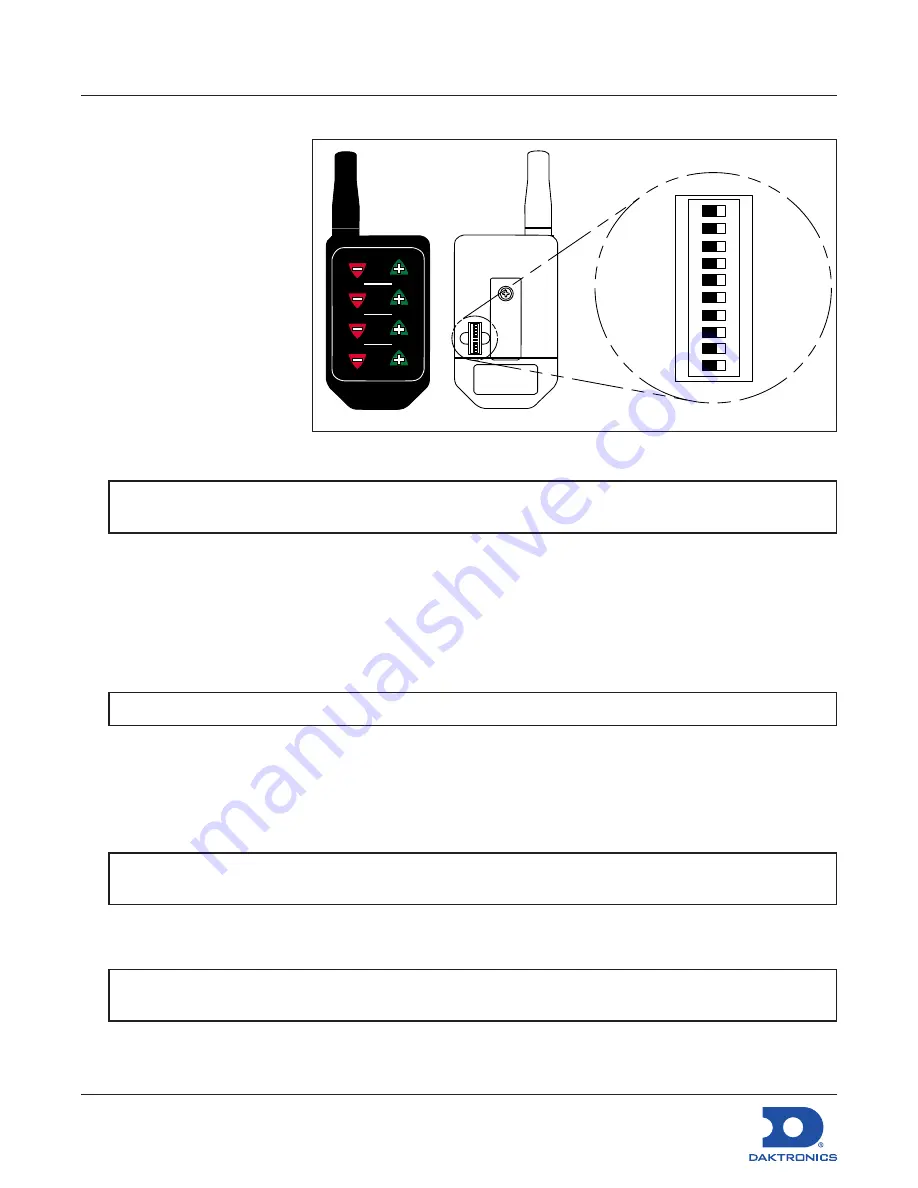
Figure 4:
FLR3 Key Fob
Note:
If key fobs and displays are mated prior to installation, verify that they are still properly
synced to one another at the time of installation.
Note:
The host display is the display with the radio antenna connected to it.
Note:
If a display gets set incorrectly, complete the process with the remaining displays then
repeat to correct.
Note:
All displays are programmed with a default price matching their line number. Use this to
easily identify that all displays are addressed correctly.


