Control Equipment Overview, Service, and Replacement
21
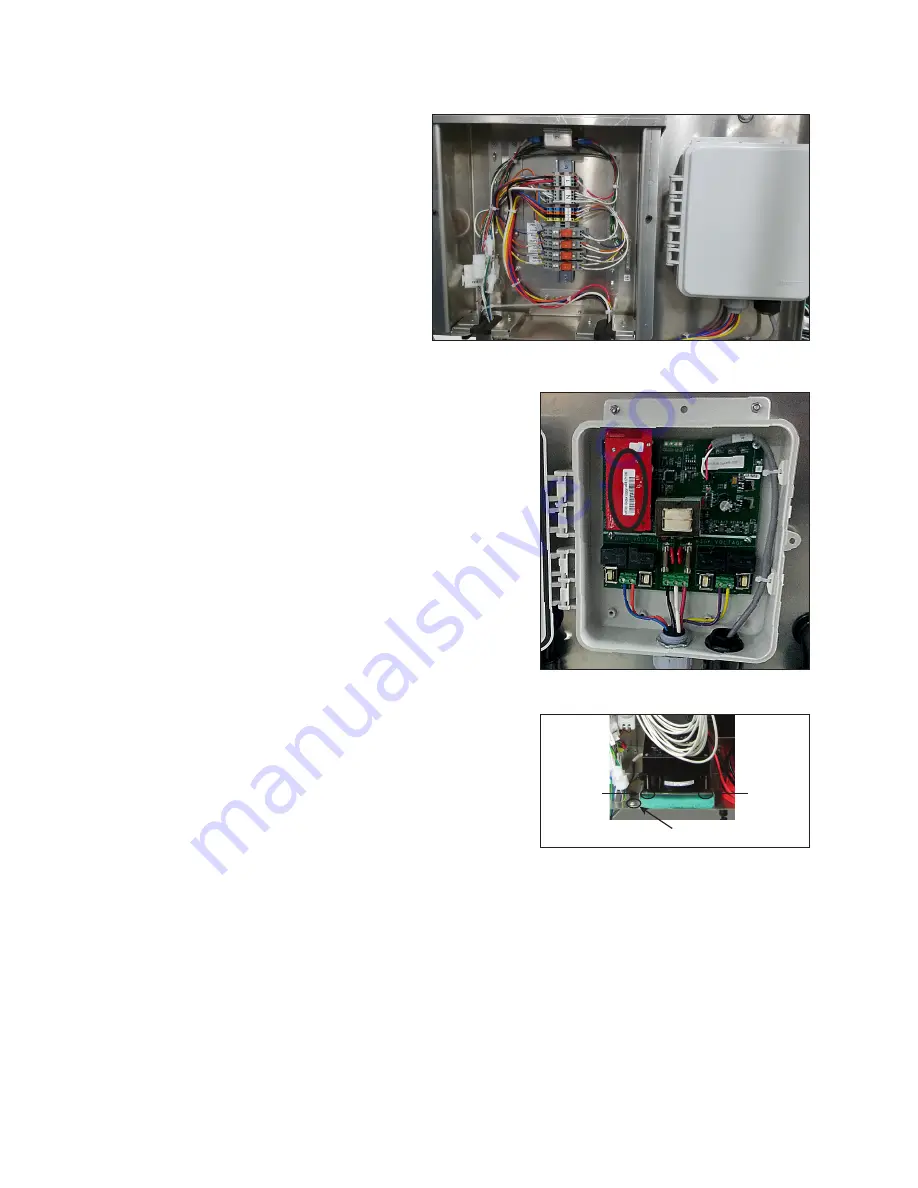
Replace the SmartLink
TM
(Optional)
1�
Turn off the SmartLink
TM
breaker
in the power entrance box.
2�
Wait for all LEDs in the
SmartLink
TM
to turn off. This
may take up to 8 minutes. The
extended time is required to
discharge components that
typically send a notification to
the data center in the event of
a power outage.
3�
Disconnect the incoming
power wires in the SmartLink
TM
.
4�
Disconnect the outgoing
power wires from the relays (R1, R2, R3, R4).
5�
Disconnect the RS232 cable and remove any
cable ties securing it within the SmartLink
TM
.
6�
Remove the four screws that secure the
SmartLink
TM
to the mounting plate.
7�
Reverse
Steps 1–6
to install the new
SmartLink
TM
.
8�
Call Daktronics help desk and provide
them with the new MEID number, circled in
.
Replace the Heater
Required Tools:
Phillips screwdriver, T20 Torx driver
1�
Disconnect the power wire to the heater.
2�
Use the T20 Torx driver to loosen and remove
the mounting plate screws. Refer to
3�
Remove the heater assembly from the ISP
enclosure.
4�
Use a Phillips screwdriver to remove the four
heater mounting bolts that secure the heater
to the mounting plate.
5�
Reverse
Steps 1–4
to install the new heater.
Figure 37:
SmartLink
TM
Relay Bank
Figure 38:
SmartLink
TM
MEID Number
Mounting Plate Screw
Heater
Mounting
Bolt
Heater
Mounting
Bolt
Figure 39:
ISP Enclosure Heater Assembly


