background image

V. Computer Software

62

Dakewe (Shenzhen) Medical Equipment Co., Ltd.

www.dakewemedical.com
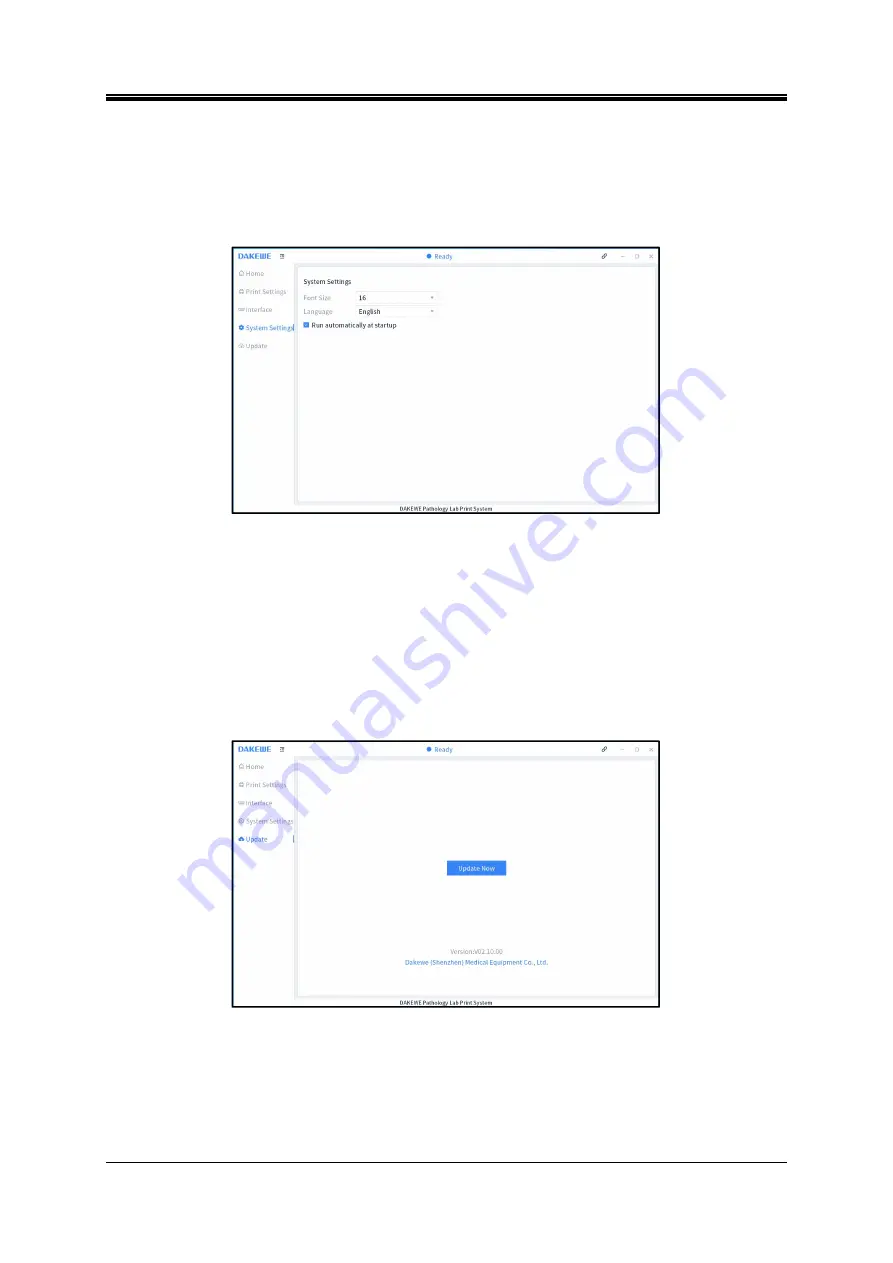
(8) System Settings

On this interface, the user can set the font size, languages, and run automatically at startup (Figure

5-24).

Figure 5- 24 PC software - System settings

(9) Update

On this interface, the user can update the software and view the current version information (Figure

5-25).

Note:

During online update, the user needs to update the PC software first and then the instrument

software.

Figure 5- 25 PC software - Update

Summary of Contents for SurePrint S200

Page 1: ...SurePrint Slide Printer Instructions for Use V3 0 English Version Apr 2023 ...

Page 2: ... Address of manufacturer Floor 5 Building B No 2 Luhui Road Jinsha Community Kengzi Street Pingshan District Shenzhen China Telephone 0755 26413421 Service provider Dakewe Shenzhen Medical Equipment Co Ltd Address Floor 5 Building B No 2 Luhui Road Jinsha Community Kengzi Street Pingshan District Shenzhen China Telephone 0755 26413421 Fax 0755 273831566 ...

Page 3: ... maintenance etc It is an essential guide for you to use the instrument This user manual is a document supplied with the instrument and should be placed around the instrument accessible by users or maintenance personnel Before use please do read this user manual carefully and follow it to perform proper operation It is sure of great help in using the instrument effectively In addition if you have ...

Page 4: ...nd technical illustrations contained in this manual and we will update accordingly In particular we shall hold no liability for any economic loss or damage direct or indirect caused by non compliance with the representations or other information in this manual This document is protected by copyright law All copyrights for this document are reserved by Dakewe Shenzhen Medical Equipment Co Ltd No te...

Page 5: ...on 10 4 Turning on off the Instrument 13 IV Instructions before Use 15 1 Description of Print Method 15 2 Scan to Print 18 3 Homepage 24 4 System Settings 28 5 Print Settings 30 6 User Management 43 7 Data Management 47 8 Update 48 9 Help 49 V Computer Software 50 1 Software Running Requirements 50 2 Network Interface Connection 50 3 IP Address Settings 50 4 Home 54 5 Print Settings 56 6 Interface...

Page 6: ...intenance 67 VII Abnormalities and Troubleshooting 68 1 Fault Alarm Types 68 2 Faults Handling 68 3 List of Common Abnormalities 69 4 Detailed Handling of Common Abnormalities 70 Appendix 1 Technical Parameters 80 Appendix 2 Common Buttons 82 Appendix 3 Warranty 83 Appendix 4 Laser Safety 84 Appendix 5 Electromagnetic Compatibility Indicators 85 ...

Page 7: ...t a USB device can be plugged into the port USB 3 0 port indicates that a USB device can be plugged into the port Laser warning marker caution class 1 laser radiation See Annex 2 for details Rotate caution sign danger keep hands away or serious injury may be caused Warning injure hand Power on Power off RoHS marking The number in the symbol represents the EFUP of the product If the use of a restri...

Page 8: ...ct vertical position of the packing case Fragile and must be handled with care Keep dry The package must be stored in a dry environment Do not roll Do not roll or turn over the transport package Keep away from sunlight Transport package shall not be exposed to sunlight Stacking limit number the maximum number of stacking layers of the same package 1 layer limit The recycling and disposal shall mee...

Page 9: ...e to follow the safety instructions and warnings in this chapter Even if you are already familiar with the operation and use of the product please be sure to read these instructions 3 Personnel Qualifications This equipment must be installed used and serviced by qualified personnel i e with the appropriate technical competence familiar with the safety issues and risks associated with the use of th...

Page 10: ...ipment for measurement control and laboratory use EMC requirements Part 1 General requirements IEC 61326 2 6 2020 Electrical equipment for measurement control and laboratory use EMC requirements Part 2 6 Particular requirements In vitro diagnostic IVD medical equipment To ensure safe operation the user must observe all safety precautions and warnings in the user manual The safety precautions descr...

Page 11: ...pment The equipment must be placed on a horizontal surface and the location must have good ventilation to ensure that the equipment has sufficient space for heat dissipation Do not place the equipment in an environment with flammable ignition source and explosive hazard Do not expose the equipment to direct sunlight The equipment shall be connected to a grounded mains outlet and shall not be conne...

Page 12: ...umstances should the input hopper and batch output hopper be directly washed with water otherwise it may cause the hopper to be abnormal 3 Safety Functions The Dakewe Slide Printer is equipped with safety functions and complete software 1 Indicator light and Hopper Lights The Dakewe Slide Printer is equipped with a status indicator light and hopper lights The status indicator is located above the ...

Page 13: ...om the laser inside the instrument When the temperature of the laser inside the instrument exceeds 40 C the laser alarm system of the equipment will send out a continuous short tone of Beep Instruction First shut down the equipment wait for 5 10 minutes and then start the equipment If the alarm still cannot be turned off please contact service personnel for inspection ...

Page 14: ...cohol xylene and acid alkaline chemical reagents under high temperature conditions and is suitable for long term storage The Dakewe Slide Printer mainly consists of 10 modules slide in output module slide transfer module slide translation module on demand output hopper not applicable for S200 Pro print module control system power supply system safety module air purification system and human machin...

Page 15: ...d it must be connected to a grounded mains socket outlet The operator should ensure that electrostatic discharge ESD safety precautions are in place The device is for indoor use only Do not use the device indoors where there is a risk of explosion Avoid collisions direct sunlight and frequent electricity fluctuation Considering the weight of the device the workbench should have the capacity and st...

Page 16: ...e device would be damaged Before unpacking please check that the packaging box is intact and no damages or deformities in appearance In case of any of the conditions above please mark on the shipping documents accordingly To ensure the device will operate properly the device should be installed with at least 100 mm space around the device for ventilation Packaging box 1 5 m 1 m 1 m Figure3 5Diagra...

Page 17: ...S200 Figure 3 15 and S200 Figure 3 16 Pro are equipped with two input hoppers input hoppers A and B while S100 is equipped with the input hopper A only Figure 3 17 The input hopper A is on the right side and input hopper B is on the left side with a loading capacity of 100 slides in each The Dakewe Slide Printer S200 and S200Pro will consume the slides in the input hopper A during printing When th...

Page 18: ...n from the top of the columns and move it down vertically along the columns Figure 3 19 When loading slides pay attention to the orientation and front and back of the painted surface of the slides and load the slides strictly in accordance with the direction of the painted surface up and towards the handle Figure 3 20 Figure3 18 Input hopper A Right Figure3 19 Loading slides The columns of the thr...

Page 19: ... are required to start the Dakewe Slide Printer 1 Connect the power switch of the instrument to a grounded power outlet 2 Turn on the main power switch on the back of the instrument and keep the switch at the 丨 end 3 After the power is turned on for the first time and the main power switch is turned on the instrument will automatically start the operation 4 Turn on the instrument daily Select the ...

Page 20: ...nstrument Turning off the instrument in other ways may cause serious damage to the instrument hardware and result in data loss 3 Turning off the Instrument The following three steps are required to completely turn off the Dakewe Slide Printer 1 Long press the ON OFF button in the front of the instrument for 3 seconds so that the software will pop up the account logout prompt to enter the shutdown ...

Page 21: ...put For S200 Figure 4 1 it is advised to remove the slides from the output when 1 3 slides are accumulated For S100 Figure 4 2 printing stops once 20 slides are printed and stored in the on demand output hopper Figure 4 1 S200 On demand output hopper Figure 4 2 S100 On demand output hopper Batch printing mode The printed slides are delivered to the batch output hopper To ensure smooth operation th...

Page 22: ...e and change it on the homepage or you can enter the Menu Print Settings Others interface to change it The print channel cannot be switched for S100 as it is equipped with input hopper A only Both Hoppers Alternately use the slides in both input hoppers for printing The slides in the input hopper A are consumed first Hopper B Only use the slides in input hopper B for printing Hopper A Only use the...

Page 23: ...y IDs 4 Print Order The Dakewe Slide Printer has three print orders By Main ID Reversive By Main ID Sequential and By Sub ID No Sequential which can be changed on the Menu Print Settings Others interface By Main ID Reversive The pathology ID added first are printed first and new print jobs can be added during printing The printing outcome is as follows 23 12345 01 23 12346 01 By Main ID Sequential...

Page 24: ...top printing and prompt Please check the slides in hopper A B are placed correctly 2 Scan to Print The user needs to perform the following three steps to enable the scanning print function Step 1 Prepare a USB scanner and connect to the USB port on the back of the instrument Step 2 Enter the Menu System Settings interface Figure 4 7 select the serial port corresponding to the scanner from the Seri...

Page 25: ...as a letter number symbol or their combinations but it must not be empty Select the field to be parsed Each field can only be parsed once under the same parsing rule Filling of correlation and use of segmentation See 8 4 2 Correlation and segmentation Sub ID increments when scanned Activated when checked When the same QR code or barcode is scanned continuously the Pathology ID number is increased ...

Page 26: ... together with Config Template Type Correlation when the user wants to decide on the input hopper slides and templates used for printing at the time of scanning to add the Pathology ID This is achieved by the parse field Type The steps are as follows Step 1 Add the field Type to the content of the QR code to be parsed by scanning Step 2 Configure the correlation among the type in the content of th...

Page 27: ...nterface Figure 4 12 check Config Template Type Correlation in the Printing Rule section and click the Edit button on the right Figure 4 12 Config Template Type Correlation Step 2 Enter a type the type is user defined but cannot be repeated The name of the type is used to distinguish different types Figure 4 13 Figure 4 13 Template Type Step 3 Select a print channel to determine the hopper slides ...

Page 28: ...xample 1 see 4 2 3 Config Template Type Correlation be sure that the QR code or barcode scanned contains the configured type field and then create the corresponding scan parsing rule as shown in the configurations below After completing the configuration select and apply this scan parsing rule Scan the QR code using the scanning gun and the Pathology ID 2200001 A01 will be added The slides in the ...

Page 29: ...ew scan parsing rule interface will be disabled after Edit parsed Pathology ID is checked and the Pathology ID displayed in the pathologyId field of the template is composed of the components shown in the Pathology ID example Figure 4 17 Menu Print Settings Pathology ID Setting interface Figure 4 16 Create a new scan parsing rule interface Figure 4 17 Pathology ID example ...

Page 30: ...omponents Position Description logo DAKEWE logo displayed on the left Status It is located in the middle of the status bar There are eight print statuses Ready Printing Stopping Resetting Abnormal Sleep Processing and Disconnected Connection status To the right of date and time If the connection is successful the icon is blue otherwise it is red Current date and time The date and time are displaye...

Page 31: ...s Others interface to modify the display of the print settings part on the homepage Modification steps Step 1 Click Edit on the right of Homepage config Figure 4 19 Figure 4 19 Homepage Config Step 2 Select the item you want to add to delete from the homepage Figure 4 20 Figure 4 20 Add Delete on the Homepage Step 3 Click Add Delete Step 4 Click Apply ...

Page 32: ...splays the remaining slides in Hopper A and B the stored slides in the batch output the preview of the ID that is currently printed and the total amount of IDs printed today The remaining slides in hopper B and batch output capacity are not available on S100 Yellow input hopper indicator implies that the hopper will be empty soon Yellow output hopper indicator implies that the output hopper is abo...

Page 33: ...se the virtual keyboard that comes with the software to input information or use an external mouse and keyboard The user can enter Chinese characters English letters numbers and special characters using the virtual keyboard or external keyboard and can also use the shortcut key combination of Ctrl Enter to quickly add the ID When you need to input information click the input box and the software w...

Page 34: ...on to save changes or confirm Switch button Press this button to switch between letters numbers and special characters Hide button Press this button to hide the virtual keyboard Language button Press this button to switch keyboard language Delete button Press this button to delete the previous character Caps lock button Press this button to switch between uppercase and lowercase 4 System Settings ...

Page 35: ...ly when the slide in a hopper is exhausted 7 Show prompts When enabled a pop up box will be displayed in a certain scenario for example Printing complete 8 Language To switch the software interface and prompt language 9 Font Size To modify the font size displayed on the interface 10 Scanner Port To select the serial port corresponding to the scanning gun when connecting the scanning gun 11 Enable ...

Page 36: ... in the composition example After the prefix content modified in the edit box is saved the prefix field on the homepage changes synchronously Separator The separators can only be printed when the user checks Separator After the user clicks Separator the separator content edit box will appear in the composition example In this case the user can modify the separator between the main ID and the Sub I...

Page 37: ...checked it is enabled and can cache up to 30 data Otherwise it will not be enabled The user can enter multiple preset values in the prefix suffix and custom 1 2 3 4 5 preset input boxes below the example Multiple preset values are separated by English commas The preset values can be displayed and viewed in the corresponding drop down boxes on the homepage The preset value can contain digits Englis...

Page 38: ...he entered main ID is more than that of the set main ID the printed ID will be consistent with the entered ID When the digits of the entered main ID is less than that of the set main ID 0 will be added before the entered main ID to form the printed ID so that the digits of the entered main ID is equal to that of the set main ID For example when the main ID is set as five digits if the entered main...

Page 39: ...e template field qrcode Figure 4 33 The QR code is composed of eight fields concatenated in sequence Each field can be set as Empty Custom Pathology ID Prefix Main ID Main ID No Section Sub ID Sub ID No Suffix Custom 1 Custom 2 Custom 3 Custom 4 Custom 5 or Datetime The Empty and Custom fields in this part are used in the same way as the Main ID Concat part Separators can be added to the QR code f...

Page 40: ...re 4 36 C2023 12345 Fr Figure 4 36 Hide the 1st sub ID Double sections Within the range of selected sections e g A to C two sections will be displayed for each ID Figure 4 37 C2023 12345 A B01 Fr C2023 12345 C01 Fr Figure 4 37 Double sections Sub ID No Uppercase When the format of the sub ID No is set as letters letters or letters digits the letters will be displayed in uppercase Hide the 1st sub ...

Page 41: ...m 5 wrap when there is a lot of printed content you can use custom 5 wrap automatically After checking you can set the number of characters displayed in the first line When the number of characters in the first line exceeds the set value it will be automatically displayed on the next line Scanning Data Parser The Scanning Data Parser is designed for setting the functions associated with Scanning P...

Page 42: ...ule currently being used 8 Delete To delete the current parsing rule Printing Rules Printing Rules is mainly used to set the print mode and convenient print including the following settings Figure 4 42 Figure 4 42 Other settings printing rules Table4 7 Printing rules functions No Function Function description 1 Print channel unavailable for S100 See section 5 1 2 Print channels 2 Print mode availa...

Page 43: ...late Edit When the default printing template of the device cannot meet the printing requirements you can log in to the administrator account to enter the template editing interface and perform visual operations such as printing effect debugging template object editing and object position adjustment of existing templates You can select the template to be debugged in the Print Settings Others interf...

Page 44: ...pand the template preview Display the print content border Hide the print content border Flip the object vertically Flip the object horizontally Increase font size of the object Reduce font size of the object Move the selected object in the list according to the direction Figure 4 45 Template Edit Configuration The template preview area has a two dimensional orientation map displaying the real tim...

Page 45: ...ctual print position place a cassette on the slideway and click the Mark position button in the template editor After confirming the print position click the Mark button on the interface to mark on the cassette Edit objects in the template Add an object In order to meet the needs of inconsistent pathology number information used in different regions the template editor provides the function of add...

Page 46: ...efix suffix date subIdnum section custom1 custom2 custom3 custom4 custom5 Common barcode type QR Code Data Matrix Code 128A Preview content Texts entered in this box will be displayed in preview Default preview text is 12345678 Modify the object name Double click the object name in the list to modify the object name Delete the object Check the objects to be deleted in the list and click the button...

Page 47: ... Settings Figure 4 49 Fill settings Figure 4 50 Fill type Fill Type The default fill typeis castle line Select other fill types from the drop down list Multi line single direction Multi line back forth Spiral inwards Castle line and Optimized castle line Fill types affect printing results Multi line single direction The pattern is filled from left to right Multi line back forth The pattern is fill...

Page 48: ...f a step of movement can be changed to achieve desired position adjustment The default distance is 1 0 and the presets in the drop down menu are 0 1 0 2 0 5 1 0 2 0 3 0 Template preview size Click the and buttons to expand or minimize the preview display of the template the font size of the objects will not change accordingly Object vertical and horizontal mirroring The template editor is configur...

Page 49: ...e created by the Root and the operator can only be created by the Admin Operator Operator can change basic settings execute the print process view user information edit their own account search export and print data Admin The Admin can perform all the functions of the operator edit the all operators account and their own account change Print Settings and System Settings and update the software Roo...

Page 50: ...Admin permission Root permission Intermediate Operator permission Operator permission Admin permission Root permission Basic Operator permission Admin permission Root permission Disabled permission system Admin permission Admin permission Admin permission Root permission 2 Account Log in out Account login If the user enables the permission system and selects Basic Permission the Switch User dialog...

Page 51: ... when the software boots 3 Add User A pop up box of Add User will appear after the user clicks the Add User button on the user management interface Figure 4 55 Touch the user name ID password input boxes in sequence and enter the information after the virtual keyboard pops up Click the Confirm button and the user is added The user accounts are displayed in the user list based on the creation order...

Page 52: ...gure 4 56 The password reset pop up will appear after clicking Reset Figure 4 57 Enter the original password and the new password New password and Reset password must match Click Confirm and the password is successfully reset Figure 4 56 Edit user interface Figure 4 57 Reset password interface 5 Delete User For the user to be deleted click the Delete button in the operation bar so that a prompt bo...

Page 53: ...ages or enter the specific page number and click Jump To Figure 4 58 The total count of slides printed for the current search date is shown in the lower left corner of the data table the total count of slides printed since the instrument was enabled is shown in the lower right corner 2 Export Date To facilitate the management of print records you can insert a USB flash disk on the USB interface of...

Page 54: ...allation package of the PC Slide Printer Setup_ _English exe file is the Chinese installation package of the instrument Step 2 Insert the USB drive into the USB port on the back of the instrument and click Update on the right of the Software Version for detection If there is no sureprint folder in the USB drive or no software update package for the instrument in the sureprint folder a message sayi...

Page 55: ...firmware the user needs to perform the following steps Step 1 Prepare a USB drive with a remaining storage capacity of greater than 1 GB and copy the main firmware update package to the USB drive Step 2 Insert the USB drive into the USB port on the back of the instrument click Update on the right of the Main Firmware select the update file for the main firmware and wait until the update is complet...

Page 56: ...h the software Windows XP 2 Network Interface Connection Insert one end of the network cable into the top Ethernet port of the device and connect the other end to the USB adapter to the host computer Figure 5 1 When the indicator of the Ethernet port of the device turns solid yellow it means that the network is connected Figure 5 1 Network Cable Connection 3 IP Address Settings After the network i...

Page 57: ...e 5 4 Figure 5 4 Network Connection Step 4 Select Properties by right clicking on the selected network icon or double click the network icon open the Ethernet Properties window Figure 5 5 select Internet Protocol Version 4 TCP Ipv4 and then click the Properties button Step 5 In the Internet Protocol Version 4 TCP Ipv4 Properties window Figure 5 6 select Use the following IP address Step 6 Enter th...

Page 58: ...IP address in the properties window of Internet Protocol Version 4 TCP Ipv4 Step 1 Click the network icon in the taskbar of the device and select Network and Internet Settings Figure 5 7 Figure 5 7 Network and Internet Settings Step 2 In the Network Status window Figure 5 8 select Change Adapter Options in the advanced network settings Step 3 Select the AX88772C network in the Network Connection w...

Page 59: ...pv4 and then click the Properties button Step 5 In the Internet Protocol Version 4 TCP Ipv4 Properties window Figure 5 11 select Use the following IP address Step 6 Enter the IP address data in the corresponding input box such as IP address 192 168 113 45 Subnet mask 255 255 255 0 Default gateway 192 168 113 1 After entering the IP address data click the OK button The IP address data can be change...

Page 60: ...0 Ethernet Properties Figure 5 11 Internet Protocol Version 4 TCP Ipv4 Properties 4 Home The homepage of the PC Software mainly contains seven parts Figure 5 12 Top Status Bar Side Menu Bar Print Settings Pathology ID Settings Hopper Status Template Preview and Print Jobs List Figure 5 12 Homepage ...

Page 61: ...e software 2 Side Menu Bar The side menu bar which is shrinkable is used to switch sub interfaces 3 Print Settings The content of the Print Settings on the homepage of the PC software changes synchronously with that of the instrument software and their operation modes are the same For details see section 4 5 Homepage print settings 4 Pathology ID Settings It is used to input ID Section Sub ID NO a...

Page 62: ...long and its content needs to be displayed in a new line After clicking a drop down box will appear on the right Under Custom 5 wrap the user can select a number so that a new line will be enabled when the number of characters in a line exceeds such number Template Settings Select the template and click the Edit button to enter the Template Editing interface for addition or modification of a templ...

Page 63: ...rsing function of a lower version in this case simply select the name of the custom rule from the second drop down box Parser is used for custom parsing rules For details see section 5 7 Pathology Information System Parser Figure 5 14 PC software Interface setting 7 Pathology Information System Parser In order to improve the accuracy of data entry and simplify the operation steps you can connect L...

Page 64: ...the interface settings of the PC software click Choose on the right side and select the path of parse files generated by LIS Figure 5 16 Figure 5 16 select the path of parse files Step 3 Enable the parse function of Pathology Information System Click and configure the parse rules of Pathology System Step 4 Enter the New parse rules interface Detailed operation steps Select Parser Select New to cre...

Page 65: ...New parse rules interface Step 5 New Parse Rule File Figure 5 19 Figure 5 19 New parse rules concatenation Basic Config File name It refers to the name of the parse rule file which can be set by the user according to the using habit Parse file type There are two options text and table which support the txt and xlsx formats ...

Page 66: ...m content will be parsed but will not be concatenated and printed in the same line The custom field shall be added to the template to print the parsed custom content Enable pathology ID concatenation The interface is as shown in Figure 5 19 The clicked fields will be printed in the same line in the sequence of pathology ID concatenation the content of the custom field in pathology ID concatenation...

Page 67: ...he index count as shown in Figure 5 22 The main ID parsed out is AB2212345 The segmentation function shall be used to print the main ID 2212345 2 is the third character and 5 is the ninth character in the main ID so the subscript of Start is 3 and the subscript of End is 9 Figure 5 22 New parse rules txt correlation xlsx file parse A piece of data in a form file is usually displayed in one row and...

Page 68: ...size languages and run automatically at startup Figure 5 24 Figure 5 24 PC software System settings 9 Update On this interface the user can update the software and view the current version information Figure 5 25 Note During online update the user needs to update the PC software first and then the instrument software Figure 5 25 PC software Update ...

Page 69: ...t Figure 6 1 Print platform Figure 6 2 Handheld Vacuum Cleaner Do not wipe the paint surfaces warning labels and touch screens with organic solvents Do not use any metal tools for cleaning to avoid scratching the surface of the instrument 2 Remove glass debris 1 Preparation Unlock the input output hoppers Make sure the Slide Printer is shut down Handheld Vacuum Cleaner Prepare tweezers brushes and...

Page 70: ...utput hopper S100 3 Operating Instructions Step 1 Open the maintenance door Put fingers under the black housing groove on the upper part of the instrument and lift it up with force Figure 6 9 Step 2 Remove the input output hoppers and take out the slide inside Step 3 Move the transfer push rod rightward to the right side of the print platform Figure 6 10 Step 4 Use tweezers to remove glass pieces ...

Page 71: ... leave the screws inside the instrument when disassembling and assembling the screws Figure 6 11 Front filter position new structure Figure 6 12 Front end filter element old structure Step 2 Replace the filter New structure Remove the front cover take out the used filter clean the dust inside and near the chamber with a brush and then fit in a new filter Figure 6 13 Proper filter direction is that...

Page 72: ...t is located at the top of the instrument and it can be replaced as follows Figure 6 15 Step 1 Take out the used filter by removing the top cover by hand Step 2 Clean the dust inside and near the chamber with a brush Step 3 Then replace with a new filter with the ribbon facing upwards and the filter placed as close to the front as possible and install the top cover back hide the ribbon properly Fi...

Page 73: ...ean off the residual alcohol with a dry dust free cloth after the lens dries the instrument can be continuously used it s recommended to perform such cleaning once every 6 months 2 Laser Distance Sensor Lens Clean the detection surface of the laser distance sensor with a dust free cloth once a year 3 Screw Rod Clean off the oil on the screw rod with a dust free cloth and reapply the lubricating gr...

Page 74: ...instrument Display sound alert 3 Note Matters to note or help information Display on interface 2 Faults Handling 1 In case of a fault of the Dakewe Slide Printer take the following steps to deal with it Read error messages Take action according to the instructions in the message prompt Check the operation log for fault information records and perform troubleshooting based on the fault 2 If the ins...

Page 75: ...s broken Check whether the slides are regular Check whether the paint surface of slide is damaged Check whether the slides in the input hopper are placed upside down Change the type of slide used Check whether there is glass debris between the slides in the input hoppers Check whether there is glass debris on the print platform Check whether there is glass debris on the input hopper holder Disable...

Page 76: ...the print button in the pop up box Figure 7 1 and the holder will shake up and down to help the slide to slide down Scenario 2 Open the packaging box of the slide and place in a dry area for a period of time or dry the slide using tools Figure 7 1 Stuck slide in the on demand output 2 No prompt displays when the slide does not slide down smoothly Abnormality Description When the slide does not sli...

Page 77: ... stops running during operation and a prompt pops up in the main interface Figure 7 4 Figure 7 4 Abnormal operation code OX06 Figure 7 5 Taking out the input hopper Cause analysis A slide is stuck in the output hopper Resolution Take out the stuck slide from the output hopper 1 Click Add Slide in the main interface and wait for the hoppers to unlock 2 Try to pull out the output hopper if it can be...

Page 78: ...ing Broken edge of slide Irregularly shaped slide Damaged paint surface of slide The slide is placed upside down Bevelled slides are used Debris between slides Debris on the print platform Debris on the input hopper holder Resolution 1 Reset the instrument Check whether the input hopper is properly inserted click Reset after it is properly inserted 2 If the resetting fails take out the stuck slide...

Page 79: ...the scale mark Figure 7 10 On demand output unlocking Figure 7 11 Scale mark in the input hopper 4 Check if the front back height difference in the cumulative thickness of slide in the input hopper is greater than 1 5 mm if so reduce the count of the slides until normal print 5 Check whether the slides in the input hopper are abnormal 1 Check whether the slides in the input hopper adhere to each o...

Page 80: ... slide 7 Check whether there is glass debris between the slides in the input hopper if so clean up the debris 6 Open the maintenance door and check whether there is glass debris on the print platform Figure 7 17 if so clean up the debris 7 Remove the input hoppers and check whether there is glass debris on the input hopper holder on both sides Figure 7 18 if so clean up the debris 8 If blocking is...

Page 81: ... door and the instrument will reset automatically 6 The preset options in the drop down box in the main interface are abnormal Abnormality Description The preset options in the drop down box such as Prefix Suffix Custom1 Custom2 in the main interface are set abnormally and cannot be displayed in different lines Cause analysis The separator entered is the full width comma Figure 7 19 Resolution Ent...

Page 82: ...ime to load and display the button associated content Resolution 1 Click the button again to perform the corresponding action click in the blank space then click the button again after the drop down box disappears 2 Wait for complete content loading Figure 7 21 Button with delayed response 8 Instrument software disconnection Abnormality Description The software connection icon at the top of the in...

Page 83: ...ystem and the print jobs list is not displayed Figure 7 23 Figure 7 23 PC disconnection Cause analysis The network cable is loose or the IP address of the PC is not correctly set The network card is damaged Resolution 1 Open the PC software prior to starting the instrument if the instrument has been started restart the instrument 2 The network cable is loose or the IP address of the PC is not corr...

Page 84: ... Description The ID printed on the slide is incompletely displayed or the font color varies in shades Figure 7 25 Cause analysis Foreign matters such as smoke or dust adhere to the laser lens Filter expired Resolution 1 Open the maintenance door and clean the laser lens with a dust free cloth dipped with alcohol 2 Replace the filter element see 6 3 Filter Element Replacement Figure 7 25 Abnormal d...

Page 85: ...e increase the parameter of Right Ready Pos by 0 3 and reduce the Left Ready Pos by 0 3 12 Fail to start the instrument Abnormality Description No response after switching on the main power switch on the back of the instrument and the instrument does not start Cause analysis Turn on the instrument within a short time after turning off the main power supply Resolution Turn on the main power switch ...

Page 86: ...uilt in activated carbon purification system Operating temperature 10 C to 35 C Relative operating humidity 10 to 80 non condensing Transportation and storage temperature 0 C to 50 C Relative humidity for transportation and storage 10 to 85 non condensing Operating altitude Up to 2500 m Noise levels 65 db A IP rating IP20 Table 1 2 Instrument parameters Instrument indexes Parameters Dimension with...

Page 87: ...eters Printing technology Non Contact UV Laser Marking Technology Printing method Ready to use no need of preheating no consumables Printing speed Fastest speed up to 5 s slide depending on printing content Printing content Barcode QR code numbers characters in multiple languages graphics Maximum printing resolution 2500 dpi Printing color Black Printing template Depending on printing needs Markin...

Page 88: ... that is currently printed Prioritize Print the chosen print jobs first Delete Delete the currently selected print jobs Enter the menu interface Back Exit from the current interface and open the previous menu OK Save changed settings Fill Slides All hopper are unlocked and slides can be added and taken out Print The instrument prints according to the print jobs list Add Add print jobs according to...

Page 89: ...subject to the agreed terms For special warranty service please contact your local sales representative or the dealer of the instrument II Technical Service Information For technical service or component replacement please contact your local sales representative or the dealer of the instrument At the same time please provide the followings Model and serial number of the instrument Instrument locat...

Page 90: ...sis Required Shall have Nominal Hazard Zone Analysis Required Standard Operating Procedures No requirement No requirement No requirement Should have Shall have Education and Training No Requirements Should have Should have Shall have Shall have Authorized Personal No Requirements No Requirements No Requirements Shall have Shall have Warning Signs and Labels No Requirements Should have Should have ...

Page 91: ...ted emission Group 1 Class A CISPR 11 radiated emission IEC61000 3 2 harmonic emission N A IEC61000 3 3 voltage fluctuation scintillation emission N A Table II Electromagnetic immunity Electromagnetic immunity Immunity test items Basic standards Test values Performance criteria Electrostatic discharge ESD IEC61000 4 2 Contact discharge 4 kV Air discharge 2 kV 4 kV 8 kV B Radio frequency electromag...

Page 92: ...use in a PROFESSIONAL HEALTHCARE FACILITY ENVIRONMENT It is likely to perform incorrectly if used in a HOME HEALTHCARE ENVIRONMENT If it is suspected that performance is affected by electromagnetic interference correct operation may be restored by increasing the distance between the equipment and the source of the interference Do not use this device in proximity to sources of strong electromagneti...

Page 93: ......

Page 94: ...y Kengzi Street Pingshan District Shenzhen China Address of manufacturer Floor 5 Building B No 2 Luhui Road Jinsha Community Kengzi Street Pingshan District Shenzhen China Telephone 0755 26413421 Fax 0755 27383156 Website http www dakewemedical com Authorized Representative SUNGO Europe B V Fascinatio Boulevard 522 Unit 1 7 2909VA Capelle aan den IJssel The Netherlands ...

Reviews: