background image

Troubleshooting by Remote Controller

SiBE341001

121

Troubleshooting

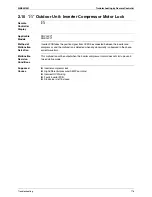
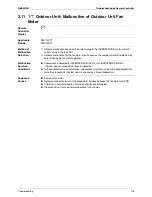
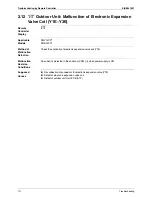
2.12

E9

 Outdoor Unit: Malfunction of Electronic Expansion 

Valve Coil (Y1E~Y3E)

Remote 
Controller 
Display

E9

Applicable 
Models

RQYQ-PY1
RQEQ-PY1

Method of 
Malfunction 
Detection

Check the continuity of electronic expansion valve coil (Y1E)

Malfunction 
Decision 
Conditions

No current is detected in the common (COM [+]) when power supply is ON.

Supposed 
Causes

„

Disconnection of connectors for electronic expansion valve (Y1E)

„

Defect of electronic expansion valve coil

„

Defect of outdoor unit main PCB (A1P)

Summary of Contents for RQYQ140-180PY1

Page 1: ...RQYQ140 180PY1 RQCYQ280 540PY1 R 410A Heat Pump 50Hz RQCEQ280 848PY1 R 410A Heat Recovery 50Hz SiBE341001 Q DRAFT...

Page 2: ...Circuit 18 1 Refrigerant Circuit 19 1 1 RQYQ140 180PY1 RQEQ140 212PY1 19 1 2 BS Unit 21 2 Functional Parts Layout 23 2 1 RQYQ140 180PY1 RQEQ140 212PY1 23 3 Refrigerant Flow for Each Operation Mode 24...

Page 3: ...tdoor Fan Motor Signal 129 2 17 H9 Outdoor Unit Malfunction of Thermistor R1T for Outdoor Air 131 2 18 J3 J4 J5 J6 J7 J8 J9 Outdoor Unit Malfunction of Outdoor unit Thermistor 132 2 19 JA Outdoor Unit...

Page 4: ...e Controller 174 2 38 UC Address Duplication of Centralized Controller 182 2 39 UE Malfunction of Transmission between Centralized Controller and Indoor Unit 183 2 40 UF System is not Set yet 186 2 41...

Page 5: ...plug socket before disassembling the equipment for a repair Working on the equipment that is connected to a power supply can cause an electrical shook If it is necessary to supply power to the equipme...

Page 6: ...e applicable model and appropriate tools to conduct repair work Never attempt to modify the equipment The use of inappropriate parts or tools can cause an electrical shock excessive heat generation or...

Page 7: ...ce valve to prevent the refrigerant gas from leaking into the room The refrigerant gas itself is harmless but it can generate toxic gases when it contacts flames such as fan and other heaters stoves a...

Page 8: ...l shock Be sure to measure the insulation resistance after the repair and make sure that the resistance is 1 Mohm or higher Faulty insulation can cause an electrical shock Be sure to check the drainag...

Page 9: ...es Heat Pump System Daikin offers a wide range of models to respond to building and office air conditioning needs We are confident that customers will be able to find the models that best suit their n...

Page 10: ...SiBE341001 1 General Information Part 1 General Information 1 Model Names of Indoor Outdoor Units 2 2 External Appearance 3 2 1 Outdoor Units 3 3 Combination of Outdoor Units 4 4 Model Selection 5...

Page 11: ...of Indoor Outdoor Units Outdoor Unit BS Unit Series Model Name Power Supply Heat Pump RQYQ 140P 180P Y1 Heat Recovery RQEQ 140P 180P 212P Type Model Name Power Supply Heat Recovery Series BSVQ 100P 16...

Page 12: ...l Information 2 External Appearance 2 1 Outdoor Units RQYQ140 180PY1 RQEQ140 180 212PY1 RQCYQ280 360PY1 RQCEQ280 360PY1 5 6 5 7 5 HP 10 13 HP RQCYQ460 500 540PY1 RQCEQ460 500 540 636PY1 RQCEQ712 744 8...

Page 13: ...ts RQYQ140PY1 RQYQ180PY1 Outdoor Unit Multi Connection Piping Kit Option 5HP 1 6 5HP 1 10HP 2 BHFP22P36C 13HP 2 16HP 3 BHFP22P54C 18HP 3 20HP 3 System Capacity Number of Units RQEQ140PY1 RQEQ180PY1 RQ...

Page 14: ...25 0 65 0 28 0 72 8 HP 10HP 13HP 16HP 18HP 20HP 22HP 24HP 26HP 28HP 30HP System name RQCEQ 280PY1 RQCEQ 360PY1 RQCEQ 460PY1 RQCEQ 500PY1 RQCEQ 540PY1 RQCEQ 636PY1 RQCEQ 712PY1 RQCEQ 744PY1 RQCEQ 816P...

Page 15: ...SiBE341001 Specifications 6 Part 2 Specifications 1 Specifications 7 1 1 Outdoor Units 7 1 2 BS Units 16...

Page 16: ...od Soft Start Soft Start Fan Type Propellor Fan Propellor Fan Motor Output kW 0 35 1 0 35 1 Airflow Rate m min 95 110 Drive Direct Drive Direct Drive Connecting Pipes Liquid Pipe 9 5 C1220T Brazing Co...

Page 17: ...3 3 1 3 3 1 Starting Method Soft start Soft start Fan Type Propellor fan Propellor fan Motor Output kW 0 35 1 0 35 1 0 35 1 0 35 1 Airflow Rate m min 95 95 110 110 Drive Direct drive Direct drive Con...

Page 18: ...ts kW 3 3 1 2 8 1 2 8 1 3 3 1 3 3 1 2 8 1 Starting Method Soft start Soft start Fan Type Propellor fan Propellor fan Motor Output kW 0 35 1 0 35 1 0 35 1 0 35 1 0 35 1 0 35 1 Airflow Rate m min 110 95...

Page 19: ...15 75 1 15 75 1 15 75 1 Number of Revolutions r p m 7440 7440 7440 Motor Output Number of Units kW 3 3 1 3 3 1 3 3 1 Starting Method Soft start Fan Type Propellor fan Motor Output kW 0 35 1 0 35 1 0...

Page 20: ...nits kW 2 8 1 2 8 1 3 3 1 3 3 1 Starting Method Soft start Soft start Fan Type Propellor fan Propellor fan Motor Output kW 0 35 1 0 35 1 0 35 1 0 35 1 Airflow Rate m min 95 95 110 110 Drive Direct dri...

Page 21: ...ts kW 3 3 1 2 8 1 2 8 1 3 3 1 3 3 1 2 8 1 Starting Method Soft start Soft start Fan Type Propellor fan Propellor fan Motor Output kW 0 35 1 0 35 1 0 35 1 0 35 1 0 35 1 0 35 1 Airflow Rate m min 110 95...

Page 22: ...s kW 3 3 1 3 3 1 3 3 1 3 6 1 3 6 1 3 6 1 Starting Method Soft start Soft start Fan Type Propellor fan Propellor fan Motor Output kW 0 35 1 0 35 1 0 35 1 0 35 1 0 35 1 0 35 1 Airflow Rate m min 110 110...

Page 23: ...mber of Units kW 3 6 1 3 3 1 3 3 1 2 8 1 3 6 1 3 6 1 3 3 1 2 8 1 Starting Method Soft start Soft start Fan Type Propellor fan Propellor fan Motor Output kW 0 35 1 0 35 1 0 35 1 0 35 1 0 35 1 0 35 1 0...

Page 24: ...ber of Units kW 3 6 1 3 6 1 3 6 1 3 3 1 3 6 1 3 6 1 3 6 1 3 6 1 Starting Method Soft start Soft start Fan Type Propellor fan Propellor fan Motor Output kW 0 35 1 0 35 1 0 35 1 0 35 1 0 35 1 0 35 1 0 3...

Page 25: ...oor Unit Liquid Pipes 9 5mm C1220T brazing connection 9 5mm C1220T brazing connection 9 5mm C1220T brazing connection Suction Gas Pipes 15 9mm C1220T brazing connection 15 9mm C1220T brazing connectio...

Page 26: ...s Outdoor unit model name Total capacity of connectable indoor units Number of connectable indoor units Indoor unit total capacity RQCEQ280PY1 14 0 to 36 4 56 0 16 RQCEQ360PY1 18 0 to 46 2 72 0 20 RQC...

Page 27: ...erant Circuit 1 Refrigerant Circuit 19 1 1 RQYQ140 180PY1 RQEQ140 212PY1 19 1 2 BS Unit 21 2 Functional Parts Layout 23 2 1 RQYQ140 180PY1 RQEQ140 212PY1 23 3 Refrigerant Flow for Each Operation Mode...

Page 28: ...o the mixing unit during normal operation 15 R1T Thermistor Outdoor air Ta Used to detect outdoor temperature correct discharge pipe temperature and others 16 R2T Thermistor Discharge pipe Used to det...

Page 29: ...SiBE341001 Refrigerant Circuit Refrigerant Circuit 20 23 29 7 6 5 28 21 22 3 4 8 17 18 2 14 10 13 12 19 9 26 1 27 30 20 Fan 15 11 25 16 3D066010A M...

Page 30: ...ing operation 3 Electronic expansion valve EVLS Y3E Opens while in cooling operation 4 Electronic expansion valve EVH Y4E Opens while in heating operation or all indoor units are in cooling operation...

Page 31: ...rant Circuit Refrigerant Circuit 22 BSV4Q100PV1 3D064148 BSV6Q100PV1 3D064149 1 7 7 6 2 4 3 5 1 6 2 4 3 5 7 1 6 2 4 3 5 7 1 6 2 4 3 5 1 6 2 4 3 5 7 1 6 2 4 3 5 7 1 6 2 4 3 5 7 1 6 2 4 3 5 7 1 6 2 4 3...

Page 32: ...r S1NPH Thermistor Suction pipe R5T Solenoid valve Hot gas Y4S Solenoid valve Circuit of oil return Y5S High pressure switch For INV S1PH Thermistor Outdoor air Ta R1T Service port Air tight and vacuu...

Page 33: ...ressure liquid Low temperature low pressure Indoor unit operation ON Cooling Thermostat ON Indoor unit operation OFF Cooling Indoor unit operation ON Cooling Thermostat OFF Indoor unit Filter Filter H...

Page 34: ...Low temperature low pressure Indoor unit operation ON Cooling Thermostat ON Indoor unit operation OFF Cooling Indoor unit operation ON Cooling Thermostat OFF Indoor unit Filter Filter Heat exchanger...

Page 35: ...essure Indoor unit operation ON Heating Thermostat ON Indoor unit operation OFF Heating Indoor unit operation ON Heating Thermostat OFF Indoor unit Filter Filter Heat exchanger Fan OFF Filter Filter H...

Page 36: ...N Cooling Thermostat OFF Fan ON Setting Indoor unit operation ON Cooling Thermostat ON Fan ON Setting Filter Filter Indoor unit Heat exchanger Heat exchanger Heat exchanger Electronicexpansionvalve No...

Page 37: ...hermostat OFF Fan ON Setting Indoor unit operation ON Cooling Thermostat ON Fan ON Setting Filter Filter Indoor unit Heat exchanger Heat exchanger Heat exchanger Electronicexpansionvalve Normal Electr...

Page 38: ...ermostat OFF Fan ON Setting Indoor unit operation ON Heating Thermostat ON Fan ON Setting Filter Filter Indoor unit Heat exchanger Heat exchanger Heat exchanger Electronicexpansionvalve Normal Electro...

Page 39: ...hermostat OFF Fan ON Setting Indoor unit operation ON Heating Thermostat ON Fan ON Setting Filter Filter Indoor unit Heat exchanger Heat exchanger Heat exchanger Electronicexpansionvalve Normal Electr...

Page 40: ...Heat exchanger Filter Filter Electronicexpansionvalve 0pls Filter Filter Indoor unit operation ON Cooling Indoor unit operation ON Heating Thermostat OFF Fan OFF Indoor unit operation ON Heating Therm...

Page 41: ...exchanger Filter Filter Electronicexpansionvalve 0pls Filter Filter Indoor unit operation ON Cooling Indoor unit operation ON Heating Thermostat OFF Fan OFF Indoor unit operation ON Heating Thermosta...

Page 42: ...Heat exchanger Filter Filter Electronicexpansionvalve Normal Filter Filter Indoor unit operation ON Heating Thermostat ON Indoor unit operation ON Heating Thermostat ON Fan ON Setting Indoor unit ope...

Page 43: ...nction General 35 1 1 Operation Mode 35 1 2 Symbol 36 2 Detailed Control Functions 37 2 1 Stop Operation 37 2 2 Standby 37 2 3 Rotation Control 37 2 4 Startup Control 38 2 5 Normal Operation 39 2 6 Pr...

Page 44: ...essor Step Control 4 Electronic Expansion Valve PI Control 5 Step Control of Outdoor Unit Fans 6 Heat Exchanger Control 7 Control of Refrigerant Amount 2 3 Outdoor Unit Rotation 1 Oil return Operation...

Page 45: ...rget evaporator outlet superheated degree SVB Y5S Solenoid valve Circuit of oil return SVG1 Y1S Solenoid valve Refrigerant regulator hot gas SVG2 Y3S Solenoid valve Refrigerant regulator gas vent pipe...

Page 46: ...to prevent the refrigerant from melting in the compressor oil in the stopped mode this mode is used to control the crankcase heater 2 3 Rotation Control 2 3 1 Outdoor Unit Rotation In the case of mult...

Page 47: ...nser Ending conditions OR A lapse of 90 sec Tc high pressure equivalent saturation temperature 48 C Pc Pe 0 39MPa Inverter compressor INV M1C 0 Hz 0 pls Step 4 52 Hz 0 pls 15 sec Ta 20 C OFF Ta 20 C S...

Page 48: ...rant discharge ON for refrigerant discharge ON for refrigerant discharge Solenoid valve Refrigerant regulator liquid pipe Y2S ON for refrigerant recovery ON for refrigerant recovery ON for refrigerant...

Page 49: ...operating frequency etc On multi outdoor unit systems this control is made according to values of the first priority unit which is detected with the pressure sensor Heating operation Controls compress...

Page 50: ...232Hz 23 248Hz 2 RQCYQ280 360PY1 RQCEQ280 360PY1 STEP No Master INV Slave INV 1 52Hz OFF 2 56Hz OFF 3 62Hz OFF 4 68Hz OFF 5 74Hz OFF 6 80Hz OFF 7 88Hz OFF 8 96Hz OFF 9 104Hz OFF 1 52Hz 52Hz Initial st...

Page 51: ...8 88Hz 88Hz OFF 3 62Hz 62Hz 62Hz 9 92Hz 92Hz OFF 4 66Hz 66Hz 66Hz 10 96Hz 96Hz OFF 5 68Hz 68Hz 68Hz 11 104Hz 104Hz OFF 6 70Hz 70Hz 70Hz 12 110Hz 110Hz OFF 7 74Hz 74Hz 74Hz 13 116Hz 116Hz OFF 8 80Hz 80...

Page 52: ...z 56Hz 56Hz 56Hz 12 110Hz 110Hz OFF OFF 7 74Hz 74Hz 74Hz OFF 3 62Hz 62Hz 62Hz 62Hz 13 116Hz 116Hz OFF OFF 8 80Hz 80Hz 80Hz OFF 4 66Hz 66Hz 66Hz 66Hz 9 88Hz 88Hz 88Hz OFF 5 68Hz 68Hz 68Hz 68Hz 10 96Hz...

Page 53: ...41 pls 2 5 5 Step Control of Outdoor Unit Fans Step control of fans Used to control the revolutions of outdoor unit fans in the steps listed in table below according to condition changes Figures liste...

Page 54: ...et condensing temperature target evaporating temperature current condensing temperature and current evaporating temperature A1 A2 A3 A4 Outdoor unit 1 2 3 Condenser Condenser Condenser GR 10 GR 15 Out...

Page 55: ...d valve Y2S Y3S when the load of the indoor unit is low and return the surplus refrigerant to the refrigerant regulator Discharge of refrigerant Open the solenoid valve Y1S and the electronic expansio...

Page 56: ...he following control is performed in the entire system Pc_max indicates the maximum value within the system Normal Operation Pc_max 3 47 MPa Compressor step Max Step Compressor system 2 step down 10 s...

Page 57: ...rformed in the system Pe_min indicates the minimum value within the system Normal Operation Pe_min 0 34 MPa Pe_min 0 15 MPa Pe_min 0 39 MPa Pe_min 0 29 MPa Pe_min 0 07 MPa Single type Compressor step...

Page 58: ...n 0 23MPa Upper limit compressor step max Max step Pe_min 0 17 MPa Compressor system 2 step down 10 sec Compressor system 2 step up 15 sec Compressor system 1 step up 15 sec Pe_min 0 20 MPa After 15 s...

Page 59: ...mp 1 step down 30 sec INV Comp 1 step up 20 sec HTdi 110 C After 20 sec HTdi 115 C After 30 sec Frequency agreement HTdi 130 C HTdi 120 C continues for 90 seconds or more or HTdi 135 C HTdi 120 C cont...

Page 60: ...llowing control of integrated as well as multi units for each INV compressor INV Comp 1 step down 10 sec INV Comp 1 step up 20 sec INV current value 14 7 A After 10 sec INV current value 14 7 A contin...

Page 61: ...ay valve ON 0 pls Four way valve OFF 480 pls Four way valve ON 0 pls Four way valve OFF 480 pls Electronic expansion valve Refrigerant charge Y2E 0 pls 0 pls 0 pls 0 pls Electronic expansion valve Sub...

Page 62: ...or unit fan M1F Fan control in normal cooling Electronic expansion valve Main Y1E 480 pls Electronic expansion valve Refrigerant charge Y2E 0 pls Electronic expansion valve Subcooling Y3E 0 pls Soleno...

Page 63: ...g oil return and defrost operation Compressor M1C 188 Hz Outdoor unit fan M1F OFF Electronic expansion valve Main Y1E 480 pls Electronic expansion valve Refrigerant charge Y2E SH control Electronic ex...

Page 64: ...e refrigerant amount By Adjusting control of the refrigerant amount Solenoid valve Hot gas Y4S ON ON Solenoid valve Circuit of oil return Y5S OFF OFF Four way valve Heat exchanger switch Y6S Defrost u...

Page 65: ...riod of 20 minutes or more in heating Example The following diagram shows outdoor unit rotation in combination of 3 outdoor units in heating Master unit slave unit 1 and slave unit 2 in this section a...

Page 66: ...th the electronic expansion valve Y4E and the indoor unit electronic expansion valve open to become a heating circuit The changeover time is about 6 minutes However this can be shortened from 6 minute...

Page 67: ...he indoor unit electronic expansion valve adjusts the opening extent to become a cooling circuit The changeover time is about 6 minutes However this can be shortened from 6 minutes to 4 minutes depend...

Page 68: ...over stop the compressor for 30 seconds 3 Heating or simultaneous cooling and heating Each indoor unit Starts the hot air supply operation by cold air prevention control 3 5 minutes 1 While the unit i...

Page 69: ...nit and operate only other outdoor units This emergency operation is not available for one outdoor unit system Emergency operation by outdoor unit PCB Setting method Set the compressor to be stopped b...

Page 70: ...t Operation Part 5 Test Operation 1 Test Operation 62 1 1 Procedure and Outline 62 1 2 Check Operation 65 1 3 Checking in Normal Operation 68 2 Field Setting from Outdoor Unit 69 2 1 Field Setting fro...

Page 71: ...r If the compressor is left to stand for an extended period of time after the refrigerant charge with the stop valve open and the power supply OFF the refrigerant may be mixed in the compressor thus d...

Page 72: ...kg 0 0kg 0 5kg 360PY1 6 8kg 460PY1 11 2kg 500PY1 11 2kg 540PY1 11 2kg RQCEQ 280Py1 1 02 5 2kg 0 0kg 0 5kg 360PY1 5 8kg 460PY1 9 1kg 500PY1 9 4kg 540PY1 9 7kg 636PY1 11 2kg 712PY1 13 8kg 744PY1 14 3kg...

Page 73: ...or unit PCB LED display Default status before delivery Micro computer operation monitor MODE HAP l l l l l H1P h h h h h H2P h h h h h H3P k k h h h H4P h h h h h H5P h h h h h H6P h h h h h H7P h h h...

Page 74: ...gerant re charging port Press the test operation button BS4 for longer than 5 seconds after connection of the refrigerant tank LED change indications then re start Use a refrigerant cylinder with suff...

Page 75: ...defect repair the defect part according to Remote controller displays malfunction code Test operate again after the repair To test operate again press the RETURN button BS3 to turn the LED back to no...

Page 76: ...ere a malfunction code is not displayed on the remote controller Correct the trouble at the corresponding BS and indoor unit If no malfunction code is displayed on the remote controller press the Insp...

Page 77: ...checking normal operation If any abnormal noise occurs due to liquid compression in the compressor or another cause stop operation immediately Then energize the crankcase heater for a sufficient peri...

Page 78: ...the mode with No 25 If necessary set the Capacity precedence setting to ON with No 29 B The low noise operation aforementioned is enabled in night time automatic low noise operation mode Start time P...

Page 79: ...g mode 2 to NONE 7 Emergency operation If the compressor has a failure used to prohibit the operation of compressor s concerned or outdoor unit s concerned and to conduct emergency operation of the sy...

Page 80: ...use of a Cool Heat selector mounted to the outdoor unit OFF Factory setting of spare PCB COOL HEAT setting is not made with the use of a Cool Heat selector mounted to the outdoor unit DS1 2 Power supp...

Page 81: ...ify the operating status and to set program addresses etc Usually used in servicing the system e Monitor mode H1P blinks Used to check the program made in Setting mode 2 Mode changing procedure 1 LED...

Page 82: ...ush the MODE BS1 button to set the system to Setting mode 1 Normally Setting mode 1 is set In case of other status push MODE BS1 button one time and set to Setting mode 1 Check the system for each con...

Page 83: ...low noise operation in a simple way The operating time is based on Starting set and Ending set 25 Setting of external low noise level Sets low noise level when the low noise signal is input from outsi...

Page 84: ...e be any faulty part in multi outdoor unit system Since the comfortable environment is extremely impaired prompt replacement of the part is required 39 Emergency operation Setting for the slave unit 1...

Page 85: ...ry setting khhh hkh High khhh khh 10 Defrost changeover setting k h h k h k h Slow defrost khhh hhk Normal factory setting khhh hkh Quick defrost khhh khh 11 Sequential operation setting k h h k h k k...

Page 86: ...demand khhhhh k 70 demand khhhhk h 80 demand khhhkh h 32 Normal demand setting k k h h h h h OFF khhhhh k ON khhhhk h 35 Setting of difference in elevation for the outdoor unit k k h h h k k Normal k...

Page 87: ...h h k h k 6 Number of connected BS units 2 l h h h k k h 7 Number of connected zone units Fixed to 0 l h h h k k k 8 Number of outdoor units 3 l h h k h h h 9 Number of BS units 4 l h h k h h k Lower...

Page 88: ...address is expressed as a binary number consisting of the lower 6 digits 0 63 In c the address is 010110 binary number which translates to 16 4 2 22 base 10 number In other words the address is 22 Th...

Page 89: ...r unit by indoor unit remote controller f Set cool heat for more than one outdoor unit system simultaneously in accordance with unified master outdoor unit by cool heat switching remote controller g S...

Page 90: ...et Cool Heat Separately for Each Outdoor Unit System by Cool Heat Selector It does not matter whether or not there is outdoor outdoor unit wiring Set outdoor unit PCB DS1 1 to OUT factory set Set cool...

Page 91: ...1 set the outdoor unit you want to give cool heat selection permission to as the group master and set the other outdoor units as group slave units Set the outdoor unit external control adaptor SS1 to...

Page 92: ...the unified control Set the DS1 1 on the PCB of master outdoor unit to OUT In setting mode 1 set the outdoor unit you want to give cool heat selection permission to as the group master and set the oth...

Page 93: ...it matches the unified cool heat address of outdoor unit main PCB Address setting for e and f Set lower 5 digits with binary number No 0 to No 31 Address No Outdoor unit PCB LED Set with setting mode...

Page 94: ...ptor optional accessory onto the outdoor outdoor indoor outdoor or indoor indoor transmission line Use setting mode 1 and set all outdoor units to SLAVE Set the outdoor unit external control adaptor S...

Page 95: ...ide for details of the installation e Connect the terminals F1 F2 of the external control adaptor for the outdoor unit to the terminals F1 F2 indoor side on the BS unit PCB Refer to the figure below f...

Page 96: ...gnored to put the system into normal operation mode B When the low noise operation is carried out automatically at night The external control adaptor for outdoor unit is not required 1 While in Settin...

Page 97: ...the normal demand operation is carried out Use of the external control adaptor for outdoor unit is not required 1 While in Setting mode 2 make setting of the set item No 32 Setting of alternate deman...

Page 98: ...prohibited Operation procedure c In setting mode 2 with units in stop mode set Refrigerant Recovery Vacuuming mode to ON The respective expansion valve of indoor and outdoor units are fully opened an...

Page 99: ...Discriminate the operating status of the master unit slave units through the following LED display In order to set the master unit to operation prohibition mode set No 38 of Setting mode 2 to MASTER O...

Page 100: ...of Setting mode 2 to SLAVE 3 OPERATION PROHIBITION Procedure 1 Press and hold the MODE button BS1 for a period of 5 seconds or more 2 Press the SET button BS2 40 times 3 Press the RETURN button BS3 on...

Page 101: ...tor R1T for Outdoor Air 131 2 18 J3 J4 J5 J6 J7 J8 J9 Outdoor Unit Malfunction of Outdoor unit Thermistor 132 2 19 JA Outdoor Unit Malfunction of High Pressure Sensor 134 2 20 JC Outdoor Unit Malfunct...

Page 102: ...d Outdoor Units in the Same System 173 2 37 UA Improper Combination of Indoor BS and Outdoor Units Indoor Units and Remote Controller 174 2 38 UC Address Duplication of Centralized Controller 182 2 39...

Page 103: ...se symptoms indicate that the system is controlled so as not to put unreasonable loads on the system Normal operation The system will automatically start operation after a lapse of five minutes Pressi...

Page 104: ...operation so that no one gets cold air Furthermore if fan operation mode is selected when other indoor unit is in heating operation the system will be brought to fan LL operation Normal operation 9 T...

Page 105: ...hat the compressor changes the operating frequency Normal operation 12 Dust comes out from the system Dust comes out from the system when it restarts after the stop for an extended period of time Dust...

Page 106: ...tion Timer setting Service Contact Model Info Convenient functions Setting status list Clock setting Language changeover Basic Screen Operation mode changeover Fan speed control Menu display Confirmat...

Page 107: ...ive action specified for the particular model 1 Checking a malfunction or warning Operation Status Display Abnormal shutdown The system stops operating The operation lamp green starts to blink The mes...

Page 108: ...nter the Service Mode Service Mode Operation Method 1 Select the mode No Select the desired item from the Service menu and then press Menu Enter button 2 Select the Item 2 Select the desired Unit No u...

Page 109: ...6 MP Drain pump ON OFF 7 52H Electric heater ON OFF 8 Hu Humidifier ON OFF 9 Anti freezing Anti freezing control ON OFF 3 Indoor Status Display 2 2 1 Unit No Select the Unit No you want to check SkyAi...

Page 110: ...No A unit No can be transferred to another 2 Transfer Unit No 8 Sensor Address Display Unit No 0 15 Select the Unit No you want to check Code 0 1 2 3 4 5 6 7 8 9 Remote controller thermistor C Suctio...

Page 111: ...ing operation Press the RUN STOP button after the completion of test run mode setting and a test run starts The remote controller will display TEST RUN on it 2 5 Remote Controller Self Diagnosis Funct...

Page 112: ...n starts to blink The message Malfunction Press Menu button will appear and blink at the bottom of the screen Warning The system continues its operation The operation lamp green remains on The message...

Page 113: ...ature rise 140 L5 l Momentary overcurrent of inverter compressor 142 L8 l Momentary overcurrent of inverter compressor 144 L9 l Inverter compressor starting failure 146 Outdoor Unit LA l Malfunction o...

Page 114: ...Damper system alarm 6A l Damper system thermistor error 6F k Malfunction of simple remote controller 6H k Malfunction of door switch or connector 94 l Internal transmission error k ON h OFF l Blink M...

Page 115: ...ioning signal malfunction H7 2DC fan motor positioning signal malfunction Abnormal outdoor temperature Ta sensor malfunction short circuited or open H9 Abnormal discharge pipe temperature Td malfuncti...

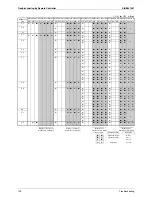
Page 116: ...l h l l h h l l l h h h h l h h 1 F4 F9 l l h h l l h h h l l h h l l l h h l h l h h l l l h h l l l h h l l l h l h h l h h l l l h l h l l h h l l J3 l h l l h l h h l l l h h h h l h h 1 l h h h h...

Page 117: ...lfunction ON Abnormal power supply voltage Insufficient INV voltage U2 INV open phase single phase Abnormal charge of capacitor of INV main circuit Test run not carried out yet Test run not carried ou...

Page 118: ...h h l h l l l U7 l h l l l l h h h h l h h l l l h h h h l h l l l l h h h h l l h l l l h h h h l l l l l l h h h l l h h l l l h h h l l h l l l l h h h l l l h l l l h h h l l l l l l U9 l l h h l...

Page 119: ...hardware section between the indoor unit and the outdoor unit are not normal Supposed Causes Defect of outdoor unit PCB A1P Defective connection of inside outside relay wires Troubleshooting Caution...

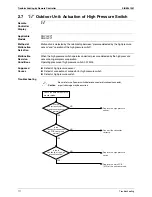
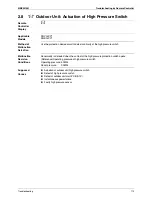
Page 120: ...ssor operation Operating pressure of high pressure switch 0 07MPa Supposed Causes Defect of high pressure sensor Defect of connection of connector for high pressure switch Defect of high pressure swit...

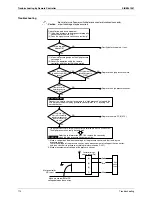
Page 121: ...to detect continuity at the high pressure switch Malfunction Decision Conditions Abnormality is detected when the contact of the high pressure protection switch opens Reference Operating pressure of h...

Page 122: ...sure sensor Replace the main PCB A1P Check if the high pressure value and the actualmeasurementvalue by pressure sensor are the same The high pressure sensor is normal and the pressure detected with t...

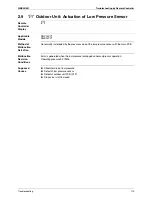
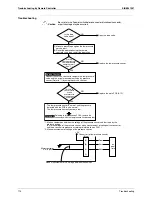
Page 123: ...d of Malfunction Detection Abnormality is detected by the pressure value of the low pressure sensor with the main PCB Malfunction Decision Conditions Error is generated when the low pressure is droppe...

Page 124: ...ake measurement of voltage of the pressure sensor YES NO NO YES Replace the low pressure sensor Replace the main PCB A1P Is the stop valve open 1 Mount a pressure gauge on the low pressure service por...

Page 125: ...l from UVW line connected between the inverter and compressor and the malfunction is detected when any abnormality is observed in the phase current waveform Malfunction Decision Conditions This malfun...

Page 126: ...he high differential pressure not less than 0 5 MPa Check 4 Is the power transistor normal NO YES NO YES NO YES NO YES YES NO YES YES NO NO NO YES YES YES NO NO YES NO Local factor Open the stop valve...

Page 127: ...of rotation detected by hole IC during the fan motor operation Malfunction Decision Conditions Overcurrent is detected for INVERTER PCB A2P or fan INVERTER PCB A5P System down is caused by 4 times of...

Page 128: ...on code E7 in the monitor mode of outdoor unit PCB Refer to P 106 P 107 for how to check Check in the monitor mode Cut the power supply OFF and wait for 10 minutes Fan motor relay connector or X1A X2A...

Page 129: ...VW phases of fan motorisoutofbalance or short circuit between UVW phases Referring to the information on P 190 Check 2 Check fan motor connector signal wire The signal wire short circuits between Vcc...

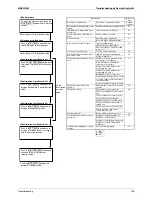
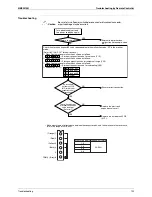
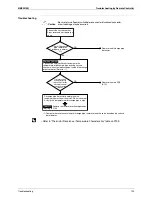
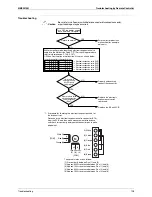
Page 130: ...icable Models RQYQ PY1 RQEQ PY1 Method of Malfunction Detection Check the continuity of electronic expansion valve coil Y1E Malfunction Decision Conditions No current is detected in the common COM whe...

Page 131: ...When Confirmation of malfunction 4 shows as follows Electronic expansion valve for refrigerant charge Y2E When Confirmation of malfunction 4 shows as follows Electronic expansion valve for subcooling...

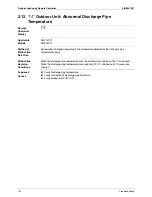
Page 132: ...ity is detected according to the temperature detected by the discharge pipe temperature sensor Malfunction Decision Conditions When the discharge pipe temperature rises to an abnormally high level 135...

Page 133: ...checker to compare the temperature of discharge pipe by using service checker with actual measurement value of discharge pipe thermistor Refer to 1 Service Checker Check if temperature of discharge pi...

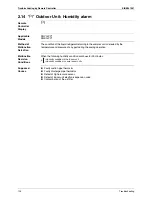
Page 134: ...ompressor is detected by the temperature and pressure of any part during the cooling operation Malfunction Decision Conditions When the following humidity condition continues for 30 minutes Supposed C...

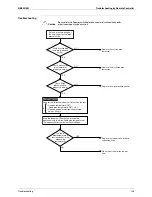
Page 135: ...Replace the discharge pipe thermistor Check if high pressure sensor property is normal The liquid pipe temperature is low equivalent to the evaporating temperature YES YES NO Replace the high pressure...

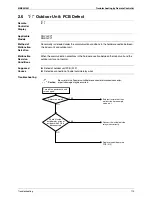
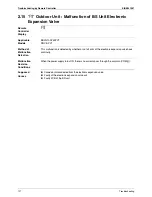
Page 136: ...E PY1 Method of Malfunction Detection This malfunction is detected by whether or not all coils of the electronic expansion valve have continuity Malfunction Decision Conditions When the power supply t...

Page 137: ...pansion valve Y1E Is the connectorfor the electronicexpansionvalve ofthePCB concerned properlyconnected Is the resistance of the electronic expansion valve coil normal See 1 YES YES YES NO NO Properly...

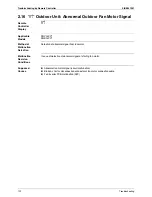
Page 138: ...e Models RQYQ PY1 RQEQ PY1 Method of Malfunction Detection Detection of abnormal signal from fan motor Malfunction Decision Conditions In case of detection of abnormal signal at starting fan motor Sup...

Page 139: ...fan motor is normal Check the connector of the fan motor 1 Check iftheresistance ofthefan motor leadwirebetween Vccand UVWand betweenGND andUVW are balanced 1 Check the procedure for fan motor connec...

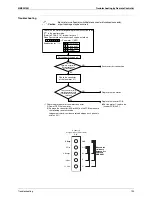
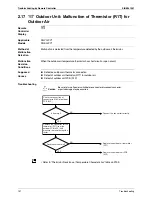
Page 140: ...tive outdoor air thermistor connection Defect of outdoor air thermistor R1T for outdoor air Defect of outdoor unit PCB A1P Troubleshooting Refer to Thermistor Resistance Temperature Characteristics ta...

Page 141: ...Display J3 J4 J5 J6 J7 J8 J9 Applicable Models RQYQ PY1 RQEQ PY1 Method of Malfunction Detection Malfunction is detected from the temperature by each thermistor Malfunction Decision Conditions When a...

Page 142: ...tor J6 Heat exchanger thermistor R6T J7 Subcooling heat exchanger liquid pipe thermistor R8T Liquid pipe thermistor R9T J9 Subcooling heat exchanger gas pipe thermistor R7T Caution Be sure to turn off...

Page 143: ...tion Detection Malfunction is detected from the pressure detected by the high pressure sensor Malfunction Decision Conditions When the high pressure sensor is short circuit or open circuit Not less th...

Page 144: ...unit monitor mode Refer to P 106 P 107 1 Set the high pressure gauge upright 2 Connect the checker for VRV to the gauge IfthePCB pressuredetection normal Makea comparison betweenthechecker pressure da...

Page 145: ...e sensor Troubleshooting Caution Be sure to turn off power switch before connect or disconnect connector or parts damage may be occurred Arethecharacteristicsofthelow pressuresensornormal Make a compa...

Page 146: ...37 Troubleshooting 1 Voltage measurement point 2 Refer to Pressure Sensor Pressure Voltage Characteristics table on P201 Outdoor unit PCB A1P 5V GND Micro computer A D input 2 Measure DC voltage here...

Page 147: ...based on the current value during waveform output before starting compressor Malfunction is detected based on the value from current sensor during synchronous operation when starting the unit Malfunc...

Page 148: ...m external causes other than failures e g exogenous noises or thunder Is the individual system applied to the outdoor unit Multi system Individual system While in monitor mode check whether the system...

Page 149: ...able Models RQYQ PY1 RQEQ PY1 Method of Malfunction Detection Radiation of compressor inverter PCB Fin temperature is detected by the thermistor of the radiation fin Malfunction Decision Conditions Wh...

Page 150: ...ly and then make measurement of resistance of the radiation fin thermistor Replace the thermistor Is the thermistor resistance normal Connect and disconnect the connector X111A for the fin thermistor...

Page 151: ...1 Method of Malfunction Detection Malfunction is detected from the current flowing in the power transistor Malfunction Decision Conditions When an excessive current 59 1A flows in the power transistor...

Page 152: ...ck if the compressor lead wires are normal Check if the wiring and connection to the compressor are normal Insulation resistance of the compressor is 100 k or less CHECK 4 Check if the power transisto...

Page 153: ...d of Malfunction Detection Malfunction is detected from the current flowing in the power transistor Malfunction Decision Conditions When the inverter secondary current value is below 1 33 5A and over...

Page 154: ...d Check 4 Check if the power transistor is normal Malfunction code L8 is displayed again Power OFF NO NO NO YES YES NO YES NO Open the stop valve Replace the compressor lead wires Correct the wiring a...

Page 155: ...Q PY1 RQEQ PY1 Method of Malfunction Detection Detect the failure based on the signal waveform of the compressor Malfunction Decision Conditions Starting the compressor does not complete Supposed Caus...

Page 156: ...t amount of refrigerant is charged Charge a right amount of refrigerant Check if the stop valve is open Check if the insulation resistanceof the compressor is more than 100k NO YES Refrigerant is melt...

Page 157: ...f refrigerant Referring to the information on P 192 Check 4 Refrigerant is melting in refrigerant oil The unit is out of power supply for more than 6 hours Check if the insulation resistance of the co...

Page 158: ...ction Check the communication state between inverter PCB and main PCB by micro computer Malfunction Decision Conditions When the correct communication is not conducted in certain period Supposed Cause...

Page 159: ...ce of not more than 100k The fan motor has insulation resistance of not more than 1M Replace it with a correct PCB Properly connect the connectors Replace the INV compressor M1C Replace the fan motor...

Page 160: ...in supply voltage is detected in PCB Malfunction Decision Conditions When the amplitude of the ripple exceeding 6V is detected Malfunction is not decided while the unit operation is continued P1 will...

Page 161: ...e between 3 phases R S S T R T for about one continuous week When voltage monitoring is possible Open phase NO YES Fix power supply voltage imbalance Part or wiring defect After turning the power supp...

Page 162: ...ued P4 will be displayed by pressing the inspection button Supposed Causes Defect of radiation fin thermistor Defect of inverter PCB Faulty inverter compressor Faulty fan motor Troubleshooting Caution...

Page 163: ...splay PJ Applicable Models RQYQ PY1 RQEQ PY1 Method of Malfunction Detection This malfunction is detected according to communications with the inverter Malfunction Decision Conditions Make judgement a...

Page 164: ...urred Replace it with the correct compressor inverter PCB Is the type of the compressor inverter PCB A3P correct NO Replace it with the correct fan inverter PCB Is the type of the fan inverter PCB A4P...

Page 165: ...upply reverse phase T phase open phase Defect of outdoor PCB A1P Troubleshooting Caution Be sure to turn off power switch before connect or disconnect connector or parts damage may be occurred Fix the...

Page 166: ...n Detection Detection of voltage of main circuit capacitor built in the inverter and power supply voltage Malfunction Decision Conditions When the voltage aforementioned is not less than 190V Supposed...

Page 167: ...ged compressor and fan motor are likely to get faulty YES NO YES NO NO YES NO YES There are problems on the condition of power supply described above NO YES The insulation resistance of compressor is...

Page 168: ...ter PCB is badly damaged recheck the compressor Check the harness Continue the operation The malfunction may temporarily result from onsite causes Causes Instantaneous power failure open phase noises...

Page 169: ...is not Executed Remote Controller Display U3 Applicable Models RQYQ PY1 RQEQ PY1 Method of Malfunction Detection Check operation is executed or not Malfunction Decision Conditions Malfunction is decid...

Page 170: ...ade Caution Be sure to turn off power switch before connect or disconnect connector or parts damage may be occurred Malfunction varies depending on the malfunction detail code Check the detail code be...

Page 171: ...Check if the transmission between indoor unit and outdoor unit is correctly executed using micro computer Malfunction Decision Conditions When transmission is not carried out normally for a certain a...

Page 172: ...eck if the voltage between R S terminals on the outdoor unit PCB is 400V The fuse on the outdoor unit PCB is blown Check if the normal condition monitor for the micro computer HAP on the outdoor unit...

Page 173: ...age YES In Confirmation of malfunction 4 LED lamp indicates as follows Start operation of all the indoor units Check if all the units indicate U9 Check if more than 2 minutes passed since U9 was indic...

Page 174: ...Decision Conditions When transmission is not carried out normally for a certain amount of time Supposed Causes Connection error in connecting wires between outdoor unit and external control adaptor f...

Page 175: ...Flow 6 Erroneous manual address settings of the slave units 1 2 and 3 Go on to the Diagnosis Flow 7 Connection of five or more outdoor units to the same circuit Go on to the Diagnosis Flow 8 Abnormal...

Page 176: ...mation of malfunction 4 Diagnosis Flow 1 Check if the normal condition monitor LED for the outdoor unit PCB blinks Check if power is supplied to the outdoor units Check if the normal condition monitor...

Page 177: ...duplicated Set the address again Replace the main PCB A1P of the outdoor unit Supply the power to the outdoor unit Replace the main PCB A1P of the outdoor unit Connect the power supply wire for the e...

Page 178: ...utdoor unit is connected to multi system Confirmation of malfunction 3 Check the connection status of connecting wires of the outdoor multi to SLAVE 1 Check if the wiring is disconnected or is about t...

Page 179: ...supply In the connection status of the outdoor multi check if more than 5 outdoor units are connected NO Confirmation of malfunction 3 Confirmation of malfunction 4 Diagnosis Flow 8 Correct the connec...

Page 180: ...pply line Replace the PCB of the external control adaptor for outdoor unit Replace the BS unit PCB NO NO YES Correct the connecting wiring with the external control adaptor for outdoor unit Diagnosis...

Page 181: ...continue for specified period Supposed Causes Malfunction of transmission between main and sub remote controller Connection between sub remote controllers Defect of remote controller PCB Troubleshoot...

Page 182: ...within or outside of other system Malfunction of electronic expansion valve in indoor unit of other system Defect of PCB of indoor unit in other system Improper connection of transmission wiring betwe...

Page 183: ...of refrigerant between indoor BS and outdoor units The number of indoor units is out of the allowable range Incorrect signals are transmitted among the indoor unit BS unit and outdoor unit Malfunction...

Page 184: ...w 4 Faulty wiring in units dedicated to multi connections To Diagnosis Flow 5 Connection of erroneous models of BS units To Diagnosis Flow 6 Faulty wiring between outdoor units and BS units To Diagnos...

Page 185: ...YES NO YES NO Diagnosis Flow 1 Confirmation of malfunction 3 Confirmation of malfunction 4 Diagnosis Flow 2 The number of indoor units connected to the same refrigerant circuit system should not be m...

Page 186: ...it PCB is replaced with spare PCB Is a correct spare PCB procured Check if the spare PCB setting is correct Check if the unit isnotconnected to outdoor units of different models Check the model of the...

Page 187: ...irmation of malfunction 3 Confirmation of malfunction 4 YES NO Diagnosis Flow 5 Is the number of indoor units downstream of BS within the specified number YES NO Replace the outdoor unit PCB Confirmat...

Page 188: ...ation of malfunction 3 Confirmation of malfunction 4 Diagnosis Flow 8 Is the connection wiring between the indoor unit and the BS unit correct Correct the connection wiring Replace the indoor unit or...

Page 189: ...Confirmation of malfunction 3 Confirmation of malfunction 4 Diagnosis Flow 11 Are all the outdoor units the same models Are RQEQ and RQYQ not mixed Correct the combination of outdoor units Replace the...

Page 190: ...of outdoor units Confirmation of malfunction 3 Confirmation of malfunction 4 YES NO Diagnosis Flow 12 Is the multi combination of outdoor units correct Replace the outdoor unit PCB Faulty combination...

Page 191: ...ss as that of its own on any other indoor unit Malfunction Decision Conditions The malfunction decision is made as soon as the abnormality aforementioned is detected Supposed Causes Address duplicatio...

Page 192: ...icro computer checks if transmission between indoor unit and centralized controller is normal Malfunction Decision Conditions When transmission is not carried out normally for a certain amount of time...

Page 193: ...mbers types of cables and wires number of units connected and others If no problems replace the indoor unit PCB NO YES Continued to A on the following page YES Check the indoor unit for which UE is di...

Page 194: ...NO YES Disconnect the transmission wiring of the master centralized controller and then check the voltage between the transmission terminals F1 and F2 of the master unit transmission equipment using...

Page 195: ...onnection of transmission wiring between indoor outdoor units and outdoor outdoor units Failure to execute check operation Defect of indoor unit PCB Stop valve is left in closed Troubleshooting Cautio...

Page 196: ...dels RQYQ PY1 RQEQ PY1 Method of Malfunction Detection Detect an indoor unit with no auto address setting Malfunction Decision Conditions The malfunction decision is made as soon as the abnormality af...

Page 197: ...atus and then check whether or not the system is normal Does a UH malfunction occur for all indoor units in the system Does a malfunction occur even after 12 minutes elapses from the time when electri...

Page 198: ...rature Short circuit High ambient temperature Check to be sure the stop valve is open Conduct visual checks for pipe conditions Is there any temperature difference caused before and after the filter o...

Page 199: ...er corresponding to the measurement of the pressure sensor Is the pressure value checked with the Service Checker corresponding to the measurement of the pressure sensor Are the electrical characteris...

Page 200: ...B Check if coil resistance and insulation are normal Check if coil resistance and insulation are normal Check if the voltage property is normal Check if the connector is connected properly Check if th...

Page 201: ...tester Measurement in the resistance value mode in the range of multiplying 1k Point of Measurement Judgement Criteria Remarks No 15k and above including 2 15k 2 15k Due to condenser charge and so on...

Page 202: ...ave normal resistance and insulation Refer to information in the Check 11 section Are the voltage characteristics normal Is the connector correctly connected Does the thermistor have normal resistance...

Page 203: ...K 6 Cooling High pressure Low pressure Frequency High pressure drooping control Low pressure is maintained at a constant level To maintain low pressure frequency increases under the capacity control H...

Page 204: ...quency comes to the minimum level Fan control is activated for high pressure protection under cooling control at low outdoor temperature i e the fan is hunting at high pressure High pressure drops wit...

Page 205: ...less for a period of one hour or more and then check to be sure that the vacuum gauge reading does not rise If the reading rises moisture may have remained in the system or refrigerant leakage may ha...

Page 206: ...aulty compressor Excessive oil or refrigerant Faulty inverter PCB E5 Inverter compressor lock The compressor is in the locked status does not rotate Faulty compressor L4 Radiator fin temperature rise...

Page 207: ...or more Transmission error Overcurrent of inverter compressor When transmissions between the main PCB and the inverter PCB are not normal Main Control PCB Weak current part Heavy current part Power t...

Page 208: ...53 71 4 5 52 38 54 6 65 54 5 6 53 5 51 09 5 5 49 83 55 6 41 55 5 6 53 6 48 61 6 5 47 42 56 6 18 56 5 6 06 7 46 26 7 5 45 14 57 5 95 57 5 5 84 8 44 05 8 5 42 98 58 5 74 58 5 5 43 9 41 95 9 5 40 94 59...

Page 209: ...8 72 5 32 23 122 7 06 122 5 6 97 23 218 24 23 5 213 51 73 31 69 73 5 31 15 123 6 87 123 5 6 78 24 208 90 24 5 204 39 74 30 63 74 5 30 12 124 6 69 124 5 6 59 25 200 00 25 5 195 71 75 29 61 75 5 29 12 1...

Page 210: ...Troubleshooting Pressure Sensor CHECK 12 High Pressure PH Low Pressure PL VH Output Voltage High Side VDC VL Output Voltage Low Side VDC PH 1 38VH 0 69 PL 0 57VL 0 28 PH High pressure MPa PL Low press...

Page 211: ...inuity 2 Procedure for checking indoor outdoor unit transmission wiring for broken wires for checking the indoor outdoor unit transmission wiring of the Outdoor Unit C for broken wires Turn OFF the po...

Page 212: ...available for combined use 2 The intelligent Touch Controller central remote controller and the unified ON OFF controller have been set to Provided with the master unit central setting connector at t...

Page 213: ...those described in the list of Setting of master unit central setting connector CHECK 15 1 2 3 4 Pattern 1 00 4 15 Master Slave 5 00 8 15 Master Slave 1 00 4 15 Master Slave 5 00 8 15 Master Slave CRC...

Page 214: ...ppendix 1 Piping Diagrams 206 1 1 Outdoor Unit 206 1 2 BS Unit 207 2 Wiring Diagrams for Reference 210 2 1 Outdoor Unit 210 2 2 BS Unit 211 3 Option List 214 3 1 Option Lists Outdoor Unit 214 4 Exampl...

Page 215: ...SiBE341001 Piping Diagrams Appendix 206 1 Piping Diagrams 1 1 Outdoor Unit RQYQ140 180PY1 RQEQ140 180 212PY1 3d066010A...

Page 216: ...Piping Diagrams SiBE341001 207 Appendix 1 2 BS Unit BSVQ100 160 250PV1 4D057985B...

Page 217: ...SiBE341001 Piping Diagrams Appendix 208 BSV4Q100PV1 3D064148...

Page 218: ...Piping Diagrams SiBE341001 209 Appendix BSV6Q100PV1 3D064149...

Page 219: ...SiBE341001 Wiring Diagrams for Reference Appendix 210 2 Wiring Diagrams for Reference 2 1 Outdoor Unit RQYQ140 180PY1 RQEQ140 180 212PY1 3D066011B...

Page 220: ...Wiring Diagrams for Reference SiBE341001 211 Appendix 2 2 BS Unit BSVQ100 160 250PV1 3D055928C...

Page 221: ...SiBE341001 Wiring Diagrams for Reference Appendix 212 BSV4Q100PV1 3D063928B...

Page 222: ...Wiring Diagrams for Reference SiBE341001 213 Appendix BSV6Q100PV1 3D063929B...

Page 223: ...SiBE341001 Option List Appendix 214 3 Option List 3 1 Option Lists Outdoor Unit 3D066354...

Page 224: ...Option List SiBE341001 215 Appendix...

Page 225: ...Equivalent length 13m Refrigerant branch kits can only be used with R410A How to select the REFNET joint When using REFNET joint at the first branch counted from the outdoor unit side Choose from the...

Page 226: ...rigerant branching kits Section D Piping between refrigerant branching kit and indoor unit Section E Piping between refrigerant branching kit and indoor unit Section E Piping between outdoor unit and...

Page 227: ...Additional refrigerant to be charged R kg R should be rounded off in units of 0 1kg Total length m of liquid piping size at 19 1 Total length m of liquid piping size at 15 9 Total length m of liquid p...

Page 228: ...B1 B4 BS Unit 1 6 Indoor unit Cool Heat selection possible Indoor unit Cooling only 7 8 r t s u 1 2 Outdoor unit multi connection piping kit and Refrigerant branch kit selection Refrigerant branch ki...

Page 229: ...utdoor unit multi connection piping kits part B Choose from the following table in accordance with the total capacity of all the outdoor units connected upstream Indoor capacity index 56 kW 56 kW x 11...

Page 230: ...tdoor system RQCEQ848PY1 Total capacity of indoor unit 116 R 50 0 26 3 0 18 3 0 12 156 0 059 20 0 022 1 02 15 6 0 5 a 19 1 30m b 19 1 20m c 9 5 10m d 9 5 10m e 9 5 10m f 9 5 10m g 9 5 10m h 9 5 10m i...

Page 231: ...l this product Do not try to install the product yourself Improper installation can result in water or refrigerant leakage electrical shock fire or explosion Use only those parts and accessories suppl...

Reviews: