18
Name
Dry cell battery
AAA. LR03 (alkaline)
(4) Clamp
Quantity
2 pcs.
3 pcs.
Shape
Name
(5) Sealing material
Operation &
Installation manual
Quantity
1 pc.
1 pc.
Shape
Name
(6) Plastic pin
(7) Plastic holder
Quantity
4 pcs.
1 pc.
Shape
2-2 OPTIONAL ACCESSORIES
For this Wireless Receiver Kit, the wireless
remote controller is separately required.
Refer to the catalog for the applicable model.
(Refer to also the installation manual attached to
the wireless remote controller for how to install.)
2-3 NOTE TO THE INSTALLER
•
Have the customer actually operate the system
while looking at the operation manual.
Instruct the customer how to operate the system.
3. REMOTE CONTROLLER
INSTALLATION
<Installing wireless remote controller>
•
Do not throw the remote controller or impose
large shocks. Also, do not store where it may
be exposed to moisture or direct sunlight.
•
When operating, point the transmitting part of the
remote controller in the direction of the receiver.
(Refer to the operation manual attached to this
kit.)
•
The maximum transmitting distance is 7 m.
This depends on the installation condition of
the indoor unit.
•
The signal cannot be transmitted if something
such as curtains blocks the receiver and the
remote controller.
•
Mounting the remote controller holder on a
wall
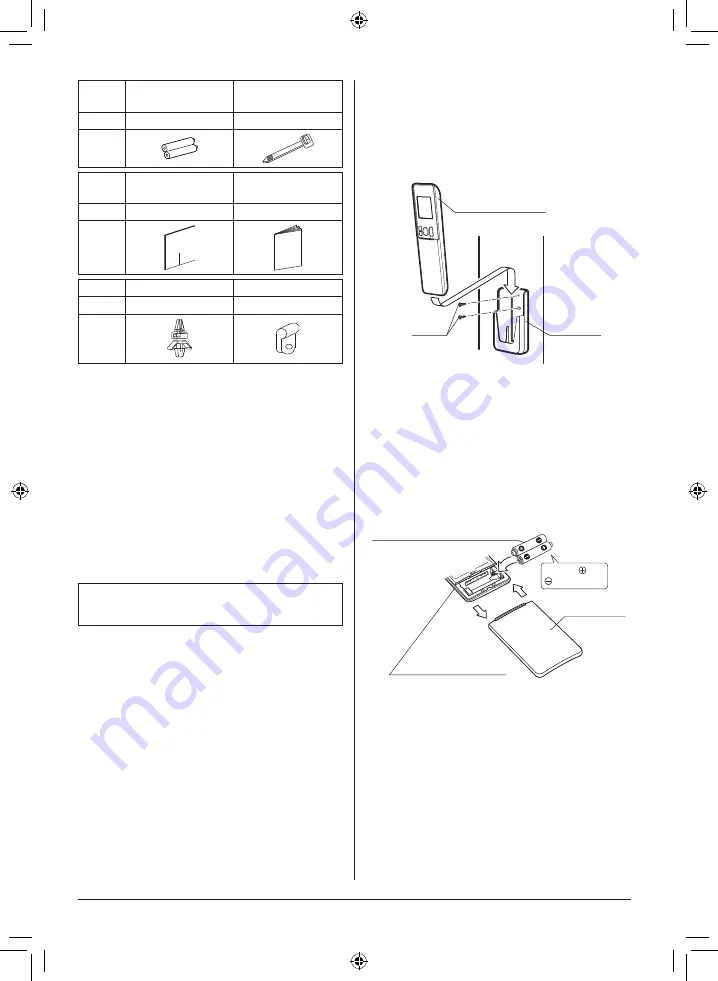
1.
Fix the remote controller holder with the
screws.
2.
Slide the wireless remote controller into the
remote controller holder from the top.
2
1
Fig. 1
Screw
Wireless remote
controller
Remote
controller
holder
•
Loading the batteries
1.
Slide the front cover and remove it.
2.
Insert the attached dry cell battery AAA.
LR03 (alkaline). Properly insert, set the
batteries by matching the (+) and (–)
polarity marks as indicated.
3.
Replace the front cover.
2
3
1
Wireless remote
controller
Dry cell battery AAA. LR03
(alkaline)
Front cover
Position and
correctly!
Fig. 2


