Example Projects
CY8CKIT-044 PSoC® 4 M-Series Pioneer Kit Guide, Doc. No. 001-96598 Rev. *C
35
4.8.2 Hardware Connections
No specific hardware connections are required for this project. All connections are hardwired on the board.
4.8.3 Verify Output
1. Power the PSoC 4 M-Series Pioneer Kit through USB connector J6.
2. Program the PSoC 4 M-Series Pioneer Kit with the
CY8CKIT_044_Sensor_Hub
project.
3. Open the Sensor Hub Micrium µC/Probe workspace,
CY8CKIT_044_uC_Probe_Sensor_Hub.wspx,
on your computer
from
<Install_Directory>\CY8CKIT-044 PSoC 4 M-Series Pioneer Kit\<version>\Firmware\PSoC
4200M\uC Probe Workspace
.
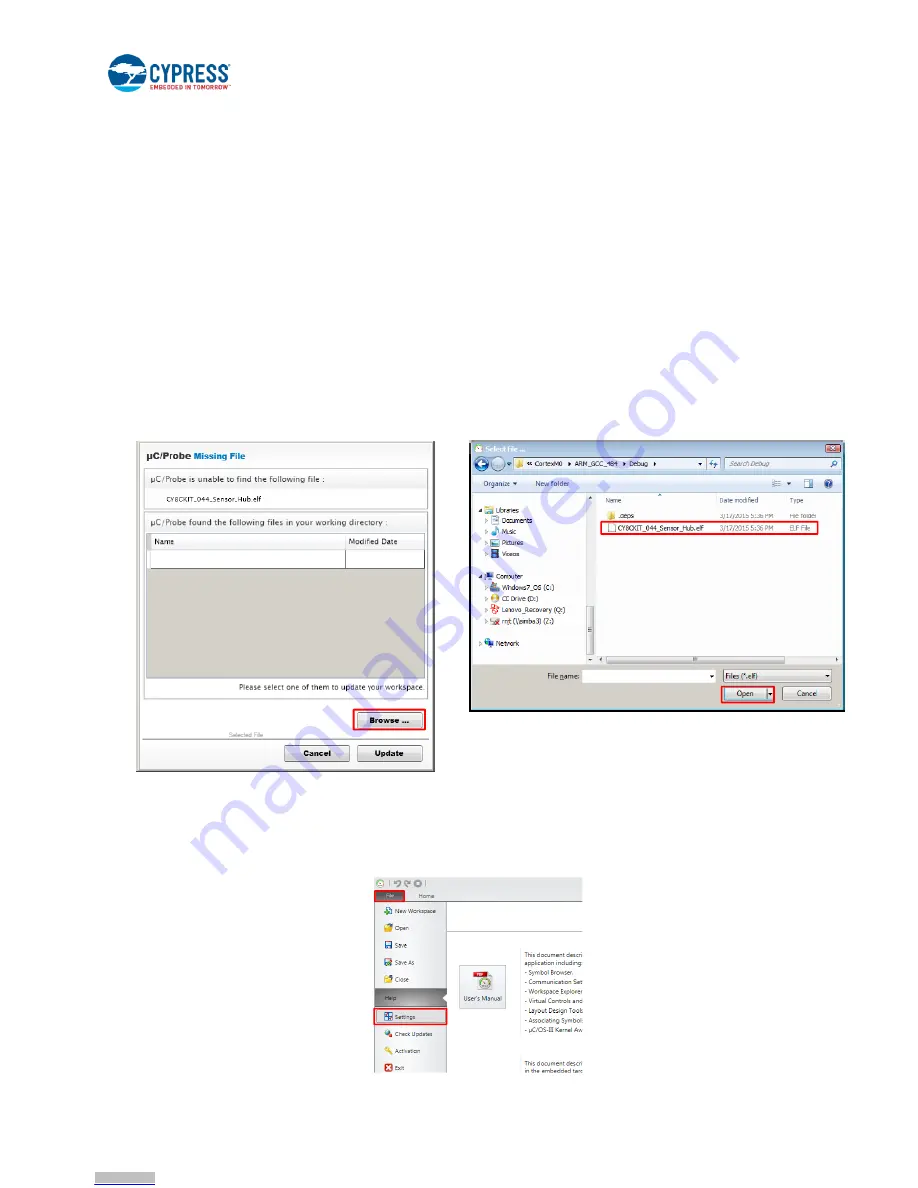
4. A pop-up window will appear asking you to update the location of the .
elf
file. The .
elf
file is located in the project
workspace directory under the folder:
<Project Location>\
CY8CKIT_044_Sensor_Hub\CY8CKIT_044_Sensor_Hub.cydsn\CortexM0\<Compiler Version>\<Debug>
or <Release>\
CY8CKIT_044_Sensor_Hub.elf
.
Figure 4-15. Locate the .
elf
file for Sensor Hub Project
5. Click on the
Settings
button from the toolbar and select
Cypress PSoC Prog
under the
Communication
tab in the
Settings window. Select the KitProg in the drop-down corresponding to the option
Port
, and click
OK
. Refer to step 9 of
the Appendix section
Using the Micrium µC/Probe
, for a detailed explanation on how to connect to the KitProg from
µC/Probe.
Figure 4-16. µC/Probe Settings
Downloaded from
Downloaded from
Downloaded from
Downloaded from
Downloaded from
Downloaded from
Downloaded from
Downloaded from
Downloaded from
Downloaded from
Downloaded from
Downloaded from
Downloaded from
Downloaded from
Downloaded from
Downloaded from
Downloaded from
Downloaded from
Downloaded from
Downloaded from
Downloaded from
Downloaded from
Downloaded from
Downloaded from
Downloaded from
Downloaded from
Downloaded from
Downloaded from
Downloaded from
Downloaded from
Downloaded from
Downloaded from
Downloaded from
Downloaded from
Downloaded from


