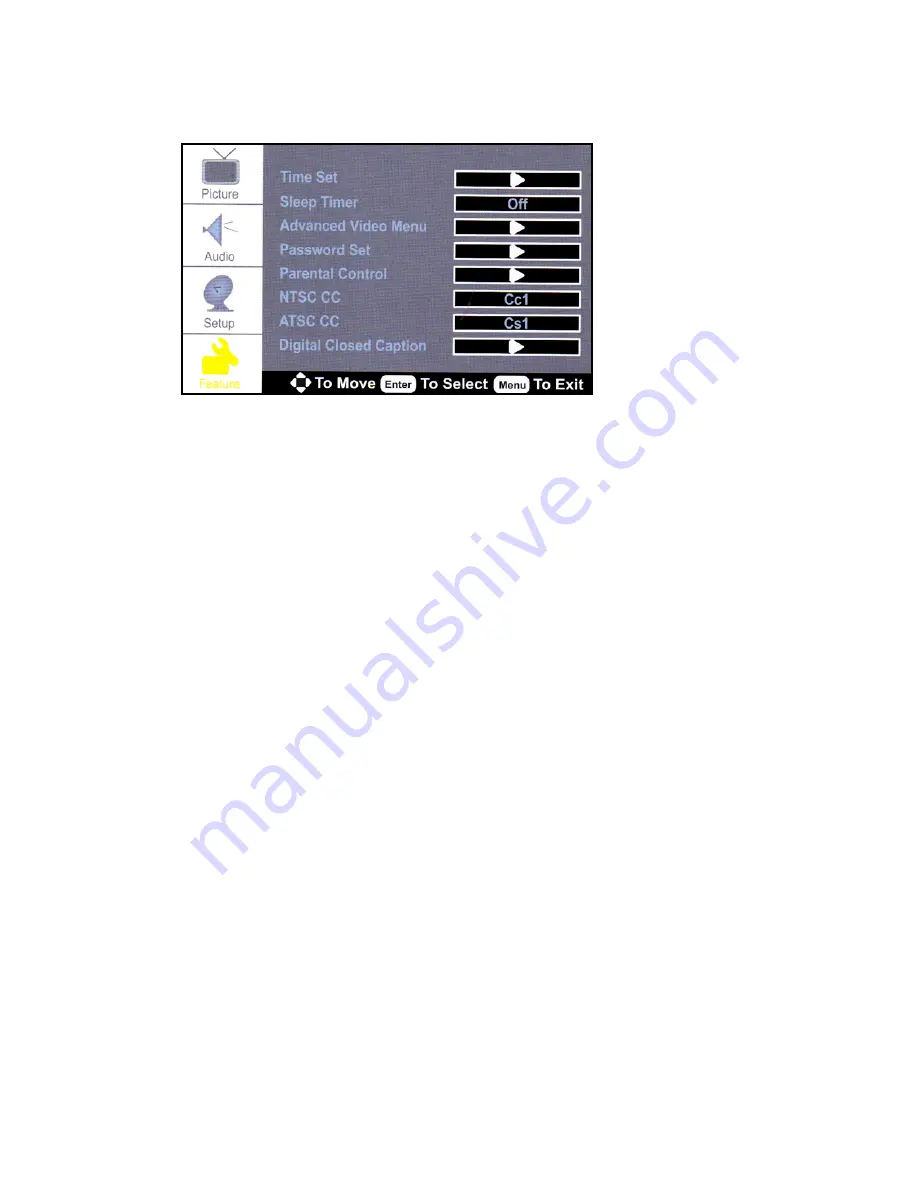
background image

5-4 

Feature Menu 


In the Feature Menu you can adjust the following. Time Set, Sleep Timer, Advanced Video Menu, Password Set, Parental 
Control, NTSC CC, ATSC CC and Digital Closed Caption.


Time Set


Set the Time Zone, Year, Date and Time 


Sleep Timer


Set the Sleep Timer. Choices are: Off, 15, 30, 45, 60, 90, 120, 180 or 240 minutes. 


Advanced Video Menu


Access to the following options: Noise reduction – (Spatial, Speckle and Temporal), Color 
Temperature (Normal, Warm or Cool), 3D Y/C (On or Off) and Blue Screen (On or Off).  


Password Set


Set the Parental Control password and access the Parental Control menu. 


Parental Control


Enter the Parental Control password and access the Parental Control menu. 


NTSC CC


Select the closed captioning text to appear on the screen. Choices are: CC1, CC2, CC3, 
CC4, TEXT1, TEXT2, TEXT3 or TEXT4. 


ATSC CC


Select the closed captioning text to appear on the screen. Choices are: CS1, CS2, CS3, 
CS4, CS5 or CS6. 


Digital Closed Caption


Set Closed Caption options. Options include Style, Size, Font, Text Color, Text Opacity, 
Background Color, Background Opacity, Edge Effect and Edge Color.

Summary of Contents for CP-20794

Page 1: ...Cybex Personal Entertainment Monitor Model CP 20794 Owner s Manual Cardiovascular Systems Part Number LT 20889 Rev A www cybexinternational com...

Page 2: ......

Page 3: ...hanges to the product described within it without notice or obligation to notify any person of such revisions or changes 2008 Cybex International Inc All rights reserved 10 Trotter Drive Medway MA 020...

Page 4: ......

Page 5: ...s 3 1 Using the Remote Control 3 1 Using the Television 3 3 Changing Channels 3 3 Volume Adjustment 3 3 Picture Menu 3 4 Hotel Menu 3 5 Audio Menu 3 6 4 Preventative Maintenance Cleaning 4 1 Storage o...

Page 6: ...ii This page intentionally left blank...

Page 7: ...ccompanying the product WARNING The appliance should be connected to a mains socket outlet with a protective earthing connection WARNING The mains plug or appliance coupler is used as the disconnectio...

Page 8: ...y exit from the apparatus Only use attachments accessories specified by the manufacturer Use only with the cart stand tripod bracket or table specified by the manufacturer or sold with the apparatus W...

Page 9: ...us LED Power Standby button Power Supply Manufacturer HuiZhou SanHua Industrial Co Ltd Model SAWA 02 598 Input 110v 240V 50 60 Hz AC Output 12 V 6 A DC 72 Watts Power consumption 48 watts Monitor Broa...

Page 10: ...2 2 This page intentionally left blank...

Page 11: ...to scan quickly Display Press to display the source and channel information Arrow Keys and Enter Press to navigate the on screen menus and adjust the system settings to your preference EXIT Press to c...

Page 12: ...o change to the next favorite channel FAV Press to change to the previous favorite channel EPG Press to enter the EPG Electronic Program Guide menu Subject to availability from broadcaster cable suppl...

Page 13: ...l or use the channel PLUS and MINUS buttons on the fitness equipment See Below NOTE You must exit any on screen menus before changing channels 2 Your remote control also has keys 1 through 9 and 0 whi...

Page 14: ...ease the Contrast Available only in User Mode Brightness Increase or decrease the Brightness Available only in User Mode Sharpness Adjust the sharpness or softness of the picture Available only in Use...

Page 15: ...V or HDMI as the default channel To be used with Boot CH and Boot CH Minor Choices are Off TV Composite Component VGA HDMI or S Video Boot CH Set the Boot Channel to appear when the monitor comes out...

Page 16: ...uage Subject to availability from the Broadcaster or Cable Company Bass Increase or decrease the Bass Range is 0 100 Treble Increase or decrease the Treble Range is 0 100 Balance Adjust the headphone...

Page 17: ...green spots appear on the screen This is a characteristic of liquid crystal display panels and is not a problem The liquid crystal panel is built with very high precision technology giving you fine pi...

Page 18: ...4 2 This page intentionally left blank...

Page 19: ...the assembly instructions 2 Unpack and verify the contents of the boxes A Open the cardboard box containing the monitor B Check to be sure that the following items are present Check off each item as...

Page 20: ...acket Insert the RJ 45 cable and coax cable into the right side of the monitor bracket See Figure 2 D Using a 3 mm Allen wrench supplied with the product secure the monitor A to the monitor bracket us...

Page 21: ...l strength Auto Ch Search Auto search the NTSC and ATSC TV signals Add On Ch Search Add channels after completing the Auto Ch Search Manual Ch Set Select viewable or non viewable after completing the...

Page 22: ...rmal Warm or Cool 3D Y C On or Off and Blue Screen On or Off Password Set Set the Parental Control password and access the Parental Control menu Parental Control Enter the Parental Control password an...

Page 23: ...rts and find information on the web at www cybexinternational com or by e mail at techhelp cybexintl com Serial Number The serial number of this product may be found on the back of the unit underneath...

Page 24: ...at the monitor has power Check the Fitness Equipment Console Internal Audio Cable Assembly is connected Check the Fitness Equipment Console Headphone Jack This is a wearable part and may need to be re...

Reviews: