34
5.1.4.2 DP7 Printhead Cleaning
1. Remove the cabinet lid and ribbon cartridge.
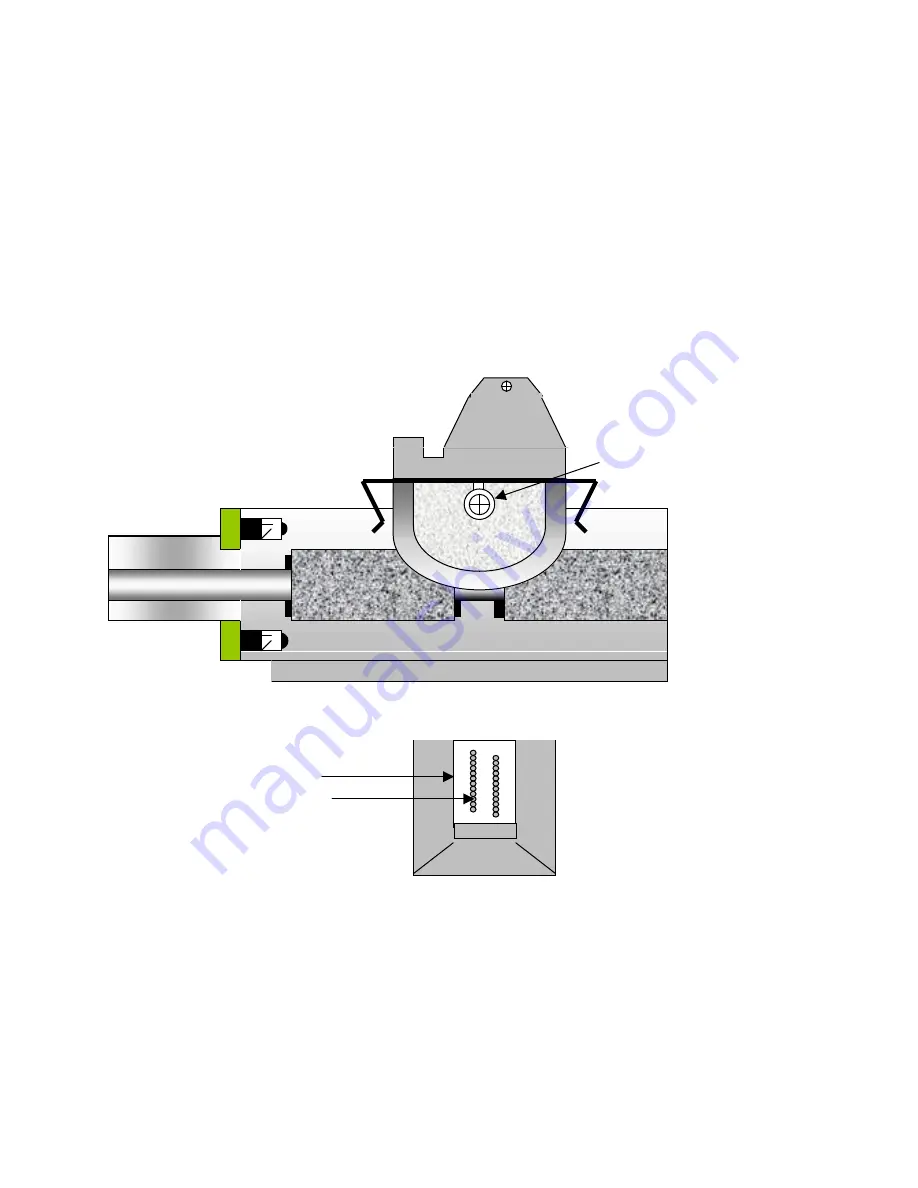
2. Remove the ribbon shield by raising the carriage, pushing down on the shield until it snaps free from the
carriage and sliding it out to the right.
3. Remove the screw fastening the printhead to the carriage.
4. Disconnect the printhead from the 2 printhead flex cables.
5. Remove the printhead by tilting it forward while lifting the carriage.
6. Clean the tip of the printhead nose where the printwires extend from the printhead with an
alcohol wetted napkin. Remove all ink and bits of ribbon fabric lint.
7. Replace the printhead and reconnect it to the flex cables.
8. Tighten the mounting screw.
9. Replace the ribbon shield and cartridge and do a test print.
DP7 Printhead Nose Tip
5.1.5 Document Print Area Cleaning
Accumulated paper dust should be brushed or vacuumed occasionally from the platen, printhead, carriage
shaft, feed rollers, document sensor and other the document path areas.
5.1.6 Cabinet Exterior Cleaning
The cabinet can be cleaned with a damp cloth and a mild, liquid soap or detergent.
Do not use harsh,
abrasive cleaners.
On the DP7 printer, remove this
screw to remove printhead.
Removing this screw on the
DP6 will irreparably damage
the printhead.
Jewel
Printwires


