background image

Kombiye bağlı oda termostatı yok

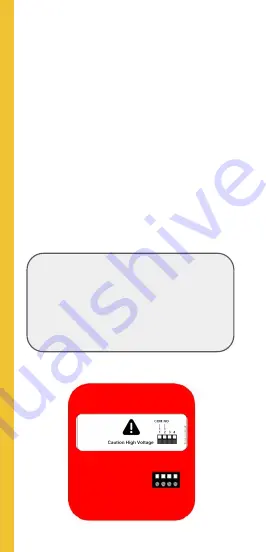
Kombinize takılı bir termostat yoksa, ürün 
ile birlikte gelen kombi bağlantı 
kablosunun bir ucunu, kombinizin 
içerisindeki on/off tipi oda termostatı 
bağlantı girişine bağlamalısınız. Diğer 
ucunu ise Alarko by Cosa Kombi Kontrol 
Ünitesinin turuncu kapağındaki 

1(COM) 

ve 2(NO) numaralı

 klemenslerine 

bağlayabilirsiniz.

KOMBİ KABLOSUNUN KOMBİ 
İÇERİSİNDEKİ BAĞLANTISI İÇİN 
KOMBİNİZİN KULLANIM 
KILAVUZUNA BAKINIZ VEYA 
YETKİLİ SERVİSİNDEN DESTEK 
ALINIZ.

Kombi kontrol ünitesinin 
montajı ve kullanımı

Turuncu Arka Kapak

18

Summary of Contents for Alarko

Page 1: ...Akıllı Oda Termostatı Kablosuz Kombi Kontrolü Kurulum ve Kullanım Kılavuzu ...

Page 2: ...stat ve kombi kontrol ünitesinin eşleşmesi Kombi kontrol ünitesinin montajı ve kullanımı Termostatın montajı ve kullanımı 4 23 20 14 6 Sıkça sorulan sorular ve teknik destek 32 Garanti belgesi Uygunluk beyanı Teknik özellikler 52 50 49 Genel güvenlik kuralları 3 2 ...

Page 3: ...ya uzun süre kullanılmadığında cihazları fişlerinden çekin Cihazın onarımı ve bakımı sadece yetkili kılınan servisler tarafından yapılmalıdır Sadece belirtilen yedek parça veya aksesuarlar kullanılmalıdır Cihazlar kullanılacağı bölgenin mevzuatına uygun ise kullanılmalıdır Cihazlar bozuk ise kullanılmamalıdır Cihazlarda kullanılan pillerin alkalin pil olması gerekmektedir Pil ile çalışan cihazlard...

Page 4: ...Alarko by Cosa ile konfor Akıllı Modlar Evin sıcaklığının aile bireylerinin konumlarına veya haftalık programlamaya göre otomatik olarak değişmesini sağlayabilirsiniz 4 ...

Page 5: ... ve tasarruf Enerji Yönetimi Kullanım sürelerini ve tasarruf oranını görebilir enerjiyi daha verimli kullanabilirsiniz 5 ...

Page 6: ...Alarko by Cosa Akıllı Oda Termostatı Üst tuş Dokunmatik sağ ve sol butonlar Led matriks ekran 5VDC adaptör girişi Pil yuvası Termostatın montajı ve kullanımı 6 ...

Page 7: ...il 5V DC adaptör veya her iki giriş bir arada olabilir ALKALİN TİPİ PİL KULLANILABİLİR ŞARJ EDİLEBİLİR VEYA FARKLI TİP PİL KULLANILAMAZ CİHAZINIZ PİL VE 5VDC ADAPTÖR TAKILABİLEN BİR MODELE SAHİPSE PİLLER VE ADAPTÖR HİÇBİR ZAMAN AYNI ANDA TAKILMAMALIDIR 5VDC ADAPTÖR 5V DC ÇIKIŞLI VE EN AZ 1A AKIM TİPİNDE OLMALI Termostatın montajı ve kullanımı 7 ...

Page 8: ...l ile kullanımında üst tuşa basarak ekranda önce Cosa logosu sonra da oda sıcaklığı görülebilir Adaptör ile kullanımda Cosa logosu ve oda sıcaklığı üst tuşa basmanıza gerek olmadan gözükecektir Üst tuş Oda sıcaklığı Termostatın montajı ve kullanımı 8 ...

Page 9: ...n sürekli açık Alarko by Cosa Akıllı Termostat ayarlar menüsünde açıklanmıştır olacak şekilde ayarlıysa cihazı uyandırmanıza gerek olmayacaktır Hedef sıcaklığını değiştirmek için sol ve sağ dokunmatik tuşları kullanın Dilediğiniz hedef sıcaklığını seçtikten sonra cihaz yeni hedef sıcaklığını otomatik olarak kaydeder Üst tuş Termostatın montajı ve kullanımı 9 ...

Page 10: ...ek için üst düğmeye tekrar basın Önce aktif akıllı modu göreceksiniz Akıllı modları değiştirmek için sol ve sağ dokunmatik tuşları kullanabilirsiniz Ayarı yaptıktan kısa bir süre sonra yeni mod otomatik olarak kaydedilir Alarko by Cosa nın internet bağlantısını yaptıktan sonra hedef sıcaklığı ve akıllı modları Cosa mobil uygulamasından da değiştirebilirsiniz Termostatın montajı ve kullanımı 10 ...

Page 11: ...ylece ayarlar ikonunu göreceksiniz Sol sağ dokunmatik tuşları kullanarak ayarlar menüsünde gezinebilirsiniz İnternet bağlantı durumu sadece 5V DC adaptörlü modellerde ve adaptör ile kullanımda vardır Ayarlar menüsü İnternete bağlı İnternete bağlanamıyor İnternete bağlantı ayarları yapılmamış Termostatın montajı ve kullanımı 11 ...

Page 12: ...mbi ünitesi eşleşmiş İki ünite arası iletişimde sorun var Cihazlar eşleşmek için hazır Eşleşme durumu Ekran sürekli açık kapalı 5V DC adaptör ile kullanımda geçerlidir Cihazı fabrika ayarlarına getirme Ayarlar menüsünden çıkma Ekran sürekli açık Termostatın montajı ve kullanımı 12 ...

Page 13: ...doğru ölçecek şekilde yerleştirilmesi gerekir Termostat doğrudan güneş ışığı alan alanlara radyatör yakınına kapı yanı veya koridor gibi yerlere yerleştirilmemelidir Ayrıca cihaz yerden 50 cm ila 150 cm arasında bir yüksekliğe yerleştirilmelidir Termostatın montajı ve kullanımı 13 ...

Page 14: ...AK KURULUM SIRASINDA KABLOLARIN HİÇBİRİNDE GÜÇ OLMADIĞINDAN EMİN OLUN KURULUMDAN ÖNCE ISITMA SİSTEMİNİZE AİT ELEKTRİK VE GAZIN KAPALI OLDUĞUNDAN EMİN OLUN ALARKO BY COSA KABLOSUZ KOMBİ KONTROL ÜNİTESİ NİN MONTAJI İÇİN ISITMA SİSTEMİNİZİN KULLANIM KILAVUZUNA BAKIN VEYA YETKİLİ TEKNİK SERVİSE DANIŞIN 14 ...

Page 15: ...bil uygulamadan internet bağlantı ayarlarının yapılmasına hazır Uzun Basım Fabrika ayarlarına getirme Arka Sağ Tuş Kısa Basım Eşleşmeye hazırlama Uzun Basım Eşleşmeyi silme Güç Eşleşme durumu İnternet bağlantısı Kombi çalışma durumu Kombi kontrol ünitesinin montajı ve kullanımı 15 ...

Page 16: ...ucunu Alarko by Cosa Kablosuz Kombi Ünitesine ve diğer ucunu fişe takın Kabloyu taktığınızda önündeki güç ışığının yandığını görmelisiniz Led yanıyor Güç açık Led sönük Güç kapalı Led yavaşça yanıp sönüyor Uzaktan yazılım güncellemesi devam ediyor Güç kablosunu çıkarmayın Kombi kontrol ünitesinin montajı ve kullanımı Güç 16 ...

Page 17: ...inize zaten bağlı olan AÇ KAPA ON OFF tipi bir oda termostatı varsa kombiden termostata uzanan bu kabloları çıkarabilir ve Alarko by Cosa Kombi Kontrol Ünitesinin 1 COM ve 2 NO numaralı klemenslerine bağlayabilirsiniz Bu durumda kombinizin iç kısmında herhangi bir kablolama yapılmasına gerek yoktur Turuncu Arka Kapak Kombi kontrol ünitesinin montajı ve kullanımı 17 ...

Page 18: ...termostatı bağlantı girişine bağlamalısınız Diğer ucunu ise Alarko by Cosa Kombi Kontrol Ünitesinin turuncu kapağındaki 1 COM ve 2 NO numaralı klemenslerine bağlayabilirsiniz KOMBİ KABLOSUNUN KOMBİ İÇERİSİNDEKİ BAĞLANTISI İÇİN KOMBİNİZİN KULLANIM KILAVUZUNA BAKINIZ VEYA YETKİLİ SERVİSİNDEN DESTEK ALINIZ Kombi kontrol ünitesinin montajı ve kullanımı Turuncu Arka Kapak 18 ...

Page 19: ...n emin olun Kombi bağlantısının test edilmesi Alarko by Cosa Kombi Kontrol Ünitesi ile kombi arasındaki bağlantıyı test etmek için Alarko by Cosa Kombi Kontrol ünitesinin üstündeki tuşa 3 saniye basılı tutup kombinizi manuel olarak çalıştırabiliyor aynı tuşa 3 saniye daha basıp kombinizi kapatabiliyor olduğunuzdan emin olun Kombi kontrol ünitesinin montajı ve kullanımı Kombi çalışıyor 19 ...

Page 20: ... enerjilendirdiğinizde Alarko by Cosa Kombi Kontrol Ünitesinin eşleşme ışığı sabit bir şekilde yanıyorsa eşleşme işlemini yapmanıza gerek yoktur Led yanıyor Eşleşmiş Led sönük Eşleşmemiş Led hızlıça yanıp sönüyor Eşleşilen cihazla iletişim kurulamıyor Led yavaşça yanıp sönüyor Eşleşmeye hazır Eşleşme durumu CİHAZLAR 1 DAKİKA İÇİNDE EŞLEŞMEZSE EŞLEŞME MODUNDAN ÇIKAR Termostat ve kombi kontrol ünite...

Page 21: ...iye boyunca üst düğmesine basın Sağ veya sol dokunmatik ön butonlarını kullanarak eşleşme simgesini bulun Üst butona basarak eşleşme ikonunu görün Eşleşme başarıyla tamamlandı Eşleşme tamamlanamadı Bu durumda eşleşmeyi yeniden gerçekleştirmeniz gerekmektedir Termostat ve kombi kontrol ünitesinin eşleşmesi 21 ...

Page 22: ...şleşme moduna alınması Termostat ve kombi kontrol ünitesinin eşleşmesi Kablosuz kombi kontrol ünitesini eşleşme moduna almak için 1 turuncu arka kapağı çıkarın 2 Sağ arkadaki eşleşme tuşuna basın 3 Ön yüzdeki eşleştirme ledi yavaşça yanıp sönecektir 22 ...

Page 23: ...ğlantısı Alarko by Cosa Kablosuz Kombi Ünitesi nden yapılmalıdır İnternet bağlantısı ALARKO BY COSA NIN CEPTEN KONTROL EDİLEBİLMESI İÇİN EVİNİZİN KABLOSUZ İNTERNET AĞINA BAĞLANMASI GEREKİR TERMOSTATIN PİL VEYA 5VDC ADAPTÖR İLE KULLANILMASINA GÖRE İNTERNET BAĞLANTISI AŞAĞIDAKİ ŞEKİLLERDE YAPILABİLİR 23 ...

Page 24: ...2 5V DC adaptör ile kullanım Cihazlardan modeminize daha yakın olanı internet bağlantısı için kullanmalısınız Her iki cihazı ayrı ayrı internete bağlamanıza gerek yoktur İnternet bağlantısı 24 ...

Page 25: ... kontrol etmek için mobil uygulamayı indirin Uygulamaya ilk defa giriş yapıyorsanız öncelikle kayıt olun ya da varsa mevcut giriş bilgilerinizi kullanın İnternet bağlantısı İNTERNET BAĞLANTISININ TAMAMLANMASI İÇİN UYGULAMADAKİ YÖNLENDİRMELERİ TAKİP EDİN 25 ...

Page 26: ...esinden internet bağlantısı Kablosuz kombi ünitesinden internet bağlantısını yapmak için kurulum sırasında aşağıdaki adıma gelince Cosa Kablosuz Kombi Ünitesini seçip adımları dikkatlice takip edin İnternet bağlantısı 26 ...

Page 27: ...tı ayarları yapılmadıysa wifi ledi sönük durumda olacaktır Arka sol tuşa kısa basarak cihazı kablosuz ağ ayarlarının yapılmasına hazır hale getirebilirsiniz Bu led iki şekilde yavaşça yanıp sönebilir Uygulamadaki kurulum adımlarında hangi şekilde yanıp söndüğü seçeneğini doğru bir şekilde işaretlemelisiniz Led yanıyor Kablosuz ağa bağlandı Led sönük Kablosuz ağ ayarı yapılamadı Led hızlıça yanıp s...

Page 28: ...ağlantısı Termostat üzerinden internet bağlantısını yapmak için kurulum sırasında aşağıdaki adıma gelince termostattan internete bağlanmak için Cosa Akıllı Termostatı v4 ü seçip adımları dikkatlice takip edin İnternet bağlantısı 28 ...

Page 29: ...3 saniye süreyle basarak ayarlar menüsüne girin 2 Dokunmatik düğmeleri kullanarak ayar ögeleri arasında wifi ikonunu bulun İnternet bağlantısı İnternet bağlantı durumu sadece 5V DC adaptörlü modellerde ve adaptör ile kullanımda vardır Ayarlar menüsü İnternete bağlı İnternete bağlanamıyor İnternete bağlantı ayarları yapılmamış 29 ...

Page 30: ...krar üst butona basarak cihazı bağlantı ayarlarının yapılmasına hazır hale getirin Wifi ikonu yanıp sönmeye başlayacaktır Bu animasyon iki şekilde gözükebilir Uygulamadaki kurulum adımlarında animasyonun hangi şekilde yanıp söndüğü seçeneğini doğru bir şekilde işaretlemelisiniz Sonrasında uygulamadaki adımları dikkatlice takip edin İnternet bağlantısı 30 ...

Page 31: ... ise aşağıdaki ikonu görebiliyor olmalısınız İnternet bağlantısı İnternete bağlandı İnternete bağlanamadı İnternet bağlantı problemi Uygulama ve Alarko by Cosa da aşağıdaki uyarıları görüyorsanız kurulum adımlarını tekrarlamanız gerekecektir Bunun için bu kılavuzun Sıkça Sorulan Sorular bölümüne bakabilirsiniz 31 ...

Page 32: ...fresini doğru girdiğinizden emin olun Modeminizin 2 4 GHz ile kablosuz yayın yaptığından emin olun Modeminizin şifreleme türü web ya da wpa professional olduğu durumlarda internet bağlantısını sağlayamazsınız şifreleme türünün wpa wpa2 yada wpa wpa2 olduğundan emin olun İnternete bağlamak istediğiniz cihazın bulunduğu bölgede kablosuz internet erişiminin olduğundan emin olun Sıkça sorulan sorular ...

Page 33: ...nülebilir Sorunu gidermek için aşağıdakileri deneyebilirsiniz Alarko by Cosa Kablosuz Kombi Kontrol ünitesi aracılığı ile internete bağlantı yapılmışsa Alarko by Cosa yı mümkün olduğunca kombinizin metal yüzeylerinden uzak etrafı açık ve yüksek bir konuma yerleştirin Modem ve Alarko by Cosa cihazının duruş açılarını değiştirmeyi deneyebilirsiniz Modeminiz uzun süreden beri çalışıyorsa zaman zaman ...

Page 34: ...nerjilendirilmesini kontrol edebilirsiniz Bunun için kablosuz kombi kontrol ünitesinin güç ışığının yanıyor olduğundan termostatın üst düğmesine bastığınızda oda sıcaklığını görebiliyor olduğunuzdan emin olun Bu durum zaman zaman oluşuyor ve kendi kendine düzeliyorsa aşağıdakileri deneyebilirsiniz Her iki cihazın duruş açılarını değiştirmeyi deneyebilirsiniz Kombi kontrol ünitesini mümkün olduğunc...

Page 35: ...ırmanız gereklidir Kombi kontrol ünitesinin üst kısmında yer alan butona 2 saniye basılı tutarak kombi ledinin yanmasını sağlayın ve kombinizi manuel olarak kontrol edin 2 Alarko by Cosa Kablosuz Kombi Kontrol Ünitesi nin arızalanması durumunda kombiniz gaz ve elektriğini kestikten sonra turuncu arka kapağı çıkararak bağlantı klemensindeki NO ve C kısmındaki kabloları birbirine kısa devre yaptıkta...

Page 36: ...Kombi bağlantısını yapamadım Kombı kablosunun kombı ı çerı sı ndekı bağlantısı ı çı n kombı nı zı n kullanım kılavuzuna bakınız veya yetkı lı servı sten destek alınız Sıkça sorulan sorular 36 ...

Page 37: ... aşağıdakileri kontrol ediniz Öncelikle bekleyiniz Bazı kombilerin devreye girmesi zaman alabilir Kombinizi kış modunda olduğundan kalorifer suyu basıncının doğru olduğundan veya kombiniz ile ilgili başka bir arıza olmadığından emin olun Kombi kontrol ünitesi ile kombinizin arasındaki kablo bağlantısının sağlam olduğundan emin olun Sıkça sorulan sorular 37 ...

Page 38: ...ını sağlayabilirsiniz c Uyku ve Dışarı modlarının hedef sıcaklığını Ev moduna göre daha düşük bir sıcaklığa getirmeniz tasarrufu arttıracaktır d Hedef sıcaklık değerinizi 1 derece dahi değiştiriyor olmanız tasarrufu arttıracaktır e Uygulamanızın ayarlar bölümünde Isıtma Soğutma Ayarları altında Kombi Ayarlarında Durma ve Çalışma aralıklarını değiştirebilirsiniz Evinizin yapısına ve konfor tercihle...

Page 39: ...in çalışma süresi baz alınarak hesaplanmaktadır Bu hesaplamada kullanılan dış sıcaklık bilgisi Cosa uygulamanızda belirlemiş olduğunuz konum bilgisi esas alınarak belirlenmektedir Dolayısıyla seçtiğiniz konum bilgisinden hava durumu bilgisi alınamıyorsa Cosa tasarruf oranını hesaplayamamış olabilir Konum seçimini düzeltip sorunu çözebilirsiniz Sıkça sorulan sorular 39 ...

Page 40: ...in olun Otomatik Kontrol ayarlarından bu özellik için kullanılmasını istediğiniz mobil telefon listesinin doğru olduğundan emin olun ios telefonlarda 1 Cep telefonu ayarlarına gidin 2 Cosa ayarlarından konumu seçin 3 Her zaman konum erişimine izin ver seçeneğini seçin 4 Konumun açık olduğundan emin olun 5 Arka planda yenileme uygulamasını açın Sıkça sorulan sorular 40 ...

Page 41: ...l telefon listesinin doğru olduğundan emin olun android telefonlarda 1 Cosa mobil uygulamasında Ev Ayarları menüsünden Otomatik Kontrol Ayarlarına girin 2 Önerilen Seçenekleri Kullan ı seçin 3 Otomatik kontrolü etkinleştirin 4 Uygulamadan çıkıp cep telefonu ayarlarına gidip pil ayarlarına girin 5 Pil optimizasyonunu seçin 6 Cosa uygulamasının daima pil kullanımına izin verin 7 Konumun ve Wi Fi öze...

Page 42: ... evinizin konumu yanlış seçildiyse Cosa farklı bir zaman dilimine göre çalışıyor olabilir Sorunu düzeltmek için evinizin konum bilgilerini kontrol etmelisiniz Bunun için 1 Ana ekrandan ayarlar menüsüne girin 2 Ev Bilgileri ve Kullanıcılar menüsüne girip Ev Bilgilerini seçin 3 Evin konumunu kontrol edin Yanlışsa düzeltip Kaydet butonuna basıp çıkın Sıkça sorulan sorular 42 ...

Page 43: ...ibi cihazın odadaki yeri yüksekliği nasıl bir zeminde durduğuna kadar ölçümlere etki eden birçok faktör olabilir Bu tip farklılıkları en aza indirgemek amacıyla Sıcaklık Kalibrasyonu özelliğini kullanarak ölçülen sıcaklığı kalibre edebilirsiniz Bunun için 1 Uygulamanızda sıcaklığını kalibre etmek istediğiniz evin ayarlarına girin 2 Cosa Cihaz Ayarları menüsüne girin 3 Sıcaklık değerini kalibre edi...

Page 44: ... alır Bu istasyonun evinize uzaklığına göre de sunulan hava durumu bilgilerinde ufak sapmalar olabilir Evinizin konum bilgisini kontrol etmek için 1 Ana ekrandan ayarlar menüsüne girin 2 Ev Bilgileri ve Kullanıcılar menüsüne girip Ev Bilgilerini seçin 3 Evin konumunu kontrol edin Yanlışsa düzeltip Kaydet butonuna basıp çıkın Kısa bir süre sonra hava durumu bilgisinin doğru hale geldiğini görmelisi...

Page 45: ... girin 3 Açılan ekranda Yeni Kullanıcı Ekle seçeneğine basın 4 Eklemek istediğiniz kullanıcının e posta adresini girin Böylece davet ettiğiniz kullanıcıya bir davet e postası gidecektir Davet ettiğiniz kullanıcının aynı e posta adresi ile Cosa uygulamasına daha önce kayıt olmadıysa kayıt olup giriş yaptıktan sonra uygulama bildirimlerinden davetinizi kabul etmesi yeterli olacaktır Sıkça sorulan so...

Page 46: ...ığı şeklinde iki değer bulunmaktadır Bunlar örneğin durma aralığı 0 3 derece çalışma aralığı 0 1 derece olarak ve evinizin hedef sıcaklığı olarak 22 derece olarak ayarlandıysa Alarko by Cosa kombinizi 22 3 derecede durdurur 21 9 derecede ise çalıştırır Dolayısıyla bu aralıkları tercihlerinize göre değiştirerek kombinizin daha kısa ve sık veya daha uzun ve nadir çalışmasını sağlayabilirsiniz Sıkça ...

Page 47: ...Teknik destek Sorularınızı veya önerilerinizi iletmek için info alarko carrier com tr e posta adresinden veya 444 0 128 Müşteri Danışma Hattı ndan bize ulaşabilirsiniz 47 ...

Page 48: ... bu sayfa özellikle boş bırakılmıştır ...

Page 49: ...Teknik özellikler 49 ...

Page 50: ... Alarko by Cosa Akıllı Oda Termostatı 2 4 GHz bandında kablosuz olarak haberleşebilir bulunduğu ortamın sıcaklık ve nem değerlerini ölçebilir bağlı olduğu on off tipi oda termostatı girişi olan ısıtıcıyı kontrol edebilir ve kullanıcının tercihleri doğrultusunda 2 4 GHz bandında kablosuz olarak internete bağlanarak ilgili verilerin bulut tabanlı sistem veya eşleştirilmiş diğer cihazlarla ile aralar...

Page 51: ...nyetik Uyumluluk Yönetmeliği EMC 2014 30 EU ETSI EN 301 489 1 V2 1 1 ETSI EN 301 489 3 V2 1 1 EN 300 220 2 V3 1 1 Ek bilgi Direktiflerle uyumluluk yalnızca marka ve modeli belirtilen ürünleri kapsamakta olup Nuvia ürünlerin birlikte kullanılacağı diğer sistemlerin ve tüm sistemin direktiflere uyumluluğundan sorumlu değildir Nuvia onayı alınmadan ürünler üzerinde değişiklik yapıldığında bu beyan ge...

Page 52: ...Tic A Ş İTÜ Ayazağa Kampüsü ARI 3 Teknokenti No 4 B111 34469 Maslak İstanbul 0212 276 11 33 info nuvia com tr FİRMA KAŞESİ VE YETKİLİSİNİN İMZASI YETKİLİ SATICI FİRMA KAŞESİ VE YETKİLİSİNİN İMZASI ÜRÜNÜN CİNSİ MARKA MODEL Alarko by Cosa Oda Termostatı Ürün kutu içeriğinde belirten modelleri kapsar C4D0 5V Bat C4J1 230V B Garanti belgesi 52 ...

Page 53: ...erisinde gerek malzeme ve işçilik gerekse montaj hatalarından dolayı arızalanması halinde işçilik masrafı değiştirilen parça bedeli ya da başka herhangi bir ad altında hiç bir ücret talep etmeksizin tamiri yapılacaktır Bu garanti ile taahhüt edilen onarım üretici firma tarafından yapılacaktır 5 Üründe bir ayıp olduğunun tespiti durumunda ve garanti süresi içinde tüketici a Ürünü geri vermeye hazır...

Page 54: ...zunda belirtilen yöntemler dışında uygun olmayan gerilimde veya hatalı elektrik tesisatı ile kullanılması c Ürünün seri numarası tahrip edilmişse veya sökülmüşse d Arıza veya hasar üretici firmanın sorumluluğu dahilinde olmayan nakliye sırasında oluşmuşsa e Ürünün dış yüzeylerinin tüketici sorumluluğu içerisinde kırılması veya çizilmesi f Üretici firmanın onayı olmadığı halde ürün ile birlikte kul...

Page 55: ... hususlara aykırı olarak kullanmasından kaynaklanan arızalar hakkında 8 madde hükümleri uygulanmaz 9 Tüketiciler ürün ile ilgili her türlü sorununu yetkili satıcı nın e posta adresine veya 444 0 128 numaralı Alarko Carrier Müşteri Danışma Hattına bildireceklerdir 10 Tüketiciler şikayet ve itirazları konusundaki başvurularını tüketici mahkemelerine ve tüketici hakem heyetlerine yapabilirler 11 Bu g...

Page 56: ...ABC UM 5V Bat AC v1 0 TR 2020 Nuvia A Ş All rights reserved Copyright ...

Page 57: ...Smart Thermostat Wireless Heater Control Installation and User Manual ...

Page 58: ...n Pairing of devices Installation and user manual of wireless heater control Installation and user manual of thermostat 60 79 76 70 62 Frequently asked questions and support 88 Declaration of Conformity Technicial Specifications 106 105 Safety Instructions 59 ...

Page 59: ...is not going to be used for a long time Maintenance and repair of devices should only be handled by authorized service providers Only stated spare parts and accessories should be used with products Out of order devices should not be used The devices should only be used if they are in conformity with the legislation where devices are going to be used Alcaline type of batteries must be used for all ...

Page 60: ...Comfort with Alarko by Cosa Smart Modes You can have the home temperature change automatically according to the locations of family members or weekly schedule 60 ...

Page 61: ...Save with Alarko by Cosa Energy Management You can monitor the usage times and the saving rates and use energy more efficiently 61 ...

Page 62: ...Alarko by Cosa Smart Thermostat Installation and user manual of thermostat Top button Left and right touch buttons Led matrix display 5VDC adapter input Battery housing 62 ...

Page 63: ... NOT USE THEM AT THE SAME TIME 5VDC ADAPTER MUST HAVE 5V DC OUTPUT AND AT LEAST 1A CURRENT Powering Remove the orange back cover of Alarko by Cosa from the main unit by holding the from the indicated arrows Depending on the model the device can have battery 5V DC adapter or both power inputs together Installation and user manual of thermostat 63 ...

Page 64: ... Cosa logo and then the room temperature can be seen on the screen by pressing the top button When used with the adapter the Cosa logo and room temperature will appear without pressing the top button Top button Room temperature Installation and user manual of thermostat 64 ...

Page 65: ...ke up the device if the screen is set to be always on explained at the settings menu of Alarko by Cosa Smart Thermostat Use the left and right touch buttons to change the target temperature After selecting the desired target temperature the device automatically saves the new target temperature Top button Installation and user manual of thermostat 65 ...

Page 66: ...ive mode You will see the active smart mode first You can use the left and right touch buttons to switch between smart modes The new mode is automatically saved shortly after making the selection After connecting Cosa to internet you can change the target temperature and smart modes with Cosa mobile app Installation and user manual of thermostat 66 ...

Page 67: ...top button for 3 seconds and you ll see the settings icon You can scroll through the settings menu using the left right touch buttons Internet connection status Valid only for models powered with 5V DC adapter Settings menu Connected to the internet Could not connect to the internet Internet connection settings are not set 67 ...

Page 68: ...aired Communication problem between two devices Ready to be paired Pairing status Screen is always on off Valid only for models powered with 5V DC adapter Factory reset Back to top menu Screen is always on Installation and user manual of thermostat 68 ...

Page 69: ...ctly for accurate measurements The thermostat should not be placed under direct sunlight near radiators near doorways or corridors Moreover the thermostat should be placed at between the height of 50 cm to 150 cm above the ground Installation and user manual of thermostat 69 ...

Page 70: ...ION BY TURNING OFF THE RELATED FUSES FROM YOUR HOME S ELECTRICAL PANEL MAKE SURE TO TURN OFF THE ELECTRICITY AND GAS OF YOUR HEATING SYSTEM BEFORE INSTALLATION REFER TO THE USER MANUAL OF YOUR HEATING SYSTEM OR CONSULT THE AUTHORIZED TECHNICAL SERVICE FOR INSTALLING ALARKO BY COSA WIRELESS HEATER CONTROL UNIT TO YOUR HEATING SYSTEM 70 ...

Page 71: ...s Heater Control Unit Top button Left back button Short Press Ready to make internet connection settings from the mobile app Long Press Reset to factory settings Right back button Short Press Ready to pair Long Press Reset pairing Power Pairing Status Internet Connection Heater On 71 ...

Page 72: ...eater Unit with 230V power cable When you plug in the cable you should see the power led on the front of the device Led is on Power is on Led is off Power is off Led is blinking slowly Remote software update is in progress Do not unplug from the power Installation and user manual of wireless heater control unit Power 72 ...

Page 73: ...stem If there is an ON OFF type room thermostat already connected to your heating system you can remove these cables extending from the heating system to the thermostat and connect them to the 1 COM and 2 NO terminals of the Alarko By Cosa Wireless Heater Control Unit In this case there is no need for any wiring inside your heating system Installation and user manual of wireless heater control uni...

Page 74: ...connection input in your heating system Then you should connect the other end to the 1 COM and 2 NO terminals on the orange cover of Alarko by Cosa Wireless Heater Control Unit FOR WIRING INSIDE THE HEATING SYSTEM REFER TO THE HEATING SYSTEM USER MANUAL OR GET SUPPORT FROM AN AUTHORIZED SERVICE PARTNER Installation and user manual of wireless heater control unit Orange Back Cover 74 ...

Page 75: ...ensing boilers and 50 C 60 C in conventional combi boilers Testing the wiring between Cosa and the heating system To test the connection between Alarko by Cosa Wireless Heating Control Unit and the heating system make sure that you can manually start your heating system by pressing the top button on the Alarko by Cosa Wireless Heating Control Unit for 3 seconds Then turn off the heating system by ...

Page 76: ...arko by Cosa Wireless Heater Control Unit is steady you do not need to pair the devices again Led is on Paired Led is off Not paired Led is blinking rapidly Communication can not be established with the paired device Led is blinking slowly Ready to be paired Pairing Status IF THE DEVICES DO NOT PAIR WITHIN 1 MINUTE EXIT THE PAIRING MODE Pairing of thermostat and wireless heater control unit 76 ...

Page 77: ... and hold the top button for 3 seconds to activate the pairing mode of thermostat Find the pairing symbol using the right left touch buttons on the front Click the top button to see the pairing animation Pairing is completed Pairing is NOT completed Please repeat the pairing steps from the beiginning 77 ...

Page 78: ...ol Unit Pairing of thermostat and wireless heater control unit To set wireless heater control unit to pairing mode 1 remove the orange back cover of the device 2 press the right back pairing button 3 the pairing led on the front will blink slowly 78 ...

Page 79: ...ernet connection must be made from the Alarko by Cosa Wireless Heater Control Unit Internet Connection ALARKO BY COSA SHOULD BE CONNECTED TO A WIFI NETWORK TO BE CONTROLLED FROM MOBILE PHONES DEPENDING ON THERMOSTAT S POWER INPUT BATTERY OR 5VDC INTERNET CONNECTION SHOULD BE SET UP AS FOLLOWS 79 ...

Page 80: ...5VDC adapter powered thermostat You should use the closest device to your modem for setting up to internet connection You do not need to connect both devices to internet separately Internet Connection 80 ...

Page 81: ... Alarko by Cosa from your mobile device If you are logging to Cosa mobile app for the first time sign up first or use your existing login information if available FOLLOW THE INSTRUCTIONS IN COSA MOBILE APP TO COMPLETE THE INTERNET CONNECTION Internet Connection 81 ...

Page 82: ...Control unit In order to make the internet connection from the wireless heater control unit come to the following step during the installation at the app Then choose Cosa Wireless Heater Control Unit and follow the next steps carefully Internet Connection 82 ...

Page 83: ...eless Heater Control unit If the internet connection setting of the wireless heater control unit is not completed the wifi led will be off Press the back left button with a short press to make the device ready for the wireless network settings This led can blink slowly in two ways During the installation steps in Cosa mobile application you should check the blinking type correctly Internet Connect...

Page 84: ... Thermostat To make the internet connection through the thermostat come to the following step during the installation select Cosa Smart Thermostat v4 to connect to the internet from the thermostat and follow the steps carefully Internet Connection 84 ...

Page 85: ...press the top button for 3 seconds to enter the settings menu 2 Use the touch buttons to find the wifi symbol Internet Connection Internet connection status Valid only for models powered with 5V DC adapter Settings menu Connected to the internet Could not connect to the internet Internet connection settings are not set 85 ...

Page 86: ...ot completed 3 In this situation press the top button again to make the device ready for connection settings The wifi icon will start flashing This animation can appear in two ways In the installation steps in the application you must correctly mark the option in which the animation is flashed Then follow the steps in the application carefully 86 ...

Page 87: ...use in the application and the icon below in Alarko by Cosa device screen Connected to the internet Couldn t connect to the internet Internet connection problem If you see the following warnings in application and Alarko by Cosa device screen you will need to repeat the installation steps To do so refer to the FAQ section of this manual 87 ...

Page 88: ... sure your wifi password is correct Make sure your modem s wifi boradcast frequency is 2 4 GHz In cases where the encryption type of your modem is web or wpa professional you can not connect to internet Make sure the encryption type is wpa wpa2 or wpa wpa2 Make sure you have wireless internet access in the area where the device you want to connect to the internet is located Frequently asked questi...

Page 89: ...in the area where Alarko By Cosa is connected Follow steps below to fix the issue If the internet connection is made through Alarko By Cosa Wireless Heater Control Unit place the device in an open and high position away from the metal surfaces of your boiler as much as possible You may try to change stance angles of your modem and Cosa device Turning Off and On your modem will be helpful if it wor...

Page 90: ...control the power of both devices Make sure Wireless Heater Control Unit s power light is on and thermostat displays the current room temperature when the top button is pressed If this situation occurs time to time and resolves itself you may try the following steps You may try to change stance angles of both devices If the internet connection is made through Alarko By Cosa Wireless Heater Control...

Page 91: ...ed to manually turn on your heating system By pressing and holding the top button wireless heating control unit for 2 seconds you can turn on heating system s leds and control it manually 2 In case of malfunction of Alarko By Cosa Wireless Heating Control Unit You should disconnect the heating system s gas and electricity Then you should remove orange back cover and by pass the terminals of NO and...

Page 92: ...t do the wiring to the heating system Please refer to the user manual of your heating system or get support from the authorized technical service for the wiring to the heating system Frequently asked questions 92 ...

Page 93: ...ing check the following At first wait It may take some time for some type of heaters to work Make sure that your heater is on winter mode and that the radiator water pressure is correct and that there is no other malfunctions related to your heater system Make sure the connection between the wireless heater control unit and the heater system is on and secure Frequently asked questions 93 ...

Page 94: ...rding to your preferences c Changing the target temperature of Sleep and Away modes to a lower temperature than Home mode will increase the savings rate d Even decreasing the target temperature by 1 can make significant differences e You can change the Stop and Run intervals in Heater Settings under Heating Cooling Settings in your application You can try changing this setting according to the str...

Page 95: ... and your outdoor temperature The outdoor temperature information used in this calculation is determined based on the location information you have set in your Cosa application Therefore if weather information cannot be obtained from the location information you selected Alarko by Cosa may not be able to calculate the savings rate You can edit the location selection and fix the problem Frequently ...

Page 96: ... correct Make sure the mobile phone list which will use the Auto Control feature is correct in the Auto Control settings On ios phones a Go to Settings Privacy Location Services 2 Select Cosa app 3 Select Always allow location access 4 Make sure your location is on 5 Open the background apps and choose Cosa to refresh the app Frequently asked questions 96 ...

Page 97: ...feature is correct in the Auto Control settings On android phones a Enter the Auto Control Settings from the Home Settings menu in the Cosa mobile application b Select Use Recommended Options c Enable Auto Control d Exit the application go to the phone settings battery settings e Select battery optimization f Always allow Cosa app to use battery g Make sure the location and Wi Fi options are turne...

Page 98: ... the location of your home is chosen incorrectly Cosa may be operating in a different time zone To fix the problem you should check your home s location information For this 1 Go to Settings from main screen 2 Go to the Home Information Users menu and select Home Info 3 Check the location of the house If it is wrong correct it and then press the Save button and exit Frequently asked questions 98 ...

Page 99: ... device used as well as many factors that affect the measurements such as the location of the device in the room its height and what kind of ground it stands on To minimize such differences you can calibrate the measured temperature using the Temperature Calibration feature For this 1 Enter the settings of the house whose temperature you want to calibrate in your application 2 Enter the Cosa Devic...

Page 100: ... may be slight deviations in the weather information provided depending on the distance of this station from your home To check your home s location information 1 Go to Settings from Main Screen 2 Go to the Home Information Users menu and select Home Info 3 Check the location of the house If it is wrong correct it press the Save button and exit You should see the weather information get correct af...

Page 101: ...Press the Add New User option 3 Enter the email address of the user you want to add An invitation email will be sent to the user you invited If the user you invited has not registered with the Cosa application before with the same e mail address it will be enough to accept your invitation from the application notifications after registering and logging in Frequently asked questions 101 ...

Page 102: ... Settings as Stop and Run intervals For example if the stopping range is 0 3 the operating range is 0 1 and the target temperature of your home is set as 22 Cosa will stop your heating system at 22 3 and start it at 21 9 Therefore by changing these intervals according to your preferences you can make your heating system work shorter and more frequently or longer and less frequently Frequently aske...

Page 103: ...Technical support You can contact us via info alarko carrier com tr or 444 0 128 customer line to send your questions or suggestions 103 ...

Page 104: ... this page is intentionally left blank ...

Page 105: ...Technical specifications 105 ...

Page 106: ...art Room Thermostat manufactured by Nuvia can communicate wirelessly in the 2 4 GHz band measure temperature and humidity values of the environment it is in control the heater that has an on off type room thermostat connection input and share related data with the cloud based system or other paired devices by connecting to the internet wirelessly in 2 4 GHz band according to the preferences of the...

Page 107: ...agnetic Compatibility Regulation EMC 2014 30 EU ETSI EN 301 489 1 V2 1 1 ETSI EN 301 489 3 V2 1 1 EN 300 220 2 V3 1 1 Additional Information Compatibility with directives only covers stated brand and models Nuvia is not responsible for the compliance of the whole system that stated brand and models are being used with This declaration does not apply if changes are made on the product without Nuvia...

Page 108: ...ABC UM 5V Bat v1 0 EN 2020 Nuvia A Ş All rights reserved Copyright ...

Reviews: