© Copyright, Core Protection Systems Ltd, 2021
Page 27
Written instructions:
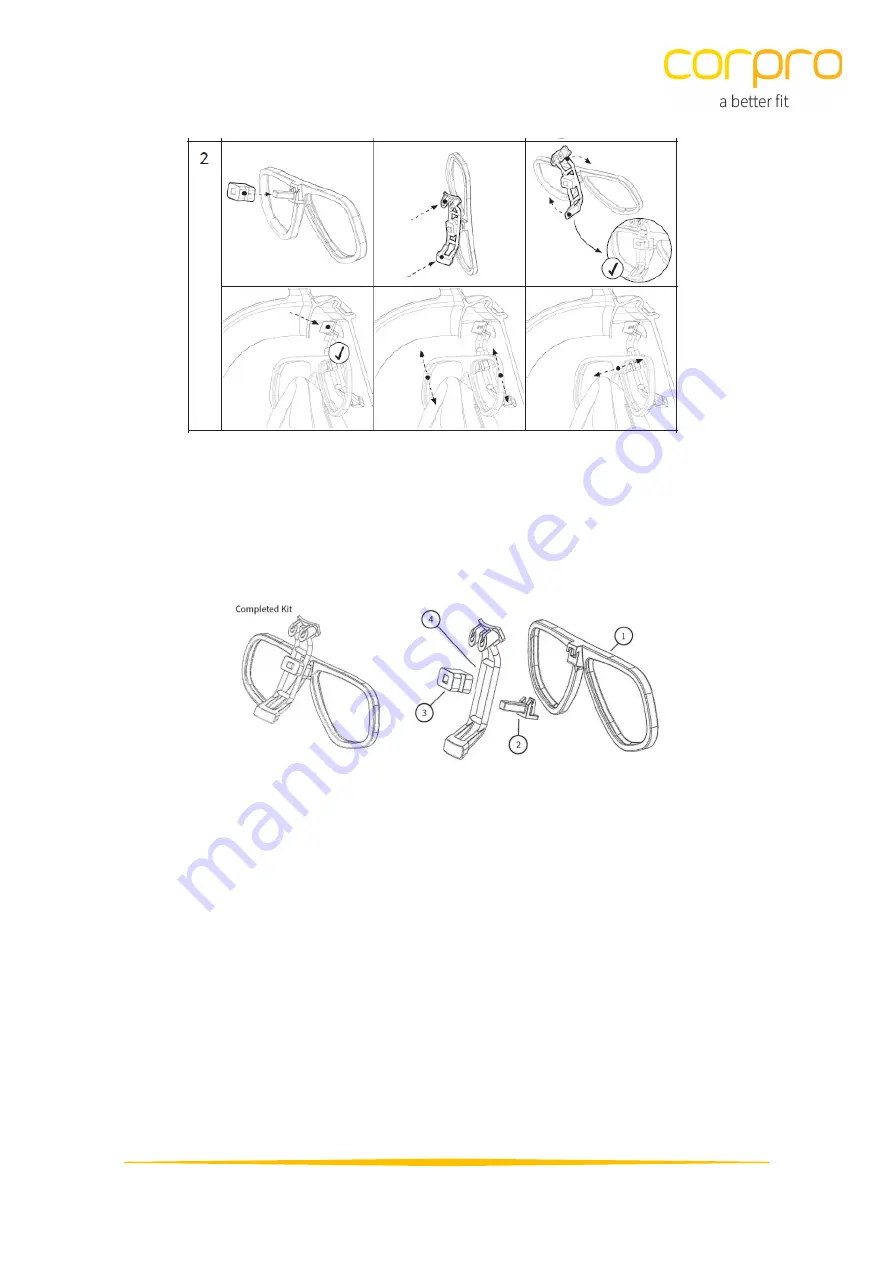
The following image shows how the spectacle kit should look once assembled and also breaks the
components down into numbered parts (referred to as ‘part 1/2/3/4’ in the written instructions) to
enable clearer explanation.
Step 1 – Assembling and Attaching
1.
Firstly, take the frame (part 1) to the opticians and arrange to receive lenses which fit your
prescription.
2.
Once your lenses are fitted into your spectacle kit, attach part 2 into part 1 by lodging part 2
upwards into the bridge of the frame.
3.
Where the long edge protrudes on part two, lodge part 3 onto this and press towards the
frame. The longer edges on part 3 should be facing upwards and downwards – not to the
sides.
4.
To place part 4 onto part 3, you:
a.
Wedge part 3 into the central opening of part 4, ensuring part 4 is horizonal and
parallel to the frame and the natural curve of part 4 points away from the frame.


