


14
6 Transferring Pictures, Video & Audio To Your Computer
• Before you transfer pictures
IMPORTANT! - Before you transfer your pictures make sure you have installed the software from the CD.
• Connecting to your computer
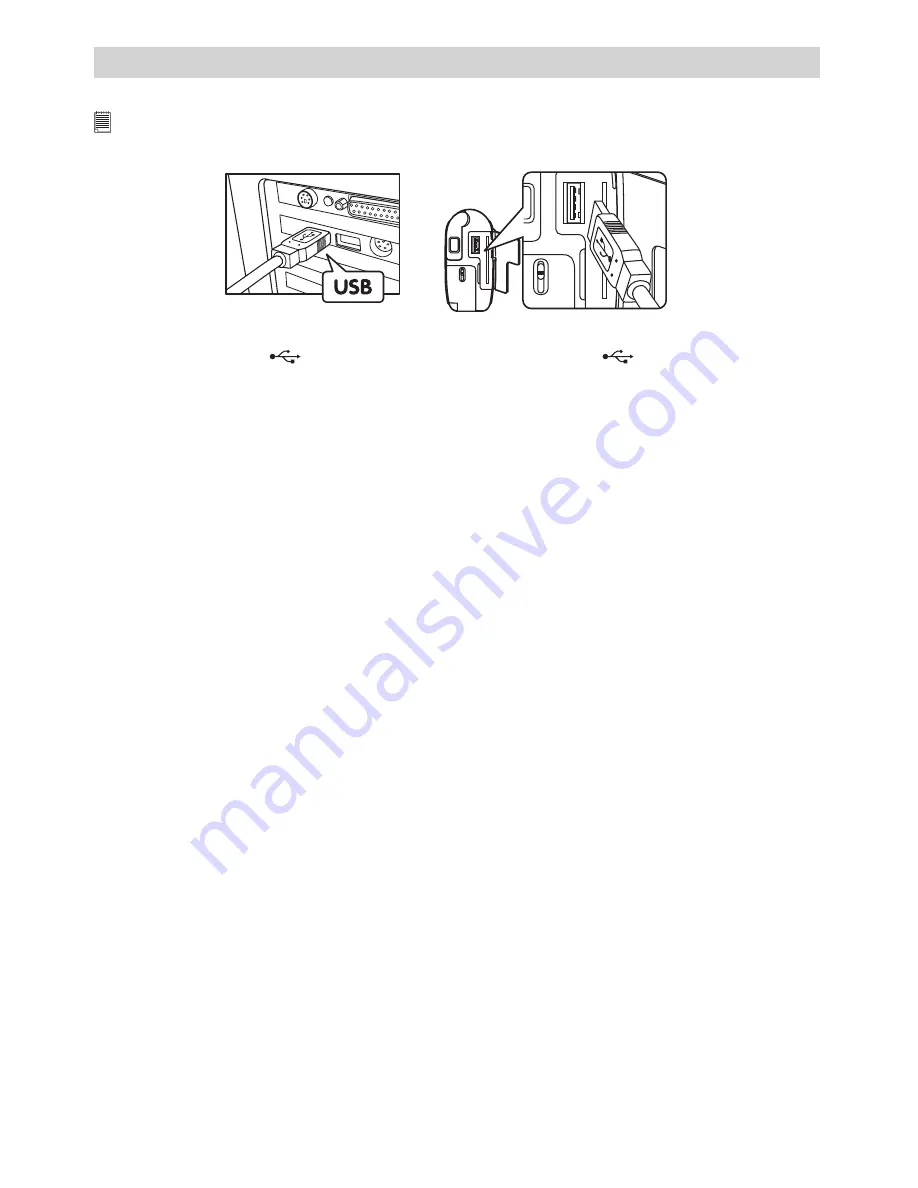
Connecting with the USB Cable.
USB Series “A” Plug Connects to your
Movi
USB Series “A” Plug
Connects to your PC
1. Turn the Camera Off.
2. Plug the labelled end
of the USB cable into the socket marked
on your computer. This is
normally located on your computer hard drive. If the port is not labelled, see your computer Users’
guide.
3. Plug the other end of the USB cable into the port on your camera.
4. Turn the camera on.
• Transferring & Viewing the Pictures on a computer
Transferring pictures to the computer
1. Turn the camera on.
2. Connect the camera to the USB cable.
3. Start the PhotoStudio® 4.0 software.
Go to Start > Programs > PhotoStudio 4.0 > PhotoStudio 4.0.
4. Select or create a new album to transfer your pictures to. File > Open Album. To create a new album,
either go to File > Open Album > select “New Album” or click icon and select “New Album”.
5. Select File > Source > TCG 201 Camera > Select
6. Select File > Acquire
7. Select “All images” or the image(s) you wish to transfer and select the “Transfer” button.
Adding into a particular Album
8. Select File > Add to Album > “Save as” dialog box will then be displayed (Rename the file name) > Save
> Select Album(if New Album is selected, a dialog box will appear on your desktop for you to type in new
album name) > OK.
Viewing the pictures
9. All the pictures selected have now been transferred into the PhotoStudio® Album you have chosen.
10. The pictures appear as thumbnail pictures on the screen.
11. View your pictures by double clicking on the thumbnail pictures.
• Transferring & playing Movies on a computer
Transferring Movie clips to the computer
1. Turn the camera on.
2. Connect the camera to the USB cable.
3. Start the PhotoStudio® 4.0 software. Go to Start > Programs > PhotoStudio 4.0 > PhotoStudio 4.0.
4. Go to File > Acquire > Movies > Create AVIs
5. The system will ask you to “Enter a base file for your AVI files”. Click the OK button.
6. A dialogue box will appear. Select a location on your computer hard drive and type a file name for your
movie clip. Now click on the “Open” button.
7. The computer will now process the Movie clip into the file location described in 6.
8. The movie clip has now been stored on your computer.
Playing Movies
9. Access the Movie clip by double clicking on the movie file name. The movie will be automatically opened
in Windows Media Player or other Media software already installed on your computer.
Summary of Contents for CIC-300
Page 1: ...TM User s Manual Movi M ...


