Step 17: Almost done
•
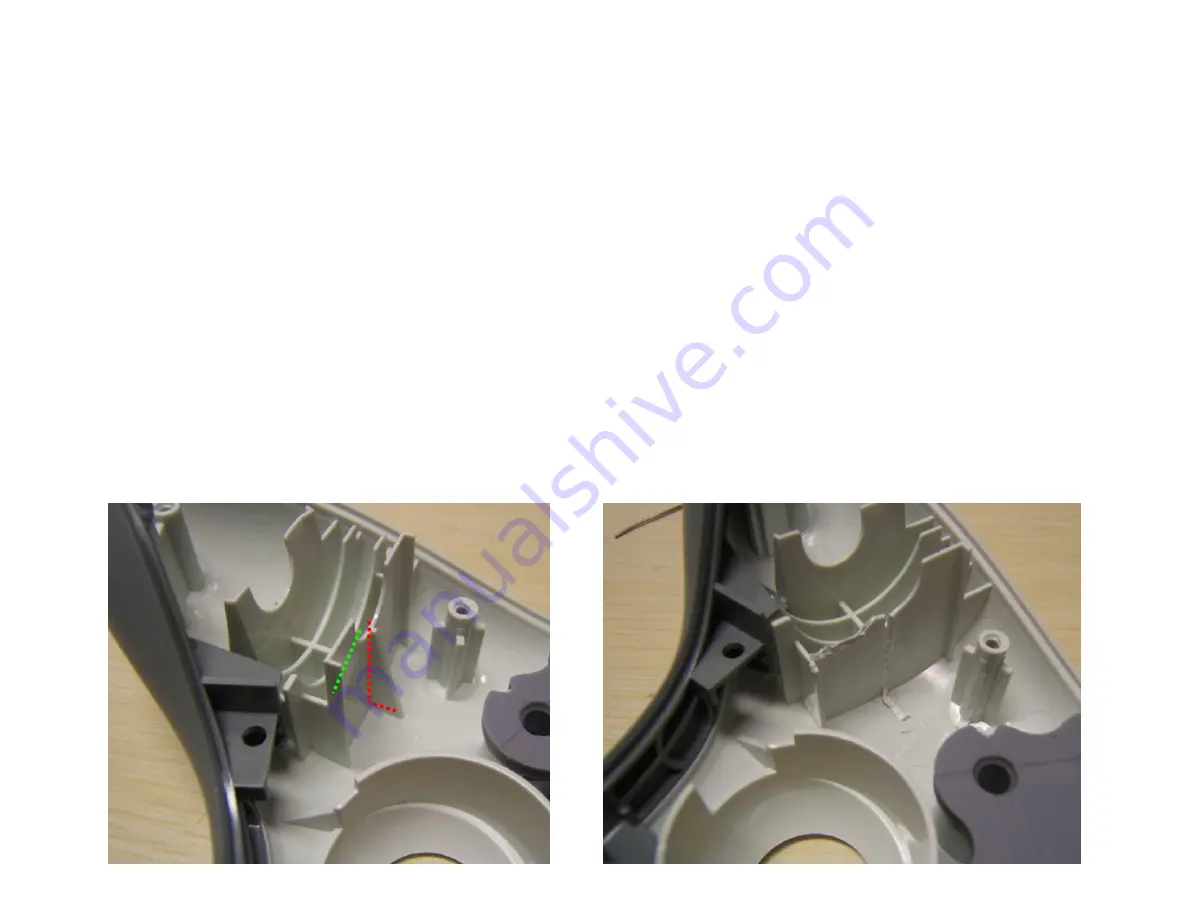
Now onto the top of the case. To make it all fit we may have to make a little bit more room. Using a knife
or side cutters remove the plastic support shown in the image in red. This is the angled support for the
right side rumble motor.
•
Depending on your button placement you may also need to remove part of the back support for the
rumble motor. This is shown in green in the images.
•
The last thing you need to do is reassemble everything. The easiest way we have found to do this is leave
the top piece face down so all the buttons do not fall out. And hold the circuit board to the back of the
controller and flip it over on the top of the case. Align the rumble motors so they are in their holders and
lay the PCB and back of the case onto the front of the case. Keep it face down and use your finger to
work the thumbsticks through the holes and work the case closed. Do not force it, you may have wires
preventing the case from closing entirely. Just go slow and look at any areas to see what is stopping it
from closing all the way.
•
Now just screw your controller back together and your done! See the next page for additional information
on using your new mod.


