58
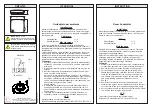
Removal and installation of the burner
1. Take the humidifier out of operation, as described in chapter 7.5.
2. Undo the screw(s) (phillips screwdriver) and remove the right side panel(s).
. Remove the combustion air blower (see the section “Removal and installation of the combustion
air blower” above).
4. Disconnect the cables to the igniter and to the flame monitoring unit and remove the components
(see the section on “Removal and installation of the igniter and the flame sensor”).
5. Unscrew the four nuts in the burner flange and
carefully
remove the burner unit . Make sure that
the burner is not damaged.
Note
: Grease, dirt and dust at the ceramic matting can affect the performance of the burner.
Re-installation is achieved by following the reverse sequence. Renew the flange seal and replace
igniter and flame sensor if necessary. Tight the nuts of the burner flange with a torque wrench (torque:
10 Nm). Make sure all cables are connected correctly.
DANGER!
Danger of explosion!
Following maintenance work on the gas system, a leakage test must always be undertaken in
accordance with chapter 5.5.2.
Cleaning the burner elements
Carefully blow out the burner element mats (ceramic fibre material) from outside with compressed
air. Severely soiled burner elements should be replaced.
Cleaning the blower/burner chamber of the unit
Carefully clean the blower and the burner chamber by freeing any kind of soiling and accumula-
tions.
CAUTION!
Wet cleaning of the blower and the burner chamber is not permitted!
Ceramic matting,
do not touch!
Hold burner only on metal pipe
Summary of Contents for GS 40 Series
Page 2: ......


