


User Manual
25
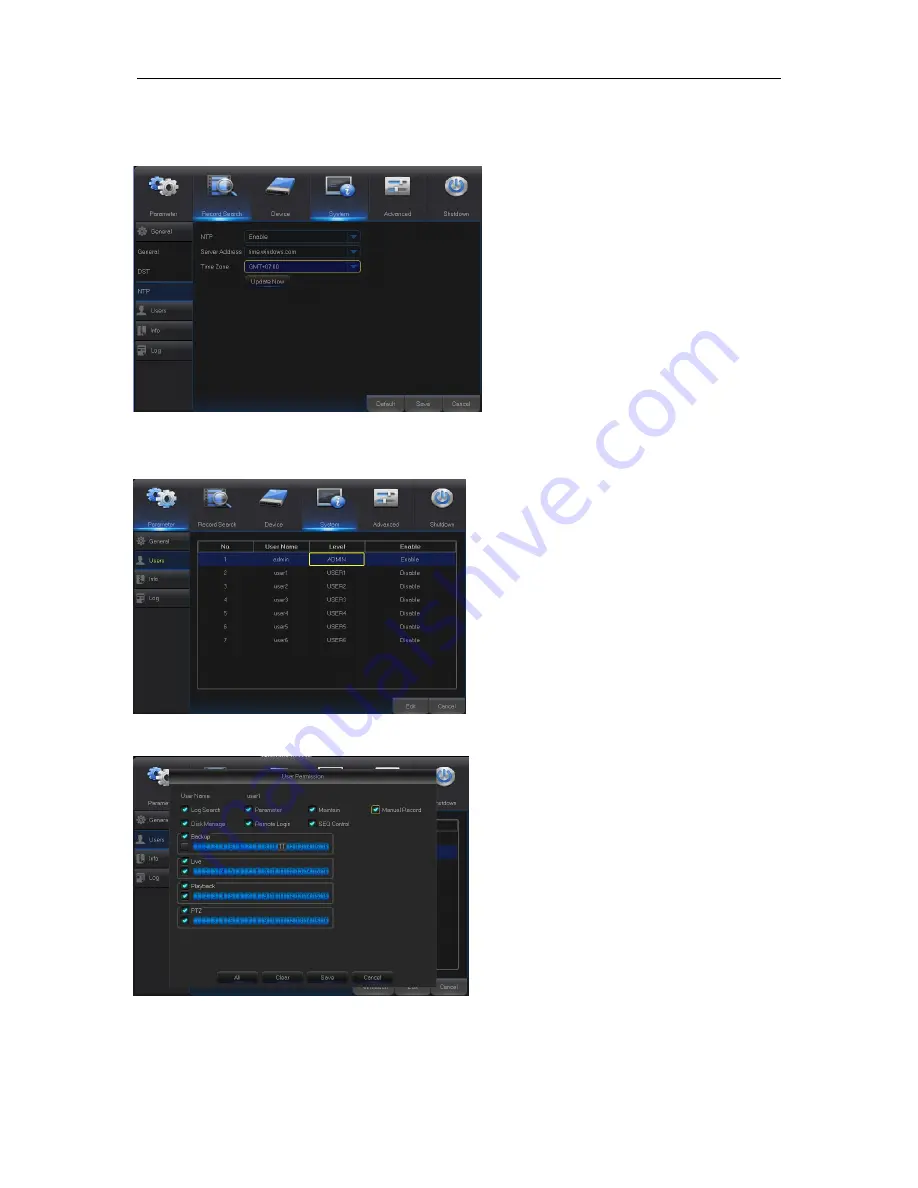
3. NTP
Go to “Main Menu” → “System” → “General” → “NTP” to get the interface shown as Fig. 5-42.
Fig. 5-42
4. Users
Go to “Main Menu” → “System” → “Users” to get the User interface shown as Fig. 5-43.
Fig. 5-43
Fig. 5-44
NTP service:
Enable/Disable NTP
Server Address:
Select NTP server
(time.windows.com, time.nist.gov, etc. )
Time Zone:
Corresponding time zones
for various nations or regions.
Update Time:
Enable NTP function and
save parameters and click Update Time
to calibrate the system time.
Note:
When NTP function is
set to “Enable”,
system will calibrate the system time at
every 00:07:50 and every start-up.
It supports up to seven users, including one
administrator and six users. Click [Edit] button to
enter into the [User Edit] interface to input user
name and password, as shown in Fig. 5-43
User Name consists of 8 characters and
password is composed by number 0-9 with
max length of 8 numbers
Set user password. Administer is authorized to
set user common user’s authority, as shown in
Fig. 5-44
Log Search:
check the all system logs.
Parameter:
allow you set all the parameters.
Maintain:
allow you update version,
recover ex-factory value, device reboot and
shut down.
Disk Management:
allow you manage and
control the HDD and USB drive.
Remote Login:
allow you remotely login
DVR.
SEQ Control:
allow you sequence live
screens for all the channels.
Manual Record:
allow you manually
start/stop record.
Backup:
Tick-select the ENABLE
“√” option
and select channel for backup, the user is
allowed to backup the record in the
selected channel.
Live:
Tick-select the ENABLE
“√”
option
and select a channel and the user is
allowed to view all the live images in the
selected channel.
Playback:
Tick-select the ENABLE
“√”
option of Playback and the common user is
allowed to playback the selected record in
the channel.


