22
23
1
2
2
4
5
6
4
3
1
1
2
2
2
3
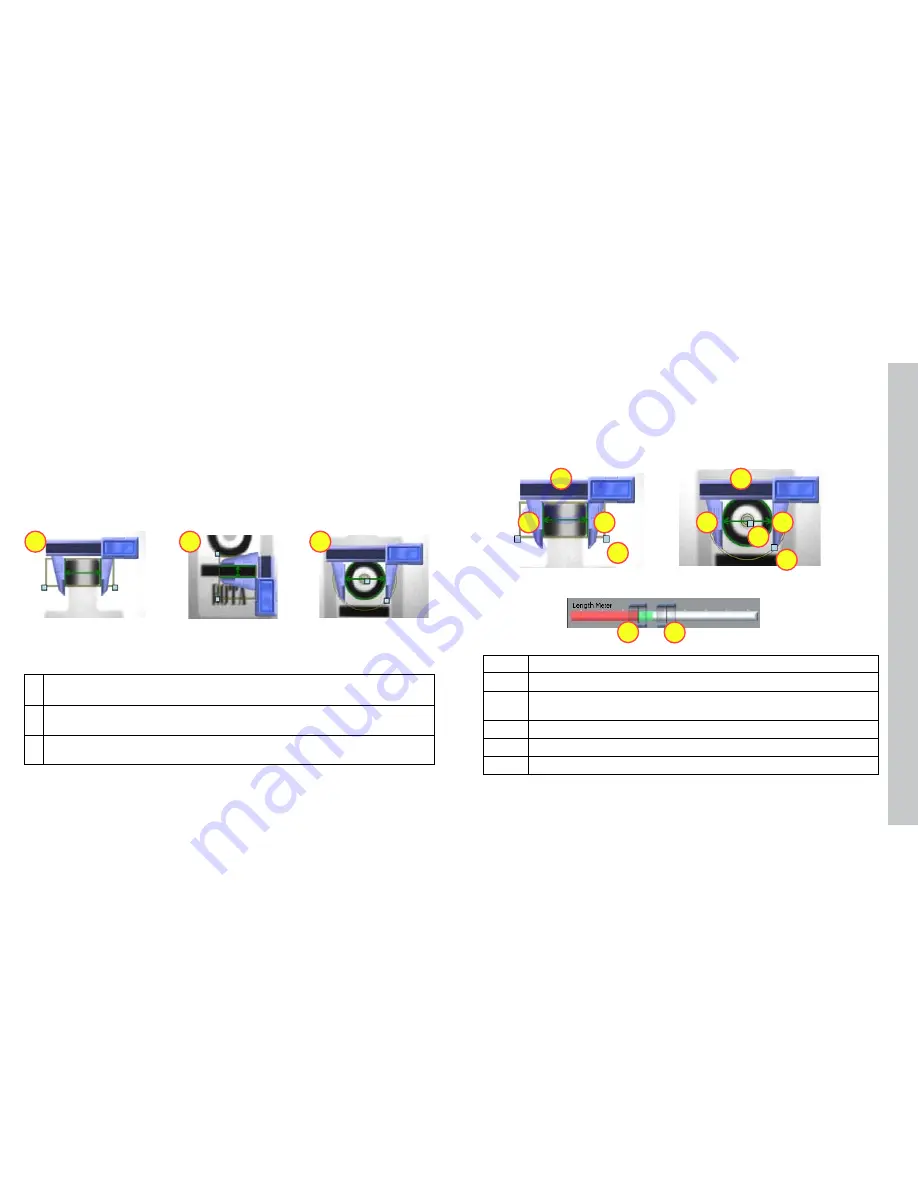
How to use the Measurement Sensor Controls
In most cases, there is no need to change the one-click setup sensor Features that are too
large or too small will fail, while features that are the correct size will pass You use the controls
shown below to adjust a measurement sensor
1
Width Sensor
: Use to measure the width of a feature with vertical edges
2
Height Sensor
: Use to measure the height of a feature with horizontal edges
3
Diameter Sensor
: Use to measure the diameter of a circular feature
1
Drag bar
: Click and drag here to reposition the sensor
2
Blades
: Click and drag here to select different feature edges
3
Width and Height Sensor Region
: Set the region for the feature Use this to
exclude features you don’t want to measure
4
Diameter Sensor Region
: Set the inner and outer limits of the search region
5
Low Threshold:
Features smaller than this fail
6
High Threshold:
Features larger than this fail
Measurement Sensors
Measurement Sensors
evaluate part of a Checker image to determine if a feature is within a
specified size range.
Measurement sensors support one-click setup; simply click on the center of the feature you want
to measure to create and configure the sensor in a single step.
There are three types of measurement sensors:
Summary of Contents for Checker 3G Series
Page 1: ...COGNEX Checker 3G Series User s Guide...
Page 25: ...COGNEX 590 7096...


