


normal usage that a disc is not functioning at full speed. You may find discs that do not work at high speed. In this
case, lower the test speed until you can get reliable results.
If your application requires a certain throughput (like some games), DVX provides a way to confirm that the disc can
play at the required speed.
Add Results to Spreadsheet
When checked, DVX will add a summary of the test results to the end of the spreadsheet DVDTests.xls (for DVD
discs) or CDTests.xls (for CD tests). For details, see
Saving Results to a Spreadsheet or Database
on pg. 14.
Test Postgap
When this is enabled, the tests will include the Postgap area of the disc. This applies to CDs only.
Get Write Mode
When checked, DVX will determine the recording method of a disc when it is loaded (except audio discs).
When checked, DVX will automatically set the horizontal axes of all graphs according to the size of the disc. When not
checked, the default value for the X axes is 80 minutes for CDs and 5 GB for DVDs. You can change the axis values
for all charts, and the settings will be remembered.
Include Validate
When checked, DVX will verify the data on the disc while performing the error test. The program will prompt you for
a Clover Signature at the start of the test. It will then attempt to validate this signature during the error test. The results
will be displayed in the "Verify Errors" box in the main view, and also in the Summary view. Before beginning the
test, you must create the signature from your master disc that you want to compare against. (See:
on pg. 24) In automation mode, you will only be prompted once for the Clover
Signature at the beginning of the test. Each subsequent disc will then be validated against this signature.
Enter User Info
When checked, the user will be prompted for information related to the disc under test, when the disc is loaded. For
details, see
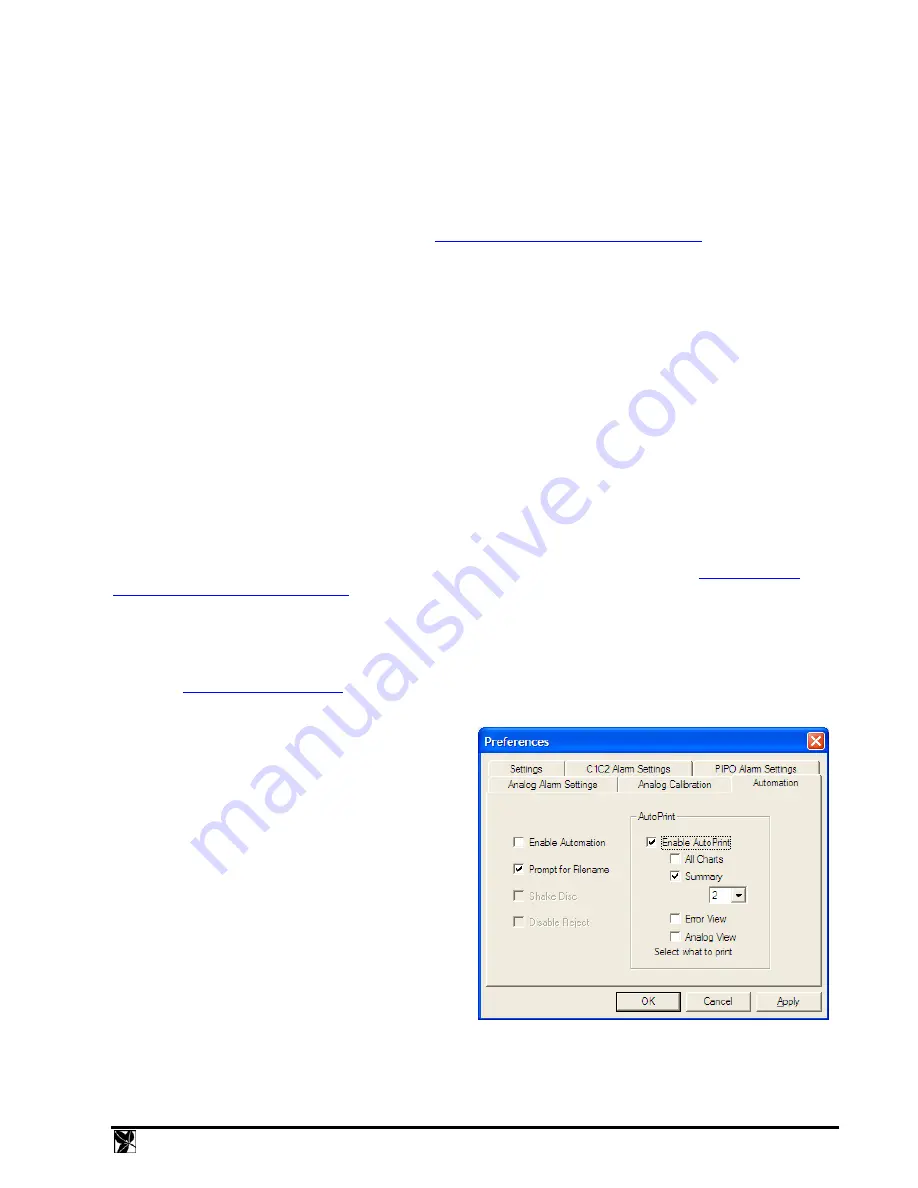
Automation
In Automation mode, the test is started automatically
when a disc is loaded, and the results can be saved
automatically without user intervention.
Enable Automation
Automation mode is enabled in the Automation property
page of the
Preferences
menu.
Prompt for Filename
When enabled, you will be prompted at the end of the test
for a filename for the saved results. When disabled, the
file will be saved without user input, with a made-up
unique name. You can also use the text in the user
information box #1 for the saved filename.
AutoPrint
Fig. 8 – Automation Settings
When enabled, results will automatically be printed at the
end of the test. You can select which views you wish to print automatically, including any or all of: All Charts;
Summary; Error View; or Analog View. When the Summary view is selected, you can choose to print either one or
DVX
Instruction
Manual
11


