83
Latest DVR firmware can be found online at www.ClintonElectronics.com/support
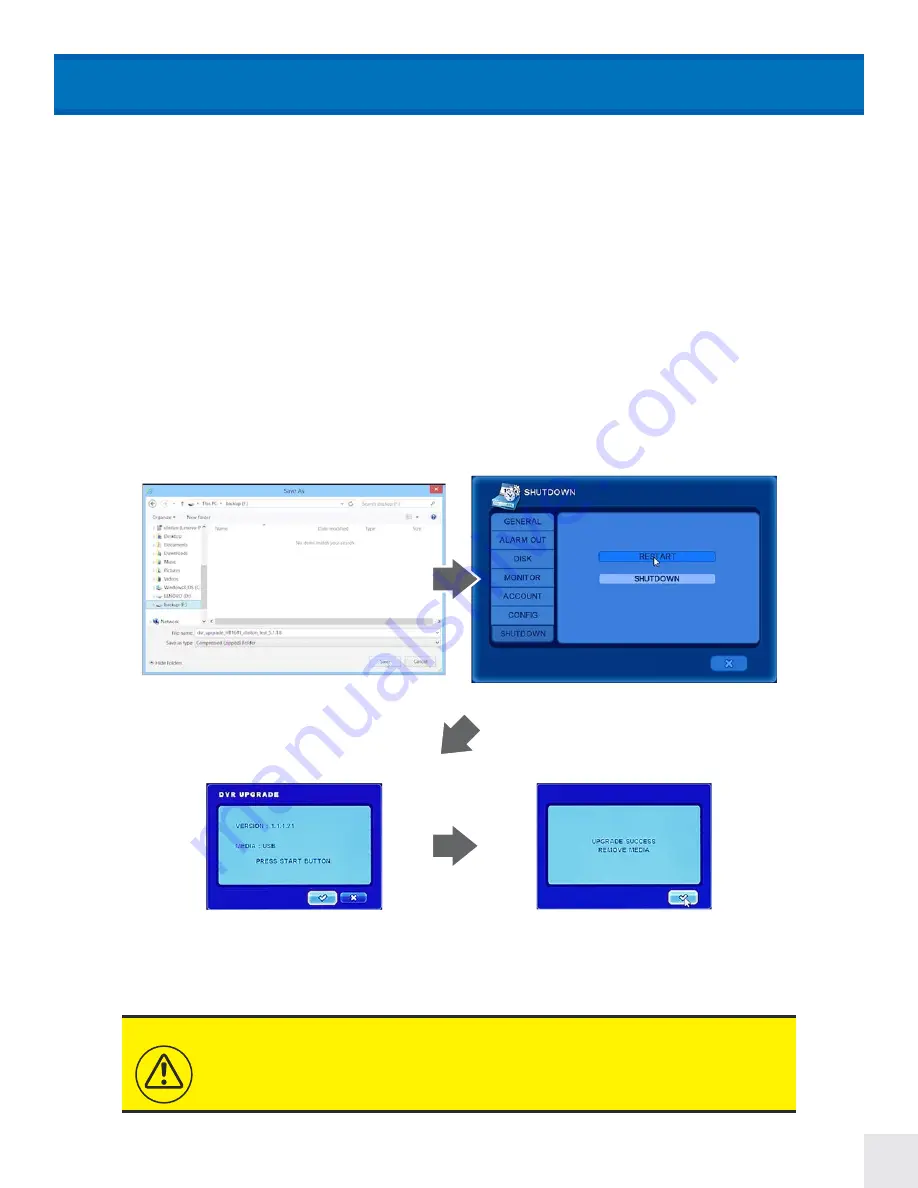
Follow the procedure below to install the firmware onto your DVR.
1. Insert a USB device (Formated to FAT32) into a computer.
2. Download the appropriate DVR firmware from www.ClintonElectronics.com/support.html
3. Save the firmware update to the USB. Do Not open the contents of the firmware update or rename the file.
Opening, modifying or renaming the firmware update will make it unreadable by the DVR.
4. Remove the USB device from the computer.
5. Insert the USB device into the DVR.
6. Restart the DVR. To restart: SETUP MENU > Shutdown > Restart
7. Confirm the firmware update during the DVR restart. Once the update starts do not remove the USB device
from the DVR. The firmware update can take several minutes to complete depending on the size of the update.
8. After successfully updating the firmware; remove the USB device when prompted then click the
3
3
mark.
9. The DVR will perform a self-restart. This can take several minutes.
10. After this second restart an “Upgrade Completed” window will be displayed. Click the
3
3
mark to return to
regular DVR functions.
• Do Not remove the USB device from the DVR until the firmware has
successfully been installed.
• If the USB device is not removed after prompted, the DVR will initiate the
firmware update again after restart.
NOTICE
Download & Save firmware update from
ClintonElectronics.com/support.html onto USB
Confirm the firmware update by clicking the
3
3
button, do
not remove USB from DVR or power down
Insert USB with firmware update into DVR & Restart
Remove USB from DVR when prompted
FIRMWARE UPDATE


