P/N 89800, Rev. 2
Page 9
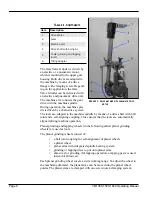
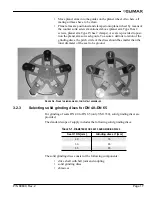
The abrasives are put onto the grinding discs which are mounted to the planet
arms. This system ensures a quick change from grinding with abrasives to CBN-
grinding discs or to lapping discs.
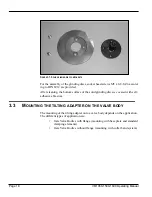
For smaller gate valve seats (DN 40, 50 ,65), solid grinding discs are provided
(model VM1350(S) only).
The solid grinding discs consist of:
•
a ball joint coupling with ball joint for self-alignment of grinding discs
•
solid grinding disc
•
abrasives
The solid grinding discs are covered with self-adhesive abrasives.
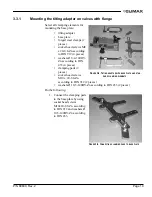
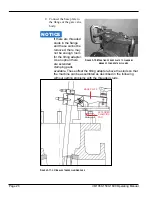
Before machine operation, the Gate Valve Grinder has to be mounted to the gate
valve body by means of a tilting adapter with clamping elements (included in basic
scope of supply). With this tilting adapter, the machine can easily be set up and
centred to the valve seat. In addition, it enables the operator to apply the required
grinding pressure by tilting the machine against the valve seat and to take the
machine system out to change the abrasives without dismantling the tilting adapter
and its clamping elements.
The machine configuration with electric drive motor is started with the trigger but-
ton. The machine spindle is rotating as long as the trigger button is being pushed.
For permanent operation, the trigger button can be locked.
The spindle speed can be adjusted at the top of the electric drive motor.
The machine configuration with pneumatic drive is started by pushing the red
safety button of the maintenance unit. This maintenance unit is available as an
option or it can be supplied by the customer.
To increase the speed range, the electric drive motor is equipped with a 2-stage
mechanically switching gear.
Due to the fact that the pneumatic drive motor has already a wide range of adjust-
ment, an additional gear system is not necessary.
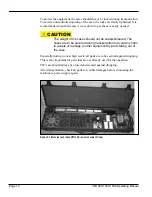
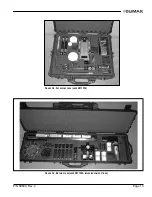
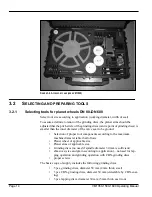
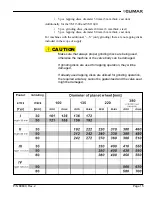
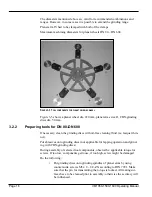
The Gate Valve Grinder and accessories are delivered in high-quality, durable car-
rying cases with foam inlet for safe transportation and storage.
2.2
S
PECIFICATIONS
T
ABLE
2-2. S
UB
-
COMPONENT MASS
Unit
Specification
Machining Data
Machining range VM1350
DN40 – DN350
Machining range VM1500
DN80 – DN500
Machining range VM1600
DN80 – DN600
Summary of Contents for VM1350
Page 2: ......
Page 4: ...Page B VM1350 1500 1600 Operating Manual CLIMAX GLOBAL LOCATIONS ...
Page 5: ...P N 89800 Rev 2 Page C CE DOCUMENTATION ...
Page 12: ...Page vi VM1350 1500 1600 Operating Manual This page intentionally left blank ...
Page 18: ...Page 6 VM1350 1500 1600 Operating Manual This page intentionally left blank ...
Page 44: ...Page 32 VM1350 1500 1600 Operating Manual This page intentionally left blank ...
Page 58: ...Page 46 VM1350 1500 1600 Operating Manual This page intentionally left blank ...
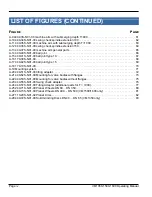
Page 62: ...Page 50 VM1350 1500 1600 Operating Manual FIGURE A 1 GATE VALVE GRINDING AND LAPPING MACHINE ...
Page 63: ...P N 89800 Rev 2 Page 51 ...
Page 64: ...Page 52 VM1350 1500 1600 Operating Manual ...
Page 65: ...P N 89800 Rev 2 Page 53 FIGURE A 2 440 10S N01 00 BASIC MACHINE ...
Page 66: ...Page 54 VM1350 1500 1600 Operating Manual ...
Page 67: ...P N 89800 Rev 2 Page 55 FIGURE A 3 240 11S N01 00 ELECTRIC DRIVE ...
Page 68: ...Page 56 VM1350 1500 1600 Operating Manual FIGURE A 4 240 13S N01 00 PNEUMATIC DRIVE ...
Page 69: ...P N 89800 Rev 2 Page 57 FIGURE A 5 240 15S N01 00 ELECTRIC DRIVE 115 V ...
Page 70: ...Page 58 VM1350 1500 1600 Operating Manual FIGURE A 6 440 20S N01 00 UPPER GEAR ...
Page 71: ...P N 89800 Rev 2 Page 59 FIGURE A 7 440 21S N01 00 UPPER GEAR ADDITIONAL PARTS FOR T 1000 ...
Page 73: ...P N 89800 Rev 2 Page 61 FIGURE A 9 440 33S N01 00 MACHINE ARM WITH SUBMERGING DEPTH T 800 ...
Page 75: ...P N 89800 Rev 2 Page 63 FIGURE A 11 440 35S N01 00 MACHINE ARM WITH SUBMERGING DEPTH T 1000 ...
Page 77: ...P N 89800 Rev 2 Page 65 FIGURE A 13 440 37S N01 00 MACHINE ARM GENERAL PARTS ...
Page 78: ...Page 66 VM1350 1500 1600 Operating Manual FIGURE A 14 440 40S N01 00 BALL JOINT ...
Page 79: ...P N 89800 Rev 2 Page 67 FIGURE A 15 440 41S N01 00 BALL JOINT TYPE 10 ...
Page 80: ...Page 68 VM1350 1500 1600 Operating Manual FIGURE A 16 170 30S N01 00 ...
Page 81: ...P N 89800 Rev 2 Page 69 FIGURE A 17 440 42S N01 00 BALL JOINT TYPE 15 ...
Page 82: ...Page 70 VM1350 1500 1600 Operating Manual FIGURE A 18 170 10S N01 00 ...
Page 83: ...P N 89800 Rev 2 Page 71 FIGURE A 19 MOUNTING SYSTEM ...
Page 84: ...Page 72 VM1350 1500 1600 Operating Manual FIGURE A 20 440 51S N01 00 TILTING ADAPTER ...
Page 85: ...P N 89800 Rev 2 Page 73 FIGURE A 21 440 52S N01 00 MOUNTING FOR VALVE BODIES WITH FLANGES ...
Page 86: ...Page 74 VM1350 1500 1600 Operating Manual ...
Page 87: ...P N 89800 Rev 2 Page 75 FIGURE A 22 440 53S N01 00 MOUNTING FOR VALVE BODIES WITHOUT FLANGES ...
Page 88: ...Page 76 VM1350 1500 1600 Operating Manual FIGURE A 23 440 55S N01 00 SWING CHECK ADAPTER ...
Page 90: ...Page 78 VM1350 1500 1600 Operating Manual Tooling ...
Page 91: ...P N 89800 Rev 2 Page 79 ...
Page 94: ...Page 82 VM1350 1500 1600 Operating Manual FIGURE A 27 110 20S N01 02 PLANET ARMS ...
Page 96: ...Page 84 VM1350 1500 1600 Operating Manual This page intentionally left blank ...
Page 97: ......
Page 98: ......

