background image

CARE AND CLEANING

Cooking equipment must be cleaned regularly to
maintain its fast, efficient cooking performance and
to ensure its continued safe, reliable operation. The
best time to clean is shortly after each use (allow
unit to cool to a safe temperature).

WARNINGS

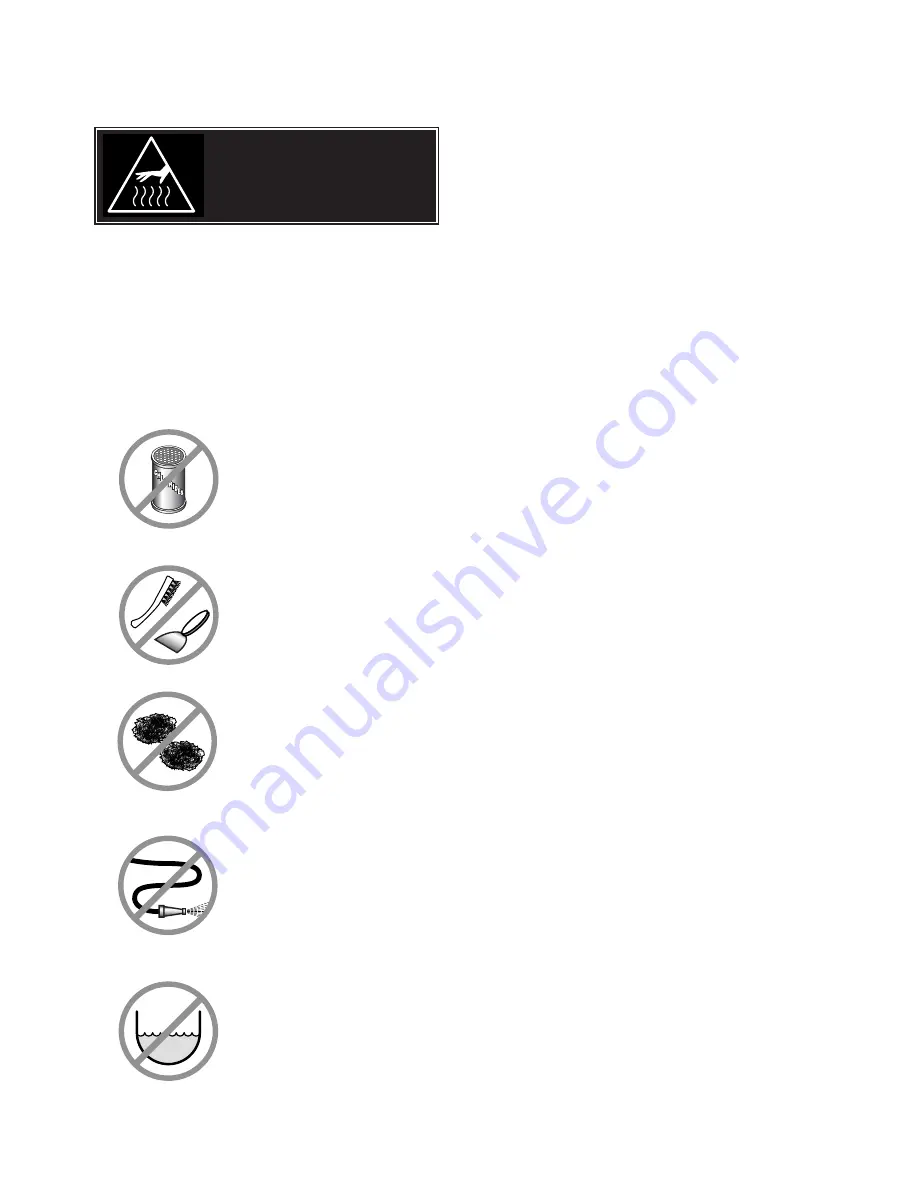
Do not use detergents or
cleansers that are chloride
based or contain quaternary
salt.

Do not use a metal bristle
brush or scraper. 

Steel wool should never be
used for cleaning the stainless
steel.

Unit should never be cleaned
with a high pressure spray
hose. 

Do not leave water sitting in unit
when not in use.

Stagnant

Water

High Pressure 

Spray Hose

Chloride Cleaners

Steel Pads

Wire Brush & 

CLEANING INSTRUCTIONS

CAUTION

SURFACES MAY 

BE EXTREMELY HOT!

CLEANING INSTRUCTIONS

1.

Turn unit off.

2.

Remove drain screen (if applicable). Thoroughly
wash and rinse the screen either in a sink or a
dishwasher.

3.

Prepare a warm water and mild detergent solution in
the unit. 

4.

Remove food soil using a nylon brush. 

5.

Loosen food which is stuck by allowing it to soak at
a low temperature setting. 

6.

Drain unit.

7.

Rinse interior thoroughly.

8.

If the unit is equipped with a Tangent Draw-Off
Valve, clean as follows:

a)

Disassemble the draw-off valve first by turning
the valve knob counter-clockwise, then turning
the large hex nut counter-clockwise until the
valve stem is free of the valve body.

b)

In a sink, wash and rinse the inside of the valve
body using a nylon brush.

c)

Use a nylon brush to clean tangent draw-off tube.

d)

Rinse with fresh water.

e)

Reassemble the draw-off valve by reversing the
procedure for disassembly. The valve's hex nut
should be hand tight only.

9.

If the unit is equipped with a Butterfly Valve, clean
as follows:

a)

Place valve in open position.

b)

Wash using a warm water and mild detergent
solution.

c)

Remove food deposits using a nylon brush.

d)

Rinse with fresh water.

e)

Leave valve open when unit is not in use.

10.

Using mild soapy water and a damp sponge, wash
the exterior, rinse, and dry. 

NOTES

For more difficult cleaning applications one of the
following can be used: alcohol, baking soda, vinegar,
or a solution of ammonia in water. 

Leave the cover off when the kettle is not in use.

For more detailed instructions refer to the Nafem
Stainless Steel Equipment Care and Cleaning manual
(supplied with unit).

Summary of Contents for MKEL-100-T

Page 1: ...L 60 T TMKEL 80 T TMKEL 100 T Operators Manual Installation Operation Service Electric Floor Model Mixers 1333 East 179th St Cleveland Ohio U S A 44110 Phone 216 481 4900 Fax 216 481 3782 Visit our we...

Page 2: ...may be extremely hot Use protective equipment Keep appliance and area free and clear of combustibles Stand clear of product discharge path when discharging hot product Wear protective equipment when...

Page 3: ...scription of the damage or the reason for suspecting damage as soon as it is discovered This will help in filling out the claim forms later 2 As soon as damage is discovered or suspected notify the ca...

Page 4: ...dge backs of consoles dotted line B Adjustments are made by turning flanges on back feet only 3 Level consoles individually from front to back dotted lines C Adjustments are made by turning flanges on...

Page 5: ...te fused disconnect switch must be supplied and installed The kettle must be electrically grounded by the installer The electric supply must match the power requirements specified on the kettle s rati...

Page 6: ...tle is level in upright position and drains fully when tilted and are not being crushed by gear 8 Lower Bridge Raise bridge Switch to mix Turn speed control to zero to reset micro switch then set spee...

Page 7: ...the ON position 4 Turn the temperature control knob to 1 Min The green LED light should remain lit indicating the burner is lit until the set temperature is reached 124 F 50 C Then the green light wi...

Page 8: ...eat Indicator Light Green When lit indicates that the kettle burner is on Cycles ON OFF with burner 12 Solid State Temperature This control allows the operator to adjust the kettle temperature in incr...

Page 9: ...s remember like a cooking pot the kettles become very hot when cooking Avoid contact with bare skin Operating the Kettle 1 Before turning kettle on read the Vacuum Pressure Gauge 19 The gauges needle...

Page 10: ...1 3 faster if the kettle is filled only to the outer steam jacket s welded seam resulting in a kettle filled to 2 3 capacity OFF ON General Operation 1 Turn MAIN POWER SWITCH 1 to ON MIX LIFT OFF Lif...

Page 11: ...structions Changing to Configuration Mode edit the parameters as follows Note The PGM program indicator will flash while the counter is in the configuration mode 2000 1930 ENT PST OUT PGM RST Upper Di...

Page 12: ...y 2 Turn mixer MAIN POWER switch to ON CAL 9900 lights up and displays present temperatures 3 Turn HEAT COOL switch to OFF AUTO 4 Turn ACTIVE BYPASS switch to BYPASS The unit should not be heating or...

Page 13: ...re setting 6 Drain unit 7 Rinse interior thoroughly 8 If the unit is equipped with a Tangent Draw Off Valve clean as follows a Disassemble the draw off valve first by turning the valve knob counter cl...

Page 14: ...lows 1 Open product valve 2 Disconnect air hoses 3 Remove air cylinder 4 Remove valve tee 5 Remove all O rings 6 Clean air cylinder do not submerge in water Wipe clean and sanitize 7 Clean and sanitiz...

Page 15: ...t be seen play it safe and use a soft cloth or plastic scouring pad 3 Use alkaline alkaline chlorinated or non chloride containing cleaners While many traditional cleaners are loaded with chlorides th...

Page 16: ...preserve the various agency safety certification UL NSF ASME Ntl Bd etc only factory supplied replacement parts should be used The use of other than factory supplied replacement parts will void warran...

Page 17: ...0 Ambient Heater Assembly 1 11 SK50370 Terminal Block 1 12 KE54402 Mounting Bracket Terminal Block 1 13 KE003209 6 Momentary Spring Return Switch Assembly 1 14 KE003209 1 Switch Assembly On Off Mainta...

Page 18: ...ency Switch 1 4 KE53377 Push Button Contact Block 1 5 SK50315 1 Pilot Light 1 6 KE003209 5 Switch Assembly On Off On Maintained single kettle 2 twin kettle 3 7 KE003209 1 Switch Assembly On Off Mainta...

Page 19: ...ry spout over desired kettle 4 Press START switch downward to RESET Delivery will start at 0 and stop at preset volume 5 To stop delivery any time press INTERRUPT switch downward 6 To complete deliver...

Page 20: ...4 11 Solenoid Valve 3 Way 120 Volt 1 SE50224 Coil Only 120 Volt 1 5 KE51848 Jack 1 SE50241 Rod Gland Seal Kit 1 SE50242 Piston Seal Kit 1 6 KE52124 Jack Upper Pin 1 7 KE51846 Hydraulic Motor Scraper A...

Page 21: ...ludes 44 1 KE00937 Secondary Agitator 80 gal includes 44 1 KE00938 Secondary Agitator 100 gal includes 44 1 KE00939 Secondary Agitator 125 gal includes 44 1 KE00940 Secondary Agitator 150 gal includes...

Page 22: ...380 415 volt KE52051 440 480 volt 10 SK50055 1 Terminal Block Sections 3 6 11 SK50054 1 Terminal Block End Section 1 12 Transformer 1 KE53838 5 200 208 220 240 440 480 volt KE53838 6 380 415 volt 13...

Page 23: ...19201 Set Screw 1 9 KE00151 Segment Gear Small up to 60 gal 1 KE52833 Segment Gear Large 80 gal and up 1 10 KE00699 Trunnion Housing 1 11 FA19177 Hex Socket Set Screw 1 12 FA20047 Jam Nut 1 13 KE52191...

Page 24: ...POWER TILT 10 CONSOLE 44 45 43...

Page 25: ...05002 6 O Ring 2 18 FA95048 Woodruff Key 1 19 FA19201 Set Screw 1 20 FA19177 Hex Socket Set Screw 1 21 FA20047 Jam Nut 1 22 KE50582 Coupling 2 23 KE50583 Coupling Insert 1 25 KE52832 1 MOTOR 1 26 SK50...

Page 26: ...KETTLE BOTTOM 6 5 4 1 2 7 8 10 9 26 27 13 12 30 25 14 11 11 3 15a 35 17 16 18 19 20 24 21 22 32 23 28 29 Element Terminals 31 32 15b 33 34...

Page 27: ...415 to 120 220V 1 KE53838 12 Transformer 440 480 to 240V 1 KE53838 13 Transformer 600 to 240V 1 15a SE00104 Pressure Gauge Back Mount c w Item 35 1 15b Pressure Gauge KE000714 4 For units built prior...

Page 28: ...WATER METER ASSEMBLY 18 CONSOLE...

Page 29: ...ee 1 11 KE51861 Gallon Meter 1 KE51860 Litre Meter 12 FI00062 Elbow 90 Degree 1 13 KE52173 1 2 1 D Hot Water Wash up Hose 1 14 FI05220 3 Hose Clamp 2 15 FI00179 Tee 1 16 FI05074 Adapter Gallon Meter 2...

Page 30: ...filter and replace if required SIX MONTH MAINTENANCE Lubrication Grease trunnion housings Grease bridge swivel assembly Use Never Seize on tilt worm and gear Strainers Clean strainers in steam in and...

Page 31: ...RAULIC OIL REPLACEMENT PROCEDURE One of the most important maintenance tasks is to change the hydraulic oil yearly Under heavy usage the oil should be changed every nine months It is important to chan...

Page 32: ...cross bar KETTLE TRUNNIONS Accessed via the top covers on the 10 and 18 consoles Each has two grease nipples Kettle Trunnion Drawing DISASSEMBLY OF SWITCH ASSEMBLY 1 Place slotted screwdriver between...

Page 33: ...nance 1 Keep the medium flowing through the valve as free from dirt and foreign material as possible 2 While in service the valve should be operated at least once a month to insure proper opening and...

Page 34: ...base sub assembly and remove core assembly core spring and solenoid base gasket 5 Remove bonnet screws valve bonnet piston assembly lip seal support inner and outer body gaskets 6 All parts are now ac...

Page 35: ...low water light is on when the kettle is upright On tilting kettles it is normal for the red light to come on when the kettle is in a tilted position as the elements are not submerged in water at this...

Page 36: ...steam If valve appears to be sticking replace pressure relief valve If foreign material is discharged then drain kettle and replace pressure relief valve See KETTLE JACKET CLEANOUT AND PASSIVATION PR...

Page 37: ...bow 4 Apply a thread sealant i e Teflon tape to the pressure relief valve s thread and replace 5 Restore power to unit at the fused disconnect switch 6 Vent kettle See Kettle Venting Instructions for...

Page 38: ...nd Kettles are designed to withstand adverse operating conditions associated with high volume cooking facilities To achieve this internal components are completely sealed from the outside environment...

Page 39: ...e defective contact the factory Elements are not field replaceable No Go to step 5 Yes Replace defective safety thermostat No Go to step 6 Yes Replace defective contactor s No Go to step 6 Yes Clean o...

Page 40: ...ve safety thermostat No Go to step 4 Yes Go to step 5 No Replace defective thermistor Yes Go to step 6 9 Measure continuity of ON OFF switch Is it operating properly 10 Unplug control box and measure...

Page 41: ...and 7 Is it approximately 100 000 ohms 4 Turn the potentiometer on the control box counter clockwise to decrease the maximum operating temperature does the kettle continue to overheat Result Remedy Ye...

Page 42: ...dge NO 2 2 KE50753 10 Relay 2 2 KE00860 Cable and Bracket Assembly Speed Control 1 SE50224 Solenoid Valve Coil 1 KE53962 Blade Stop Ring 2 2 KE51834 Scraper Blades 2 2 SE50094 Oil Filter 1 1 KE51652 S...

Page 43: ...Hydraulic Motor Primary Hydraulic Motor Check Valve Hydraulic Cylinder To Tank 3 Way Solenoid Valve 2 Way Solenoid Valve DOWN UP LIFT MIX IN OUT Pump Relief Valve set at 1000 psi To Tank Variable Res...

Reviews: