CALIBRATING PROCEDURE
1.
Insure the unit has a vacuum before you begin
calibrating procedures. If unit requires venting refer
to Kettle Venting Instructions.
2.
Set On-Off Switch/Temperature Control to "
10
" (Max.).
3.
Allow the unit to cycle twice.
4.
Check temperature of the inner kettle surface with
a digital surface thermometer.
5.
Temperature should be between 260° F and 265° F.
6.
Using a screw driver adjust temperature by turning
the potentiometer on the black box. Turn very little.
Turn clockwise to INCREASES and counter-
clockwise to DECREASE temperature.
7.
Allow the unit to cycle twice.
8.
Check temperature of the inner kettle surface with
a digital surface thermometer.
9.
Repeat steps
4.
through
8.
until
unit is calibrated.
PRESSURE RELIEF
VALVE PERIODIC
TESTING PROCEDURE
Most insurance agencies require periodic testing of
pressure relief valves used on pressure vessels. This
procedure will allow you to safely and quickly test your
kettle's pressure relief valve. We recommend this test be
performed twice a year.
NOTE:
The following instruction is intended for use by
qualified service personnel.
WARNING:
Kettle surface will be hot and steam will be
released during testing. Take necessary precautions
including the use of gloves and eye protection to
prevent personal injury.
1.
With the kettle empty, set On-Off Switch/Temperature
Control to "
10
" (Max.). Allow the kettle to heat until
the unit cycles off.
2.
Switch On-Off Switch/Temperature Control to "
0
" (Off)
and disconnect main power at fused disconnect switch.
3.
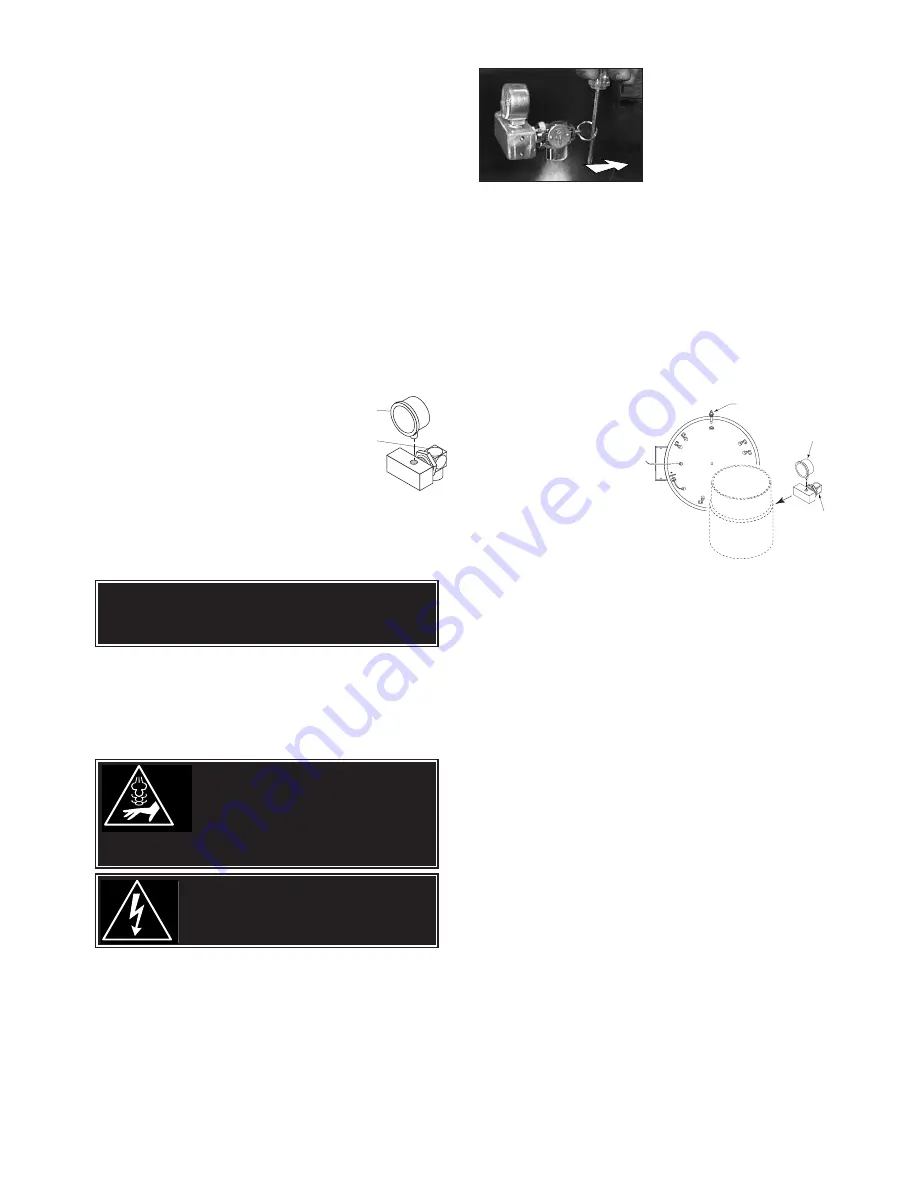
Stand to the side of the pressure relief valve
discharge tube and pull valve open for a maximum
of one second. Repeat test three to four times.
Each time the mechanism
should move freely and be
accompanied by a rapid
escape of steam.
If valve appears to be
sticking replace pressure
relief valve.
If foreign material is discharged then drain kettle and
replace pressure relief valve.
See KETTLE JACKET CLEANOUT AND PASSIVATION
PROCEDURES for full instructions on the correct
method for refilling kettle jacket.
WARNING:
Improper refilling of kettle jacket will result
in irreversible damage to unit.
NOTE:
Rust inhibitor is purchased locally. Read directions
and do not exceed manufacturer's recommendation
(excessive rust inhibitor can also cause solidification).
DANGER:
PRESSURE RELIEF
VALVE WILL EXHAUST HIGH
TEMPERATURE STEAM. CONTACT
WITH SKIN COULD RESULT IN
SERIOUS BURNS. KEEP FACE,
HANDS AND BODY CLEAR OF DISCHARGE
.
DANGER:
WORKING ON MACHINES
WITH POWER COULD RESULT IN
SEVERE ELECTRICAL SHOCK.
WARNING:
IMPROPER REFILLING OF
KETTLE JACKET WILL RESULT IN
IRREVERSIBLE DAMAGE TO UNIT.
Pressure
Gauge
Pressure
Relief
Valve
VACUUM
LEAK TEST
PROCEDURE
If the kettle will not hold
vacuum, test for leaks at:
A.
Water Level Probe
(Remove bottom
cover).
B.
Pressure Relief Valve.
C.
Pressure Gauge.
LEAK TEST PROCEDURE:
1.
Heat kettle until unit cycles off.
2.
Shut off power to the kettle at the fused
disconnect switch.
3.
Spread Bubble Type Leak Detector over
suspected are and watch closely for bubbles.
4.
Repair areas as required.
REPAIRING LEAKS IN STEAM
JACKETED KETTLE FITTINGS
If unit will not hold a vacuum the most likely cause is a leak
at one of the fittings.
Often, the easiest way to eliminate a leak is reseal the
suspect areas.
1.
Water Level Probe
Remove, clean threads, apply
teflon thread sealant and reinstall.
2.
Pressure Relief Valve
A
/ Inspect for signs of leaks.
Replace if required.
B
/ Remove, clean threads, apply
teflon thread sealant and reinstall.
3.
Pressure Gauge
A
/ Inspect face of gauge. If it
contains moisture on the inside of
face replace.
B
/ Remove, clean threads, apply
teflon thread sealant and reinstall.
PRESSURE
GAUGE
WATER LEVEL
PROBE
PRESSURE
RELIEF
VALVE
Summary of Contents for MKEL-100-T
Page 24: ...POWER TILT 10 CONSOLE 44 45 43...


