background image

VXZ646

23

English

Fast forward and Fast rewind

Press and hold the Fast forward [

d

] button or

Fast rewind [

a

] button during playback.

Press and hold the button, and the playback
speed becomes 4-time faster first and then 16-
time faster 3 seconds later. Release the button,
and the normal speed is restored.

• No audio is reproduced during fast forward and

fast rewind operation.

• The unit may return to the menu screen when

the button is pressed.

Searching with a track
number

This operation allows searching with the track
numbers recorded on the video CDs.

This function can only be used from the remote
control unit.

1. Press the [

SEARCH MODE

] button during

playback.

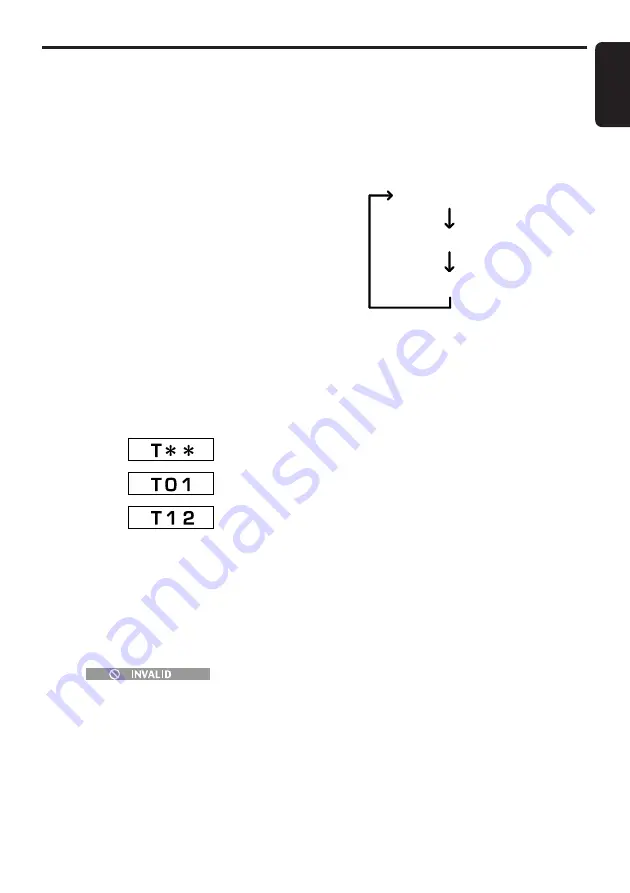
2. Input the number of the track that you want to

play back with the ten-key buttons (0 to 9).
• To input the track number “

12

”, press “

1

” of

the ten-key buttons and then “

2

”.

3. Press the [

ENT

] button on the remote control

unit.

Playback starts from the scene of the input
track number.

• If the input track number does not exist or

searching with a track number is not
allowed, the following message appears to
invalidate the input.

You cannot do this operation when PBC is ON
for a disc with PBC functions.

Watching a video CD (V-CD)

Press “1”.

Press “2”.

Changing audio output

You can change the audio output method.

This function can only be used from the remote
control unit.

Press the [

AUDIO

] button during playback.

Each time you press the button, you can
switch among audio output methods.

Scan playback

This operation scans and plays back all tracks on
the disc, the first 10 seconds for each.

Press the [

SCN

] button.

Press the [

SCN

] button again, and scan

playback is turned off.

You cannot do this operation when PBC is ON
for a disc with PBC functions.

Repeat playback

This operation plays back one track recorded on
the video CD repeatedly.

Press the [

RPT

] button.

* Press the [

RPT

] button again, and repeat

playback is turned off.

You cannot do this operation when PBC is ON
for a disc with PBC functions.

Random playback

This operation plays back all tracks on the disc in
no particular order.

Press the [

RDM

] button.

Press the [

RDM

] button again, and random

playback is turned off.

You cannot do this operation when PBC is ON
for a disc with PBC functions.

LR

 (Stereo)

LL

 (Left)

RR

 (Right)

Summary of Contents for VXZ646

Page 1: ...AM FM DVD VCD CD MP3 PLAYER Owner s manual VXZ646 Clarion Co Ltd All Rights Reserved Copyright 2004 Clarion Co Ltd 2004 1 Abe Abe PE 2630K 280 8051 00...

Page 2: ...TIONS 13 Basic Operations 13 Radio Operations 15 DVD Operations 17 DVD Video Operations 18 Watching a video CD V CD 22 Listening to a CD 25 Listening to an MP3 26 Changing Initial Settings such as Men...

Page 3: ...ata session Your personally created CDs with more than second data sessions recorded cannot be played on this DVD video player About playing a CD R CD RW disc This player can play CD R CD RW discs pre...

Page 4: ...en The VCD MENU is displayed while a Video CD is playing when PBC is ON MP3 files are displayed in the MP3 mode RDM button Perform random play while in the DVD mode Press and hold the button for 1 sec...

Page 5: ...en The VCD MENU is displayed while a Video CD is playing when PBC is ON MP3 files are displayed in the MP3 mode RDM button Perform random play while in the DVD mode Press and hold the button for 1 sec...

Page 6: ...ata session Your personally created CDs with more than second data sessions recorded cannot be played on this DVD video player About playing a CD R CD RW disc This player can play CD R CD RW discs pre...

Page 7: ...ntation as shown in the figure below and put it into the supplied DCP case Ensure the DCP is in the correct orientation DCP DCP case CUATION The DCP can easily be damaged by shocks After removing it b...

Page 8: ...RPT SUB TITLE a SCN AUDIO SEARCH MODE DISC SEL 0 8 P TIME VOLUME MUTE BAND DISC UP WIRELESS REMOTE CONTROLLER P CH PS AS TV VTR REVERSE FUNC POWER 5 2 9 6 3 7 4 1 VOLUME P TIME DISP MUTE DISC SEL 0 9...

Page 9: ...d off TRACK number CD TRACK number Inserting the Batteries 1 Open the rear battery cover Rear cover 2 Insert the two supplied size AA R6 1 5V batteries orienting the plus and minus poles of the batter...

Page 10: ...mode Press to switch the control zone between main zone or sub zone while 2 ZONE mode on Preset scan When pressed and held for 2 seconds Auto store No function No function Scan play Press and hold the...

Page 11: ...e unit When the system check is complete press the FNC button again Selecting a mode 1 Press the FNC button to change the operation mode 2 Each time you press the FNC button the operation mode changes...

Page 12: ...select SW VOL 0 2 Turning the ROTARY knob clockwise or counterclockwise to adjust the subwoofer volume Basic Operations The factory default setting is SW VOL 0 Adjustment range 6 to 6 3 When the adju...

Page 13: ...ay Radio Operations Listening to the radio 1 Press the FNC button and select the radio mode The frequency appears in the display 2 Press the BND button and select the radio band Each time the button i...

Page 14: ...ired band FM or AM 2 Press and hold the P A button for 2 seconds or longer The stations with good reception are stored automatically to the preset channels Preset scan Preset scan receives the station...

Page 15: ...be ejected Note If the ejected disc is left as it is it will be reloaded after 15 seconds However single CDs will not be reloaded so make sure to remove them Listening to a disc already loaded in the...

Page 16: ...control unit during playback or press and hold the d button during pause While the button is being pressed slow playback continues at the speed 1 2 times the normal playback Slow playback cannot be p...

Page 17: ...n the disc the menu may appear again after scan playback of all chapters within the title Press the SCN button again and scan playback is turned off Depending on a chapter previously set SCAN may be c...

Page 18: ...n during playback Each time you press the button you can switch among subtitles Depending on the disc up to 32 kinds of subtitles may be recorded For details see the mark of the disc 8 Indicates that...

Page 19: ...non display OFF of the playback status By pressing the button for 1 second or longer while the playback status is displayed you can switch among time displays TITLE ELAPSED TITLE REMAIN CHAPTER ELAPSE...

Page 20: ...e beginning If the unit is CeNET connected and the function is switched the disc plays from the beginning When the PBC is turned off To resume playback Press the button and playback resumes from the s...

Page 21: ...r is not allowed the following message appears to invalidate the input You cannot do this operation when PBC is ON for a disc with PBC functions Watching a video CD V CD Press 1 Press 2 Changing audio...

Page 22: ...s not work When this happens the indication INVALID will appear Watching a video CD V CD On off of Play Back Control On video CDs equipped with Play Back Control function you can turn it on off This f...

Page 23: ...s button is pressed again within about 1 second playback starts from the beginning of the previous track Fast forward and Fast rewind Press and hold the Fast forward d button or Fast rewind a button d...

Page 24: ...bout 10 music CDs can be recorded on a CD R disc or CD RW disc to allow a long listening time without having to change CDs Precautions when creating an MP3 disc File extensions 1 Always add a file ext...

Page 25: ...is in a severe condition play stops showing the DISC ERROR display After disc selection the play mode is automatically engaged Example showing ID3 Tag display Note If ID3 Tag information was entered w...

Page 26: ...howing FOLDER list display Screen selection flow ID3 Tag display screen FILE list display screen FOLDER list display screen Press the RTN button or MENU button 1 Select with the Cursor button and and...

Page 27: ...utton again The playback status indication TRACK RPT goes off from the monitor and the track currently being played back continues in normal playback Listening to tracks in a folder repeatedly Folder...

Page 28: ...corded on the disc the language specified on the disc is used for display Selecting the monitor menu 1 Press the SET UP button on the remote control unit or press and hold the A button on the unit for...

Page 29: ...onitor menu select TV DISPLAY from GENERAL SETUP 2 Press the or button to select a screen size The color of the selected item changes When watching through a conventional TV monitor 4 3 NORMAL PS The...

Page 30: ...onitor menu select ANGLE MARK from GENERAL SETUP Changing Initial Settings such as Menu Language etc 2 Press the or button to select ON or OFF 3 Press the ENT button Setting up the output mode for aud...

Page 31: ...CES 2 Press the or button to select a language to be used Languages SELECT in the order ENGLISH FRENCH SPANISH CHINESE JAPANESE 3 Press the ENT button Setting up the subtitle language The factory defa...

Page 32: ...OR FIJI GRENADA GUATEMALA GUYANA HAITI HONDURAS JAMAICA KIRIBATI MARSHALL ISLANDS MEXICO 6678 7572 7368 7580 7582 7665 7789 7777 8072 8371 8472 8678 8480 7275 7779 8487 6571 6582 6585 6683 6666 6690 6...

Page 33: ...8669 6573 6587 8671 7589 6789 6767 6775 7075 7170 8070 7180 7185 7781 7783 6578 7867 7885 7870 7780 8078 8475 8467 8770 Setting up the parental level You can change the level of parental lock audio vi...

Page 34: ...cer function cannot be set for the sources of the SUB zone Setting the 2 ZONE function Factory default setting is OFF When you have set the 2 ZONE function to ON in the initial state the MAIN zone ser...

Page 35: ...off Source change 2 ZONE turned on MAIN zone Radio playback Radio playback Radio playback External equipment CD changer External equipment CD changer SUB zone Radio playback AUX Radio playback Extern...

Page 36: ...the clock 1 Press the A button to switch to the adjustment selection display 2 Press the a or d button to select CLOCK E 3 Press the button 4 Press the a or d button to select the hour or the minute 5...

Page 37: ...e A button to return to the previous mode Setting the Subwoofer The factory default setting is SUB W ON 1 Press the A button to switch to the adjustment selection display 2 Press the a or d button and...

Page 38: ...ounds from external devices connected to this unit are difficult to hear even after adjusting the volume The factory default setting is MID 1 Press the A button to switch to the adjustment selection d...

Page 39: ...DISP button to display the title 2 Each time you press and hold the DISP button for 1 second or longer the title display changes in the following order User title disc CD text title disc Artist name C...

Page 40: ...repeat play press the RPT button again RPT goes off from the display and normal play resumes Disc repeat play After all the tracks on the current disc have been played disc repeat play automatically r...

Page 41: ...quency changes one step at a time In the quick tuning mode you can quickly tune the desired frequency TV Operations 1 Press the BND button and select the desired band TV1 or TV2 If MANU is not lit in...

Page 42: ...the following order MULTI NTSC PAL 4 Press the A button to return to the previous mode Setting the TV area When you select the TV area TV reception area the TV tuner area setting changes 1 Press the A...

Page 43: ...the same amperage If the fuse blows again consult your store of purchase Consult your store of purchase 1 Turn the unit off 2 Remove all wires attached to the power antenna lead Check each wire for a...

Page 44: ...e DVD changer cannot be played because it is loaded upside down Parental level error Region code error The speaker protection circuit is operating During this operation if any volume opera tion is per...

Page 45: ...audio output 1 5 Vrms Audio Maximum Power Output 208 W 52 W 4 ch Continuous Average Power Output 17 W 4 into 4 20 Hz to 20 kHz 1 THD Bass Control Action 50 Hz 80 Hz 120 Hz 16 dB 12dB Treble Control A...

Page 46: ...48 VXZ646 English...

Reviews: