48
1
,
Head Power Voltage Adjustment
①
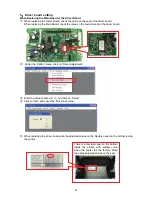
This adjusts the Head Power Voltage. Turn the printer ON.
②
Adjust using the variable resistor while monitoring Power Unit CN101 with a meter.
2
,
Sensor Voltage Adjustment
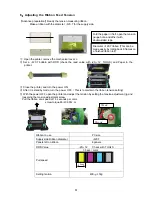
This is set using the variable resistors on the Driver Board.
Signal Resistor
Paper end
VR1
Ribbon R
VR2
PC Mark
VR3
Ribbon C
VR4
Head Power Voltage Range
35.0V
±
0.05V
Caution
Variable
resistor
+
-
Variable Resistor
VR3
PC Mark
VR1
Paper end
VR2
Ribbon R
VR4
Ribbon C
The Power Unit has high voltage, and can get hot, so use caution.
Adjust the head power voltage measuring the power unit directly with a meter. Do
not adjust using OP2-Tools “Head Voltage” value setting
.

