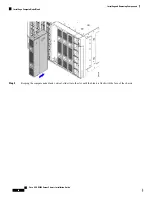


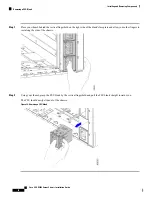


Step 1
With the chassis on an ESD-safe work area, grasp the new PSU Keying Bracket, and align it with right exterior side of
the chassis.
Step 2
Place the bracket against the side of the chassis, aligning the screwholes in the bracket with the screwholes in the chassis.
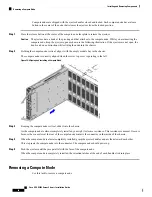
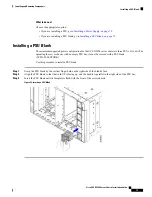
Step 3
Insert the 6 screws into the screwholes.
Step 4
Using a T10 screwdriver, secure the bracket to the chassis by tightening each screw to snug.
If you have access to a torque wrench, tighten the screws to 6 in-lb.
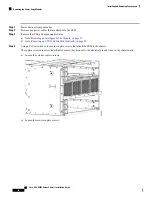
Step 5
Reinstall the chassis:
a) Insert the chassis into the rack.
b) Reinstall the chassis components and reconnect any cables that were disconnected.
For additional info, see
Installing the Chassis, on page 32
.
Cisco UCS X9508 Server Chassis Installation Guide
78
Installing and Removing Components
Installing the PSU Keying Bracket
Summary of Contents for UCS X9508
Page 6: ...Cisco UCS X9508 Server Chassis Installation Guide vi Contents ...
Page 26: ...Cisco UCS X9508 Server Chassis Installation Guide 18 Overview Interpreting LEDs ...
Page 31: ...Cisco UCS X9508 Server Chassis Installation Guide 23 Installation Handling the Chassis ...
Page 64: ...Cisco UCS X9508 Server Chassis Installation Guide 56 Installation Repacking the Chassis ...
Page 124: ...Cisco UCS X9508 Server Chassis Installation Guide 116 Technical Specifications Switzerland ...