

22 ciscoBus Token Ring Card and Applique Installation and Upgrade Instructions
Installation
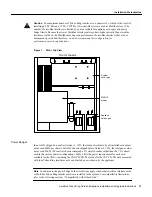
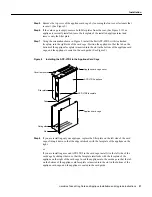
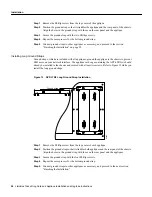
Step 9
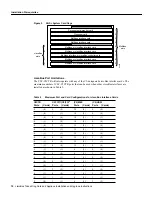
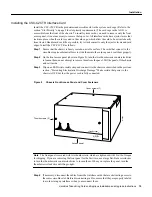
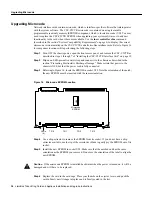
Replace the top cover of the applique card cage. Ensure correct alignment of the cover with
the two guide pins on the bottom of the cover. The guide pins should pass through the
alignment holes in the tabs on the top of each applique and faceplate assembly. (See
Figure 9.)
Step 10
Secure the top cover to the card cage with the four cover fasteners you loosened in step 5.
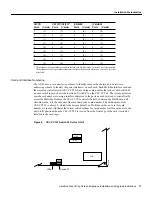
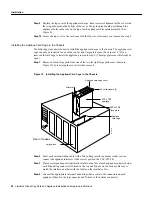
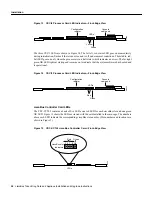
Installing the Applique Card Cage in the Chassis
The following steps describe how to install the applique card cage in the chassis. The applique card
cage can only be installed in one of the two far right large plate areas. (See Figure 10.) If you
removed the card cage to install the applique, proceed to step 2. (The large plate area will already be
open.)
Step 1
Remove a blank large plate from one of the two far right large plate areas (shown in
Figure 10) by removing the six screws that secure it.
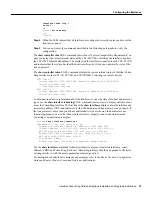
Figure 10
Installing the Applique Card Cage in the Chassis
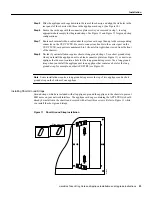
Step 2
Label each internal ribbon cable with a Token Ring interface number so that you can
connect the applique interfaces to the correct ports on the CSC-C2CTR.
Step 3
Place a corresponding external interface label on the face of each applique connector below
each Token Ring connector (Token0 on the top and Token1 on the bottom). Be sure to
match the interface numbers with the labels on the internal cables.
Step 4
Connect the appropriate internal Token Ring ribbon cable to the connectors on each
applique (Token0 to the top connector and Token1 to the bottom connector).
H1301a
Applique card cage cover
Cover fasteners (4)
APP-LTR2
applique
Applique
card cage
Rear of chassis
Filler plate
Large plate
APPL-LTR2
face plate