CIGWELD WeldSkill 250 MIG Operating Manual Download Page 29

5- 

Manual No 0-5072 

set up                                                                             weldskill 250, 350

December , 2008 

SECTION 5: 

SET UP FOR THE WELDSKILL 250, 350 POWER SOURCE  

5.01  Power Source Connections

A. Remove all packaging materials.
B. Connect the work lead to the negative welding 

terminal (-) [positive welding terminal (+) for 

flux cored electrode wire]. If in doubt, consult 

the electrode wire manufacturer.

C. Position a gas cylinder on the rear tray of the 

Power Source and lock securely to the Power 

Source cylinder bracket with the chain provided. 

If this arrangement is not used or the Power 

Source  is  not  fitted  with  a  gas  cylinder  tray 

then ensure that the gas cylinder is secured to a 

building pillar, wall bracket or otherwise securely 

fixed in an upright position.

5.02  Wirefeeder Connections 

A.  Connect the TORCH power cable to the positive 

welding terminal (+) [negative welding terminal 

(-) for flux cored electrode wire]. If in doubt, 

consult the electrode wire manufacturer.

B.   Fit the gas regulator and flowmeter to the gas 

cylinder then connect the gas hose from the rear 

of the Power Source to the Flowmeter outlet.

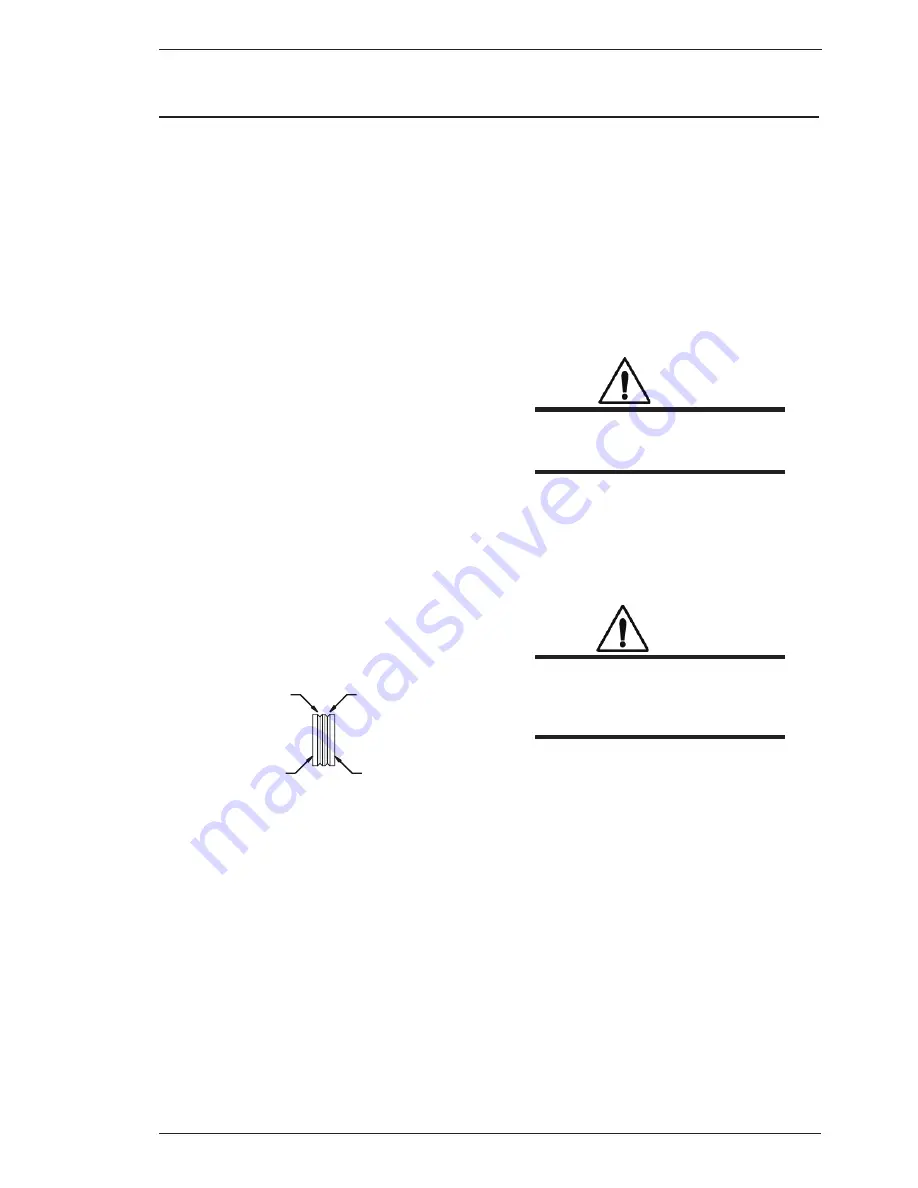
C. Dual groove feed rollers are supplied as stan-

dard. They can accommodate 0.9 / .2 diameter 

hard wires. Select the roller required with the 

chosen wire size marking facing outwards.


GROOVE “B”

GROOVE “A”

GROOVE “A” SIZE

GROOVE “B” SIZE

Art # A-08739

D. Fit  the  electrode  wire  spool  to  the  wire  reel 

hub. Ensure that the drive dog-pin engages the 

mating hole in the wire spool. Push the 'R' clip 

into place to retain the wire spool securely. The 

electrode wire should feed from the bottom of 

the spool.

E.  MIG Torch, EURO MIG Torch Connection
     Fit the MIG Torch to the Power Source by pushing 

the torch connector into the brass torch adaptor 

and screwing the plastic torch nut clockwise to 

secure the torch to the torch adaptor.  Remove 

the contact tip from the torch handset.

5.03  Common Connections

A. Lift  up  the  wire  feeder  pressure  levers  and 

pass the electrode wire through the inlet guide, 

between the rollers, through the centre guide, 

between  the  rollers,  through  the  outlet  guide 

and into the MIG torch.

B. Lift  up  the  wire  feeder  pressure  levers  and 

pass the electrode wire through the inlet guide, 

between the rollers, through the centre guide, 

between  the  rollers,  through  the  outlet  guide 

and into the MIG torch.


   WARNING

D O  N O T  W E A R  G L O V E S  W H I L E 

THREADING THE WIRE OR CHANGING 

THE WIRE SPOOL.

C. Lower the pressure levers and with the torch 

lead  reasonably  straight,  feed  the  electrode 

wire  through  the  torch.  Fit  the  appropriate 

contact tip, eg a 0.9mm tip for 0.9mm wire.

D. Press  the  Torch  switch  to  feed  the  wire 

through the torch.

   WARNING

The electrode wire will be at welding volt-

age potential whilst it is being fed through 

the wirefeeder system if the wire is fed by 

using the TORCH SWITCH.

5.04  Drive Roller Pressure Adjustment 

The moveable rollers apply pressure to the grooved 

feed  rollers  via  a  scaled  adjustable  tension  screw. 

These  devices  should  be  adjusted  to  a  minimum 

pressure  that  will  provide  satisfactory  WIREFEED 

without slippage. If slipping occurs, and inspection 

of the wire contact tip reveals no wear, distortion or 

burn back jam, the conduit liner should be checked 

for kinks and clogging by metal flakes and swarf. If 

it is not the cause of slipping, the feedroll pressures 

can be increased by rotating the scaled tension screws 

clockwise. The use of excessive pressure may cause 

rapid wear of the feed rollers, shafts and bearing.

Summary of Contents for WeldSkill 250 MIG

Page 1: ...Art A 09201 WELDSKILL 250 Operating Manual Version No AC Issue Date December 1 2008 Manual No 0 5072 Operating Features MIG WELDING MACHINE 350...

Page 2: ...help you to avoid potential hazards that may exist when working with this product YOU ARE IN GOOD COMPANY The Brand of Choice for Contractors and Fabricators Worldwide CIGWELD is the Market Leading Br...

Page 3: ...GWELD Pty Ltd 71 Gower Street Preston Victoria Australia 3072 www cigweld com au Copyright 2008 2009 by CIGWELD All rights reserved Reproduction of this work in whole or in part without written permis...

Page 4: ...ssories 2 7 SECTION 3 INSTALLATION 3 1 3 01 Environment 3 1 3 02 Location 3 1 3 03 Ventilation 3 1 3 04 Mains Supply Voltage Requirements 3 1 3 05 Installation And Use Users Responsibility 3 1 3 06 As...

Page 5: ...01 Routine Maintenance Inspection 8 1 8 02 Cleaning The Feed Rolls 8 1 8 03 Basic Troubleshooting 8 1 8 04 Solving Problems Beyond The Welding Terminals 8 1 8 05 Solving Problems Beyond The Welding Te...

Page 6: ......

Page 7: ...ess to prevent falling if working above floor level 15 Keep all panels and covers securely in place WARNING ARC RAYS can burn eyes and skin NOISE can damage hearing Arc rays from the welding process p...

Page 8: ...flying sparks and hot metal 2 Do not weld where flying sparks can strike flammable mate rial 3 Remove all flammables within 35 ft 10 7 m of the welding arc If this is not possible tightly cover them w...

Page 9: ...rmful exhaust gases 1 Use equipment outside in open well ventilated areas 2 If used in a closed area vent engine exhaust outside and away from any building air intakes WARNING ENGINE FUEL can cause fi...

Page 10: ...Even more frustrating it does not yet allow us to draw definite conclusions about questions of possible risk or to offer clear science based advice on strategies to minimize or avoid potential risks T...

Page 11: ...uirements among them are AS NZS 3652 EMC Directive EN50199 applicable to arc welding equipment generic emissions and regulations AS 60974 1 2006 applicable to welding equipment and associated accessor...

Page 12: ...1 December 1 2008 weldskill 250 350 Manual No 0 5072 This page left intentionally blank...

Page 13: ...will be shown in italics 2 02 Equipment Identification The unit s identification number specification or part number model and serial number usually appear on a nameplate attached to the machine Equip...

Page 14: ...ease Decrease Circuit Breaker AC Auxiliary Power Remote Duty Cycle Percentage Amperage Voltage Hertz cycles sec Frequency Negative Positive Direct Current DC Protective Earth Ground Line Line Connecti...

Page 15: ...es and provide guidelines on gaining the best production efficiency from the Power Source Please read this manual thoroughly before using your welder 2 06 User Responsibility This equipment will perfo...

Page 16: ...e temperature limits of the insulation of the component parts To explain the 10 minute duty cycle period the following example is used Suppose a Welding Power Source is designed to operate at a 30 dut...

Page 17: ...t Refer NOTE Below This Column Applies to the Factory Fitted 2 5mm2 20A Primary Lead This Column Applies to a 4 0mm2 27A Primary Lead Open Circuit Voltage Range 22 to 46 V 22 to 46 V Output Current Ra...

Page 18: ...ge 17 to 42 V Output Current Range 30 380 A Rated Output Duty Cycle 350A 30 100 Duty Cycle Output Rating 205 A Operating Temperature Range 0 C 40 C Duty Cycle Period 10 minutes Number of Output Voltag...

Page 19: ...eared Adaptor W4013215 Feed Roll Adaptor W4013216 Plain Pressure Roll top Table 2 3 Optional Accessories for 250 Part Number Description W4013200 Feed Roll 0 6 0 8 HARD W4013201 Feed Roll 0 8 1 0 HARD...

Page 20: ...2 Manual No 0 5072 weldskill 250 350 December 1 2008 This page left intentionally blank...

Page 21: ...lated 3 04 Mains Supply Voltage Requirements The Mains supply voltage should be within 10 of the rated Mains supply voltage Too low a voltage may cause poor welding performance Too high a supply volta...

Page 22: ...omagnetic Emissions A Mains Supply Welding equipment should be connected to the mains supply according to the manufacturer s recommen dations If interference occurs it may be necessary to take additio...

Page 23: ...table capacitance selected according to national regulations F Screening and Shielding Selective screening and shielding of other cables and equipment in the surrounding area may allevi ate problems o...

Page 24: ...3 Manual No 0 5072 weldskill 250 350 December 1 2008 This page left intentionally blank...

Page 25: ...Should this occur the operator will risk completing the electrical circuit through the body When welding in confined spaces where rea sonable movement is restricted particular care must be taken to en...

Page 26: ...t Such filter lenses are incorporated within welding handshields To prevent damage to the filter lenses from molten or hard particles an additional hard clear glass or special plastic external cover l...

Page 27: ...A R This should take no longer than 3 or 4 seconds 3 Place victim flat on their back on a hard surface open airway using head tilt and jaw support as shown 4 Begin artificial breathing 5 full breaths...

Page 28: ...4 Manual No 0 5072 December 1 2008 weldskill 250 350 This page left intentionally blank...

Page 29: ...the Power Source by pushing the torch connector into the brass torch adaptor and screwing the plastic torch nut clockwise to secure the torch to the torch adaptor Remove the contact tip from the torch...

Page 30: ...el hub incorporates a friction brake which is adjusted during manufacture for optimum breaking If it is considered necessary adjustment can be made by turning the large nut inside the open end of the...

Page 31: ...nnected to the Mains supply voltage and the internal electrical components are at Mains voltage potential 2 WIRESPEED CONTROL The Wirespeed Control knob controls the welding current via the electrode...

Page 32: ...ectrical connection 7 NEGATIVE WELDING TERMINAL Negative Welding Terminal Welding current flows from the Power Source via heavy duty bayonet type terminals It is essential however that the male plug i...

Page 33: ...eld SPOT This mode of welding is used to weld two plates together at a desired location by melting the top bottom plates together to form a nugget between them The spot time period is set by the SPOT...

Page 34: ...ng C BURNBACK Burnback time is the difference between the wirefeed motor stopping and switching off of the welding cur rent The Burnback time allows the electrode wire to burn out of the molten metal...

Page 35: ...GAS PURGE GAS PURGE Art A 08728 When the push button switch is pressed the shielding gas flows through the Wirefeed system out of the MIG torch nozzle The Wirefeed motor does not operate and welding...

Page 36: ...6 Manual No 0 5072 weldskill 250 350 December 1 2008 This page left intentionally blank...

Page 37: ...fusion If however the welding voltage is too high large drops will form on the end of the wire causing spatter The correct setting of voltage and Wirespeed can be seen in the shape of the weld deposit...

Page 38: ...This product is a particularly efficient MIG welder with the 0 9mm steel wire in spray transfer mode The savings from decreased welding time will more than cover the small cost penalty of the smaller...

Page 39: ...ource should also be wiped clean If necessary solvents that are recommended for cleaning electrical apparatus may be used Troubleshooting and repairing the WeldSkill 250 350 MIG Power Source should on...

Page 40: ...piece to a minimum 7 Maintain the MIG torch in good working order A B C Ensure that the gas holes are not blocked and gas is exiting out of the torch nozzle Do not restrict gas flow by allowing spatte...

Page 41: ...ncorrect torch angle Excessive heat input A B C Reduce voltage by reducing the Voltage Control switch positions or turn the Wirespeed control knob anticlockwise Adjust angle Increase the torch travel...

Page 42: ...wer penetration shielding gas Increase weld metal strength or revise design Decrease voltage by reducing the Voltage Control switches Slow the cooling rate by preheating part to be welded or cool slow...

Page 43: ...urities Gas regulator turned off Empty Cylinder A B C D Replace or repair Disconnect gas hose from the rear of Power Source or wirefeeder then raise gas pressure and blow out impurities Turn on Replac...

Page 44: ...8 Manual No 0 5072 weldskill 250 350 December 1 2008 This page left intentionally blank...

Page 45: ...WS250 W7004523 Fuse holder W7004512 Socket 50mm Dinse W7004524 Fuse 8A W7004535 Fuse 3A Table Appendix 1 1 Key Spare Parts for 250 Part No Description Part No Description W7004500 Main Transformer W70...

Page 46: ...rve WeldSkill 250 VA Curve 0 0 5 0 10 0 15 0 20 0 25 0 30 0 35 0 40 0 45 0 50 0 0 20 40 60 80 100 120 140 160 180 200 220 240 260 280 300 Amps Volts Art 0 08731 WeldSkill 350 VA Curve Weldskill 350 VA...

Page 47: ...TIAL DAMAGES SUCH AS BUT NOT LIMITED TO LOST PROFITS AND BUSINESS INTERRUPTION The remedies of the Purchaser set forth herein are exclusive and the liability of CIGWELD with respect to any contract or...

Page 48: ...our Accredited Distributor in writing of its claim within seven 7 days of becoming aware of the basis thereof and at its own expense returning the goods which are the subject of the claim to CIGWELD o...

Page 49: ...ated the warranty period includes parts and labour CIGWELD reserves the right to request documented evidence of date of purchase CIGWELD WeldSkill 250 350 MIG WELDING EQUIPMENT WARRANTY PERIOD Origina...

Page 50: ......

Page 51: ...onesia Kawasan Industri Jababeka JI Jababeka VI Blik P No 3 Cikarang Bekasi 17550 Indonesia Tel 62 21 893 6071 Fax 62 21 893 6067 6068 http www thermadyne com Thermadyne Asia Sdn Bhd Lot 151 Jalan Ind...

Page 52: ...Corporate Headquarters 71 Gower Street Preston Victoria Australia 3072 Telephone 61 3 9474 7400 FAX 61 3 9474 7488 Email cigweldsales cigweld com au www cigweld com au...

Reviews: