background image

CI Systems 

SR-800R 

9.3.6 

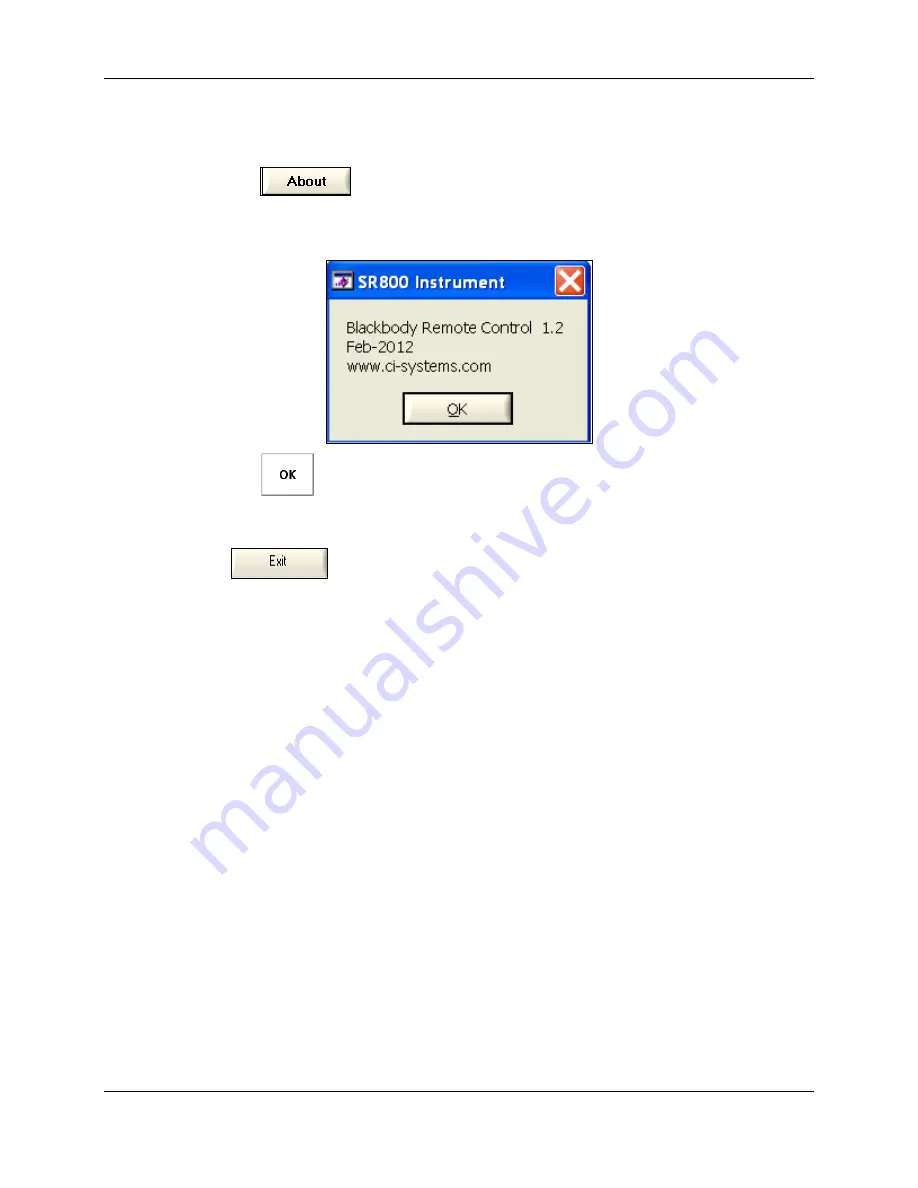
Viewing the SR-800R Remote Control Program Version 

1. Click 

 to view the SR-800R Remote Control Program Version. The 

following opens: 

Figure  9-5:  Blackbody Remote Control Program Version 


2. Click 

 to close and return to the Main Window. 

9.3.7 

Exiting the SR-800R Remote Control Program 

Click 

 to close the SR-800R Remote Control Program and return to the 

Desktop. 


605-7040  

Operation 

Manual 

Rev D 

9-7 


June 2013 

Artisan Technology Group - Quality Instrumentation ... Guaranteed | (888) 88-SOURCE | www.artisantg.com

Summary of Contents for ControlMaster SR-800R

Page 1: ...l service in house repair center WE BUY USED EQUIPMENT Sell your excess underutilized and idle used equipment We also offer credit for buy backs and trade ins www artisantg com WeBuyEquipment REMOTE INSPECTION Remotely inspect equipment before purchasing with our interactive website at www instraview com LOOKING FOR MORE INFORMATION Visit us on the web at www artisantg com for more information on ...

Page 2: ...ControlMaster SR 800R Extended Area Blackbody Operation Manual Manual P N 605 7040 Rev D June 2013 Artisan Technology Group Quality Instrumentation Guaranteed 888 88 SOURCE www artisantg com ...

Page 3: ...e duplicated released disclosed or used in whole or in part for any purpose other than that stated herein without the express written permission of CI Systems Technical Support Tel 972 4 6448888 Fax 972 4 6543570 Address CI Systems P O Box 147 Industrial Park Ramat Gabriel Migdal Ha Emek Israel 10551 E mail cis ci systems com Web site www ci systems com This document was designed and written by N ...

Page 4: ...he SR 800R Chapter 5 Maintenance Provides safety and troubleshooting maintenance information and step by step instructions on how to perform preventive and scheduled maintenance tasks on the SR 800R Chapter 6 SR 800R Communication Protocol Defines the communications protocol between the ControlMaster Blackbody and the HOST Chapter 7 Removable Sensors Provides the removal and installation procedure...

Page 5: ...l B September 2010 Addition of 2 and 14 20 Blackbodies All C June 2012 Technical Updates Formats All D June 2013 Addition of the LT Blackbody option Technical Updates Formats All 605 7040 Operation Manual Rev D iv June 2013 Artisan Technology Group Quality Instrumentation Guaranteed 888 88 SOURCE www artisantg com ...

Page 6: ...tor Pinout 2 9 2 4 5 LAN Connector Pinout 2 10 2 4 6 GPIB Connector Pinout 2 11 2 5 SR 800R Block Diagram Description 2 12 3 OPERATION 3 1 3 1 Powering on the SR 800R 3 1 3 2 Operation Procedures 3 4 3 2 1 Absolute Mode Window 3 5 3 2 2 Differential Mode Window 3 9 3 2 3 Menu Window 3 13 3 2 3 1 Mode 3 14 3 2 3 2 Preset Setup 3 16 3 2 3 3 Motion Control 3 18 3 2 3 4 IO Control 3 19 3 2 3 5 MRTD 3 ...

Page 7: ...ctrical Interface 6 1 6 1 2 Communication Sequence Timing 6 1 6 1 3 Transferred Data Format 6 2 6 1 4 Naming Bits 6 2 6 1 5 Command Message Structure 6 2 6 1 6 End of Message EOM 6 3 6 1 7 Error Messages 6 3 6 2 Communication Protocol 6 4 6 2 1 SETMODE 6 8 6 2 2 GETAXISSTATUS 6 8 6 2 3 AXISHOMING 6 9 6 2 4 SETTARGET 6 10 6 2 5 SA 6 11 6 2 6 SETACTIVEAXIS 6 12 6 2 7 GETACTIVEAXIS 6 13 6 2 8 GETNUMB...

Page 8: ...INT 6 26 6 2 34 GETDIFFERENTIALSETPOINT 6 27 6 2 35 SETCOMPUTERNAME 6 27 6 2 36 GETTEMPERATURERANGE 6 28 6 2 37 RG 6 29 6 2 38 RV 6 30 6 2 39 GETBITERROR 6 31 6 2 40 DM 6 31 6 2 41 CALIBRATETOUCHPANEL 6 32 6 2 42 SETREMOTETYPE 6 32 6 2 43 Computer to GPIB Serial Poll Procedure 6 33 6 2 43 1 Description 6 33 6 2 43 2 Response 6 33 7 REMOVABLE SENSORS 7 1 7 1 General 7 1 7 2 Emitter Sensor Replaceme...

Page 9: ...System and Low Temperature Blackbody 8 6 8 4 2 Connecting Pipes and Dry Nitrogen to the Low Temperature Blackbody 8 8 8 4 3 Connecting Pipes to the Julabo Circulation System 8 12 8 4 4 Cable Connection 8 13 8 4 5 Operation Instructions 8 15 8 5 Disassembling the System 8 17 8 5 1 Shutting Down the System 8 17 8 5 2 Draining the Fluid from the Blackbody 8 17 8 5 3 Disconnecting the Pipes from the B...

Page 10: ...otocol 9 3 9 3 3 Selecting a Target 9 6 9 3 4 Settings of the Blackbody 9 6 9 3 5 Using the I O Control Feature 9 6 9 3 6 Viewing the SR 800R Remote Control Program Version 9 7 9 3 7 Exiting the SR 800R Remote Control Program 9 7 10 APPENDIX A CALIBRATION METHODS 10 1 INDEX 10 1 605 7040 Operation Manual Rev D ix June 2013 Artisan Technology Group Quality Instrumentation Guaranteed 888 88 SOURCE w...

Page 11: ...2 12 Figure 3 1 Controls Indicators 3 1 Figure 3 2 Power Up Sequence Message 3 2 Figure 3 3 Absolute Mode Window Description 3 2 Figure 3 4 Differential Mode Window Description 3 3 Figure 3 5 Absolute Mode Window 3 5 Figure 3 6 Using the Floating Keypad 3 6 Figure 3 7 Selecting a Preset Using the Preset Buttons 3 7 Figure 3 8 Selecting a Preset from the Preset Menu 3 8 Figure 3 9 Differential Mode...

Page 12: ...e 3 38 Target Type Tuning 3 34 Figure 3 39 Settings 3 36 Figure 3 40 Reboot Message 3 38 Figure 3 41 Communications Setup 3 39 Figure 3 42 Communications Setup Direct LAN setup 3 40 Figure 3 43 Setting Up the Host Computer for Direct Link 3 41 Figure 3 44 Setting Up the Internet Protocol TCP IP 3 42 Figure 3 45 Re Store Factory Defaults 3 43 Figure 3 46 Absolute Temperature Setting 3 44 Figure 3 4...

Page 13: ...Low Temperature Blackbody Removal of Pipe Clamps 8 8 Figure 8 5 Connecting Pipes and Dry Nitrogen to the Low Temperature Blackbody Removal of Pipes Inlet Caps 8 9 Figure 8 6 Connecting Pipes and Dry Nitrogen to the Low Temperature Blackbody Fastening the Pipes 8 10 Figure 8 7 Connecting Pipes and Dry Nitrogen to the Low Temperature Blackbody Fastening the Pipe Clamps 8 11 Figure 8 8 Connecting Pip...

Page 14: ...ut Output LAN Local Array Network LCD Liquid Crystal Display MCC Motion Control Card MMI Man Machine Interface MRTD Minimum Resolvable Temperature Difference NIST National Institute of Standards and Technologies PAC Power Amplifier Card PRT Platinum Resistance Thermometer PS Power Supply TSC Temperature Sense Card TTL Transistor Transistor Logic Applicable Documents N A 605 7040 Operation Manual R...

Page 15: ...not strictly observed could result in damage to or destruction of equipment NOTE An operating procedure practices and so forth which is essential to highlight WARNING Handle this product only as instructed in this manual Do not attempt to operate or maintain this product in a manner not specifically stated in this manual Failure to comply could result in injury to personnel and or damage to equipm...

Page 16: ...h the Blackbody surfaces during operation If necessary use the Blackbody carrying handle Failure to comply may result in injury to personnel CAUTION Power off the SR 800R before disconnecting or replacing any SR 800R cable Failure to comply may result in damage to equipment Always observe standard safety precautions during the installation operation and maintenance of this product 605 7040 Operati...

Page 17: ...Artisan Technology Group Quality Instrumentation Guaranteed 888 88 SOURCE www artisantg com ...

Page 18: ...artment The calibration of the blackbody can be updated where it is used requiring no special tools no expensive equipment no specially trained technicians and almost no downtime The calibration procedure simply involves ordering a freshly calibrated sensor and replacing the old sensor with the new one Details of the process provided in this document will assure that the instrument stays calibrate...

Page 19: ...e a sensor 1 Order a new calibrated sensor s from CI Systems 2 Replace the old sensor s with the new one 3 Upload the calibration data via your PC Now your test station is back in operation fully calibrated and NIST traceable However users who prefer to carry out calibration themselves can do so using the CK 800R Calibration Kit For more details about calibration methods refer to Appendix A Calibr...

Page 20: ...ated radiation heads independent of the controller Ethernet GPIB IEEE 488 and RS232 communication ports Remote control over a local area network Large color LCD display Touch screen user interface Ability to control up to four motorized wheels 2 4 20 standard heads other head dimensions available upon request Seven general purpose I O ports five outputs and two inputs Compact and portable controll...

Page 21: ...erating Voltage 90 240VAC 50 60 Hz Operating Temperature 0 C to 50 C Storage Temperature 20 C to 70 C Relative Humidity 95 non condensing Controller Dimensions 342x310x133 mm 3U Height Controller Weight 10 Kg 605 7040 Operation Manual Rev D 1 4 June 2013 Artisan Technology Group Quality Instrumentation Guaranteed 888 88 SOURCE www artisantg com ...

Page 22: ...Blackbodies the SR 800R Controller can simultaneously control various models of Blackbodies for information on the models and their specifications refer to the SR 800R data sheets Host Computer used for remote control of the SR 800R Controller when the SR 800R Controller is integrated as part of an Electro optics Test System Motorized Target Wheels the SR 800R Controller can operate and control up...

Page 23: ...rk Only one protocol can be active The communication protocols are LAN standard LAN Ethernet communication port may be used when the SR 800R Controller operates under the control of a host computer either directly or via the computer network RS232 standard RS232 communication port may be used when the SR 800R Controller operates under the control of a host computer or operates under the control of...

Page 24: ...n the Emitter and the target is controlled The target plate is mounted in front of the emitter surface The efficiency of the thermoelectric modules is ensured by a heat sink and a fan Mounted in the emitter and target plates are two PRT sensors used by the controller to measure their temperature difference The target is clamped to the target holder with captive screws and can be easily replaced Th...

Page 25: ...ification Label BB to ControlMaster Connector Fan Emitter Sensor Cover Target Sensor The BB contains a Temperature Sensor Card TSC which is used for Reading the emitter and target temperature Storing the BB temperature calibration data Storing the BB identification data Model S N etc Storing the sensors data Digital communication with the SR 800R Controller 605 7040 Operation Manual Rev D 2 4 June...

Page 26: ...y to the SR 800R 2 Soft Touch Panel Soft touch LCD colored panel used as the MMI of the SR 800R 3 Brightness A linear potentiometer used to set the LCD screen brightness 4 Carrying Handle Used when the SR 800R is functioning as a portable device Figure 2 3 Controls Indicators Power Soft Touch Panel Brightness Carrying Handle 605 7040 Operation Manual Rev D 2 5 June 2013 Artisan Technology Group Qu...

Page 27: ...e SR 800R connectors are shown in Figure 2 4 Figure 2 4 Connectors 110 230V F12 5A I O RS232 GPIB LAN HEAD AXES 1 2 AXES 3 4 605 7040 Operation Manual Rev D 2 6 June 2013 Artisan Technology Group Quality Instrumentation Guaranteed 888 88 SOURCE www artisantg com ...

Page 28: ...disconnect the power cable from Mains before replacing the fuse or performing any maintenance activities on the SR 800R 3 I O 20m SR 800R I O devices A D type 9 pin female connector contains five general purpose output channels and two general purpose inputs used to drive or sense devices that may be connected to these channels 4 RS232 4m 15m SR 800R Host Computer Standard RS232 communication port...

Page 29: ...puter network 7 HEAD 4m 20m SR 800R Blackbody A D type 25 pin female connector the SR 800R Controller to Blackbody connection used to power the head and communicate digitally with the temperature sensor card located inside the Blackbody 8 AXES 1 2 4m 20m SR 800R Two Stepper motors A D type 25 pin male connector used to control up to two step motor devices such as Target Wheels and Stage 9 AXES 3 4...

Page 30: ...ut Drive 24 1 V 100 Max 8 OUT5 Output Drive 24 1 V 100 Max 9 GND Ground 2 4 4 RS232 Connector Pinout Table 2 4 lists the RS232 Connector Pinout Table 2 4 RS232 Connector Pinout Pin Signal Name Function Max Voltage V Max Current mA 1 DCD Data Carrier Detect 25 2 2 RXD Received Data 25 15 3 TXD Transmitted Data 7 5 2 4 DTR Data Terminal Ready 7 5 15 5 GND Ground 6 DSR Data Set Ready 25 2 7 RTS Reque...

Page 31: ...ignal Name Function Max Voltage V Max Current mA 1 TXP Transmitted Data 7 2 TXN Transmitted Data 7 3 RXP Received Data 7 4 RXN Received Data 7 5 Not used 6 Not used 7 Not used 8 Not used 605 7040 Operation Manual Rev D 2 10 June 2013 Artisan Technology Group Quality Instrumentation Guaranteed 888 88 SOURCE www artisantg com ...

Page 32: ...L 2 7 NRFD Ready For Data TTL 2 8 NDAC Data Accept TTL 2 9 IFC Interface Clear TTL 2 10 SRQ Status Request TTL 2 11 ATN Attention TTL 2 12 SHIELD Connected to the shield 13 DIO5 Data IO5 TTL 2 14 DIO6 Data IO6 TTL 2 15 DIO7 Data IO7 TTL 2 16 DIO8 Data IO8 TTL 2 17 GND Ground 18 GND Ground 19 GND Ground 20 GND Ground 21 GND Ground 22 GND Ground 23 GND Ground 24 GND Ground 605 7040 Operation Manual ...

Page 33: ...supply 24VDC 4A LCD the SR 800R display 320x240 resolution Inverter the LCD backlight high voltage power supply Touch Panel the input device where the operator operates the SR 800R by pressing on the LCD Touch Panel Motherboard Card Cage used to house the CPU and the MCC cards as well as supply power to the SR 800R cards 3 3 V 15 W and 5 V 15 W CPU Card used to manage and control the entire SR 800...

Page 34: ...nding on the Blackbody type The PA is powered by the AC DC Converter Card Two card grades are available grades A and C The grades differ in their throughput power Compatibility is required between the card grade and Blackbody type model Temperature Sensor Card TSC located in the Blackbody The card is used to sense the Blackbody temperature to store the BB temperature calibration data to store the ...

Page 35: ...Artisan Technology Group Quality Instrumentation Guaranteed 888 88 SOURCE www artisantg com ...

Page 36: ...wering on the SR 800R Power on the SR 800R using the Power switch see Figure 3 1 Figure 3 1 Controls Indicators Power Soft Touch Panel Brightness Carrying Handle 605 7040 Operation Manual Rev D 3 1 June 2013 Artisan Technology Group Quality Instrumentation Guaranteed 888 88 SOURCE www artisantg com ...

Page 37: ...The power up sequence continues however Upon BIT completion and pending pre setup of the SR 800R the Temperature Control window opens in either the Absolute or Differential working modes for step by step instructions on how to change the working mode see Section 3 2 3 1 Mode Figure 3 3 Absolute Mode Window Description Blackbody Model Working Mode Temperature Scale Celsius or Kelvin 605 7040 Operat...

Page 38: ...Model Working Mode Temperature Scale Celsius or Kelvin The power on sequence is completed The SR 800R is ready for operation see Section 3 2 605 7040 Operation Manual Rev D 3 3 June 2013 Artisan Technology Group Quality Instrumentation Guaranteed 888 88 SOURCE www artisantg com ...

Page 39: ...tric Offset in MRTD Tests Section 3 2 3 5 1 MRTD Test Window Section 3 2 3 5 2 Setting Up the MRTD Test Section 3 2 3 5 3 MRTD Test Run Window Section 3 2 3 5 4 Options Section 3 2 3 6 Motion Setup Section 3 2 3 6 1 Settings Section 3 2 3 6 2 Communications Section 3 2 3 6 3 Re Store Factory Section 3 2 3 6 4 Touch Panel Calibration Section 3 2 3 6 5 Temperature see Section 3 2 3 6 6 About Section...

Page 40: ...only Te SET from a predefined Preset list for detailed information on how to predefine the list see Section 3 2 3 2 Preset Setup To use the Absolute Mode Window 1 Set the temperature of the Blackbody Emitter default selection a Press The Te SET button turns red and the temperature adjustment is enabled To cancel press again b To set a temperature use one of the following Press on the up down arrow...

Page 41: ...led as SOURCE or FILTER The TARGET button turns red and the target selection is enabled b Select a target by using the up down arrows The target name is displayed in the TARGET field c Press to execute your settings The Target Wheel starts to rotate toward the selected target The TARGET button blinks until the selected target is valid d To define the target parameters see Section 3 2 3 6 1 Motion ...

Page 42: ... turns red a gray button is invalid no Preset is available Figure 3 7 Selecting a Preset Using the Preset Buttons b Press to execute your selection The Te field continuously displays the temperature of the Blackbody Emitter The Tt field continuously displays the target temperature The TARGET field is updated with the preset and the target is selected on the Target Wheel The P1 button blinks until ...

Page 43: ... the new Preset The Te field continuously displays the temperature of the Blackbody Emitter The Tt field continuously displays the target temperature The TARGET field is updated with the preset and the target is selected on the Target Wheel The P button blinks until the Emitter temperature reaches the requested temperature in the Te SET field You have completed the setting of the Blackbody tempera...

Page 44: ...of T SET and TARGET or only T SET from a predefined Preset list for detailed information on how to predefine the list see Section 3 2 3 2 Preset Setup To use the Differential Mode Window 1 Set the temperature difference between the Blackbody Emitter and the target default selection a Press The DT SET button turns red and temperature setting is enabled b To set a temperature use one of the followin...

Page 45: ... be labeled as SOURCE or FILTER The TARGET button turns red and the target selection is enabled b Select a target by using the up down arrows The target name is displayed in the TARGET field c Press to execute your settings The Target Wheel starts to rotate toward the selected target The TARGET button blinks until the selected target is valid d To define the target parameters see Section 3 2 3 6 1...

Page 46: ...urns red a gray button is invalid no Preset is available Figure 3 11 Selecting a Preset Using the Preset Buttons b Press to execute your selection The T field continuously displays the temperature of the Blackbody Emitter The Tt field continuously displays the target temperature The TARGET field is updated with the preset and the target is selected on the Target Wheel The P1 button blinks until th...

Page 47: ...T field continuously displays the temperature of the Blackbody Emitter The Tt field continuously displays the target temperature The TARGET field is updated with the preset and the target is selected on the Target Wheel The P button blinks until the Emitter temperature reaches the requested temperature in the DT SET field You have set the temperature of the Blackbody Emitter using the Differential...

Page 48: ... Menu Window includes Mode Section 3 2 3 1 Preset Setup Section 3 2 3 2 Motion Control Section 3 2 3 3 IO Control Section 3 2 3 4 MRTD Section 3 2 3 5 Options Section 3 2 3 6 About Section 3 2 3 7 To close and return to the Main window press 605 7040 Operation Manual Rev D 3 13 June 2013 Artisan Technology Group Quality Instrumentation Guaranteed 888 88 SOURCE www artisantg com ...

Page 49: ...work in Differential mode select the Differential radio button see Section 3 2 2 Differential Mode Window 3 Set the temperature Scale Kelvin or Celsius that is to be displayed in the main window in either the Absolute or Differential modes a To display the temperature measurements in Celsius select the Celsius radio button b To display the temperature measurements in Kelvin select the Kelvin radio...

Page 50: ...tric Offset settings b Set the offset by using the up down arrows 0 001 resolution OR press the Radiometric Offset numeric edit field to open the floating Keypad and enter the required offset by pressing the desired number keys and then press The R letter is displayed in the main window next to the T sign To close and return to the last opened window the Menu Window press To close and return to th...

Page 51: ...nu Window press The following window opens Figure 3 15 Preset Setup To set a new list or update a predefined list 2 Press The PRESET button turns red 3 Select a Preset No by using the up down arrows 4 Set the temperature a Press The TEMP SET button turns red and the temperature setting is enabled To cancel press again b Press the TEMP SET numeric edit field A floating Keypad opens c Enter the requ...

Page 52: ... required target a blank field selection is acceptable e g the current target selection remains as is 6 Press to save your settings 7 To set new or update an existing Preset No repeat steps 2 6 8 To clear the entire list settings press 9 To close and return to the last opened window the Menu Window press 10 To close and return to the Main window press 605 7040 Operation Manual Rev D 3 17 June 2013...

Page 53: ... list by using the Up Down buttons The target name is displayed under the selected axis button 3 Press The selected axis target wheel rotates until the required target reaches its position The axis button remains red 4 To select a target from another axis target wheel repeat steps 1 3 replacing AXIS1 with another available axis 5 In order to reset the target wheel axis press The target wheel rotat...

Page 54: ... Off The Off message changes to the On message 2 To switch OFF any output press The Turn Off button changes to Turn On The On message changes to the Off message If valid you can monitor up to two Inputs The On message indicates that the input device is active above a predefined threshold The Off message indicates that the input device is inactive below a predefined threshold To close and return to...

Page 55: ...en being able to resolve the target s individual features and not being able to resolve them Figure 3 18 MRTD Typical 4 Bar Targets 3 2 3 5 1 Using Radiometric Offset in MRTD Tests The Radiometric Offset can be used to shorten the duration of MRTD Tests A Radiometric Offset is defined as a constant temperature deviation added artificially to the real Blackbody differential temperature This feature...

Page 56: ... Menu Window press The following window opens Figure 3 19 MRTD Test The MRTD Test window includes the following tasks Setting Up the MRTD Test see Section 3 2 3 5 3 MRTD Test Run Window see Section 3 2 3 5 4 605 7040 Operation Manual Rev D 3 21 June 2013 Artisan Technology Group Quality Instrumentation Guaranteed 888 88 SOURCE www artisantg com ...

Page 57: ...eel select the axis from the Current Axis pull down list The selected axis is displayed on the Current Axis field 3 To setup up to five pairs of temperature and target a Press the last available Step number button 1 in this example The Step number turns red The following window opens listing all possible 4 bar targets of the selected target wheel Figure 3 21 MRTD Test Setup 2 of 5 605 7040 Operati...

Page 58: ...d enter a value related to the selected spatial frequency according to the FLIR MRTD specifications and then press The floating Keypad closes The value you entered is displayed in the dT Spec field e Press the dT Start field A floating Keypad opens Figure 3 22 MRTD Test Setup 3 of 5 605 7040 Operation Manual Rev D 3 23 June 2013 Artisan Technology Group Quality Instrumentation Guaranteed 888 88 SO...

Page 59: ...is displayed under Step 1 b Repeat step 2 replacing Step 1 with the next step number A general view of five steps frequencies is displayed as shown below Figure 3 24 MRTD Test Setup 5 of 5 5 To remove delete the last line of the target press The last line is deleted pressing Remove again will delete the last remaining line 6 Press to close and return to the MRTD main window 605 7040 Operation Manu...

Page 60: ... transient situation for the temperature and target of Step 1 on the MRTD test When the target has reached its position and the BB temperature has stabilized the Status field displays the Ready indication and the red target color turns yellow 2 Observe the target on the FILR monitor and change the temperature by using the Temperature up down arrows Wait until the temperature has stabilized and the...

Page 61: ...d Figure 3 26 MRTD Test Results Chart 6 You may press to view the MRTD Test results in a table format Figure 3 27 MRTD Test Results Table 7 You may stop running the MRTD test at any time by pressing To close and return to the last opened window Figure 3 26 press 605 7040 Operation Manual Rev D 3 26 June 2013 Artisan Technology Group Quality Instrumentation Guaranteed 888 88 SOURCE www artisantg co...

Page 62: ...assword dialog box opens Figure 3 28 Password 2 Using the Keypad enter your password default 123 and press The following Options window opens Figure 3 29 Options To close and return to the last opened window the Menu Window press To close and return to the Main window press 605 7040 Operation Manual Rev D 3 27 June 2013 Artisan Technology Group Quality Instrumentation Guaranteed 888 88 SOURCE www ...

Page 63: ...3 6 6 3 2 3 6 1 Motion Setup The Motion Setup window allows you to setup axis and target list defined in a target wheel To open the Motion Setup window From the Options window press The following window opens Figure 3 30 Motion Setup 3 2 3 6 1 1 Axis Setup 1 Press The following Axis Setup window opens Figure 3 31 Axis Setup 605 7040 Operation Manual Rev D 3 28 June 2013 Artisan Technology Group Qu...

Page 64: ...value is displayed in the EFL field If the value is set to 0 all the target sizes will be displayed in units of mm otherwise the target sizes are displayed in mRads or Cy mRad c Press to save your changes 4 Plate Distance The Plate Distance value indicates the distance between each of two consecutive plates measured in wheel MSteps If each plate holds only one target in its center then the distanc...

Page 65: ...ct a target from the list you may browse the list by using the Up Down buttons b From the Type pull down menu select a new target type Figure 3 33 Target Setup Type Pull Down Menu c Press and confirm the modification to the target setup 605 7040 Operation Manual Rev D 3 30 June 2013 Artisan Technology Group Quality Instrumentation Guaranteed 888 88 SOURCE www artisantg com ...

Page 66: ...to enter edit the target name Figure 3 34 Alphanumeric Keypad c Complete the action by pressing OK or discard the changes by pressing Cancel d Press to save the new settings Figure 3 35 Saving New Settings 605 7040 Operation Manual Rev D 3 31 June 2013 Artisan Technology Group Quality Instrumentation Guaranteed 888 88 SOURCE www artisantg com ...

Page 67: ... To verify the target new positioning press and check that the target wheel rotates to the desired location 6 To Set the Temperature Offset The temperature offset settings should be carried out for every target If the Temperature Offset 0 then the system is using the Radiometric Offset value providing that the Radiometric Offset is set to On see Section 3 2 3 1 step 4 a In the Differential Mode wi...

Page 68: ...ding a New Target to the Target List c Select the TargetID and press The window closes d Select the target Type see step 2 e Set the target Name see step 3 f Define the target Size in mm see step 4 g Define the target Position in Msteps see step 5 h Press and confirm the modification of the Target Setup 605 7040 Operation Manual Rev D 3 33 June 2013 Artisan Technology Group Quality Instrumentation...

Page 69: ...o longer displayed in the Select Target list 9 Target Tuning fine tuning the Positioning of the Targets on the Target Wheel a Select a target from the list you may browse the list by using the Up Down buttons b Press The following Target Tuning window opens while the Target Wheel rotates to the selected target position Figure 3 38 Target Type Tuning 605 7040 Operation Manual Rev D 3 34 June 2013 A...

Page 70: ...ve your changes g Press to return to the Target Setup window h Repeat steps a g to tune all the remaining targets NOTE If each wheel plate contains only one target and target T01 is already fine tuned then you can fine tune all the remaining targets automatically by pressing the Adjust All button NOTE To immediately stop the Target Wheel rotation press This causes an error in the absolute position...

Page 71: ... are The last Set Temperature of the Absolute Differential The last Temperature Scale Celsius Kelvin The Radiometric Offset On Off The last status of the IO_Out Ports On Off The last selected target b If you want the SR 800R to boot with the system defaults settings select the Default option The system defaults are Absolute temperature of 25 C and Differential temperature of 0 C The Temperature Sc...

Page 72: ... Axis 4 To Set the Blackbody Head Type of the SR 800R use the drop down menu to select the Head type of the blackbody There are 2 types that can be defined Abs Diff and Abs only Abs Only is a must if the target sensor is disconnected or not exist NOTE Blackbodies that operate in Abs Diff mode require that the Head be connected to Target Sensor Otherwise the system will not operate correctly A fact...

Page 73: ...ompting you to re boot the SR 800R c Confirm the parameter updates by pressing Yes Figure 3 40 Reboot Message d Turn the SR 800R OFF and ON Note that the display of the Main and Menu windows has been changed 6 Press to update the settings in the system 7 To close and return to the last opened window the Options window press 8 To close and return to the Main window press 605 7040 Operation Manual R...

Page 74: ... IP address and SubNet Mask The settings can be changed by clicking on each three consecutive numbers value and typing the new number value You can also connect the SR 800R directly to a computer not through the local network In this case you must use a Direct LAN or crossover cable this may be ordered from CI Systems You need also to change the setting of your computer the computer IP address sho...

Page 75: ...P addresses Usually when connected via a DHCP network server this is done automatically In cases where there is no in house network and or for security reasons the connection needs to be direct use the Direct Link method The LAN can be used to remotely connect to the SR 800R by implementation of the communications protocol It is also needed for updating the SR 800R application program via the SR 8...

Page 76: ...ections Start Settings Network Connections Local Area Connection The following window opens Figure 3 43 Setting Up the Host Computer for Direct Link b Select the Internet Protocol TCP IP and click The Internet Protocol TCP IP Properties window opens 605 7040 Operation Manual Rev D 3 41 June 2013 Artisan Technology Group Quality Instrumentation Guaranteed 888 88 SOURCE www artisantg com ...

Page 77: ...with the LAN Output socket on the SR 800R You should now be able to communicate directly with the SR 800R NOTE To restore to the original settings on the Host Computer set the TCP IP Properties back to Obtain an IP Address Automatically and on the SR 800R restore the Communication Type that was active such as GPIB or RS232 etc via the Communications Setup window 605 7040 Operation Manual Rev D 3 4...

Page 78: ...troller 1 From the Options window press The following window opens Figure 3 45 Re Store Factory Defaults 2 Press to continue The following opens 3 To confirm and restore the factory defaults press To cancel press 605 7040 Operation Manual Rev D 3 43 June 2013 Artisan Technology Group Quality Instrumentation Guaranteed 888 88 SOURCE www artisantg com ...

Page 79: ...ach cross sign Upon completion the Options window re opens 3 2 3 6 6 Temperature The Temperature option allows you to set the temperature display resolution the arrow increments and the temperature stabilization attributes 1 From the Options window press Pending on the blackbody working mode the following window opens Figure 3 46 Absolute Temperature Setting 605 7040 Operation Manual Rev D 3 44 Ju...

Page 80: ... resolution of the Temperature value display from the Display Resolution drop down list Figure 3 48 Temperature Display Resolution Setting 605 7040 Operation Manual Rev D 3 45 June 2013 Artisan Technology Group Quality Instrumentation Guaranteed 888 88 SOURCE www artisantg com ...

Page 81: ...t value must be higher than the Display Resolution value The dT MRTD field is used for MRTD stabilization only 5 To restore the temperature window values press the default values are as shown in Figure 3 47 6 Press to update the settings in the system 7 To close and return to the last opened window the Options window press 8 To close and return to the Main window press 605 7040 Operation Manual Re...

Page 82: ...enu Window The following About ControlMaster window opens Figure 3 49 About 2 To change the Controller Name a Press the Controller Name field A floating Alphanumerical Keypad opens Figure 3 50 Changing the Controller Name 1 of 3 605 7040 Operation Manual Rev D 3 47 June 2013 Artisan Technology Group Quality Instrumentation Guaranteed 888 88 SOURCE www artisantg com ...

Page 83: ...ss to approve your changes The About window re opens with the new updated Controller Name Figure 3 52 Changing the Controller Name 3 of 3 3 To close and return to the last opened window the Menu Window press 4 To close and return to the Main window press 605 7040 Operation Manual Rev D 3 48 June 2013 Artisan Technology Group Quality Instrumentation Guaranteed 888 88 SOURCE www artisantg com ...

Page 84: ...l packaging 4 2 Storage While packed in its original packaging the SR 800R can be stored in the following conditions Temperature range 20 C to 70 C Relative humidity 5 95 non condensing 4 3 Installation CAUTION Tighten all screws using hand torque only Failure to comply may result in damage to equipment The SR 800R installation includes the following main stages Unpacking see Section 4 3 1 Install...

Page 85: ... two configurations Portable Configuration see Section 4 3 2 1 19 Rack Mount Configuration see Section 4 3 2 2 4 3 2 1 Portable Configuration This procedure provides step by step instructions on how to install the SR 800R to be operated as a portable unit To install 1 Unpack the SR 800R 2 Open the carrying handle as shown in Figure 4 1 3 Place the SR 800R on the Bench Figure 4 1 Portable Configura...

Page 86: ... Connectors 110 230V F12 5A I O RS232 GPIB LAN HEAD AXES 1 2 AXES 3 4 Now you have completed installation of the SR 800R as a portable unit The SR 800R is ready for operation For information on how to use and operate the SR 800R refer to Chapter 3 of this manual CAUTION Power off the SR 800R before disconnecting or replacing any SR 800R cable Failure to comply may result in damage to equipment 605...

Page 87: ...k Figure 4 3 19 Rack Mount Configuration typical Carrying Handle Tightening Screw x4 Rack Adapter x2 Removal Installation 3 Connect the cables see Figure 4 2 d Connect the HEAD cable between the SR 800R HEAD connector and the Blackbody connector e Connect all the other cables you might use such as AXES 1 2 AXES 3 4 I O LAN RS232 and GPIB f Connect the power cable between the SR 800R 110 230V conne...

Page 88: ...rom mains Failure to comply may result in injury to personnel and or damage to equipment HOT SURFACE The Blackbody may contain hot surfaces Do not attempt to touch the Blackbody surfaces during operation If necessary use the Blackbody carrying handle Failure to comply may result in injury to personnel CAUTION Power off the SR 800R before disconnecting or replacing any SR 800R cable Failure to comp...

Page 89: ...rt the controller 30 ERROR IO Port Short Circuit Please check the short circuit in the IO output accessories or cables and restart the system Fix the shorted circuit Restart the controller 31 ERROR Power Amplifier Short Circuit The Power Amplifier has been shut down Possible causes are Electrical short circuit inside the Black Body head Short circuit in the interconnect cable Please fix the proble...

Page 90: ...I Systems technical support 51 ERROR VCO frequency measurement failed All the axes are disabled Call CI Systems for assistance Contact CI Systems technical support 52 ERROR VCO frequency is out of range All the axes are disabled Call CI Systems for assistance Contact CI Systems technical support 54 ERROR MCC Card axis XX1 test failed This axis is disabled Contact CI Systems technical support 57 ER...

Page 91: ... short circuit The temperature control is disabled Contact CI Systems technical support 72 ERROR Emitter sensor malfunction The temperature control is disabled Please fix the problem and restart the system Contact CI Systems technical support 73 ERROR Target sensor malfunction The temperature control is disabled Please fix the problem and restart the system Contact CI Systems technical support 74 ...

Page 92: ...ems technical support 97 WARNING The Power Amplifier VCClow Voltage is out of range VCC 25 6V VCCmin 17 0V VCCmax 23 0V The system may not work properly Follow the on screen text and instructions Contact CI Systems technical support 98 WARNING Invalid Power Amplifier output voltages V1 16 1V V2 29 1V VCC 37 3V Dvmin 2 0V Dvmax 8 5V The system may not work properly Follow the on screen text and ins...

Page 93: ...g range of the currently defined Head Contact CI for further assistance Contact CI Systems technical support 167 ERROR Slow increment is lower than display resolution Please fix this value Enter slow increment value that is higher than the display resolution 169 WARNING Stabilization window is lower than the display resolution Please fix this value Enter stabilization window value that is higher t...

Page 94: ... connectors etc 3 Verify the tightening and proper connection of all cable connectors 5 4 2 Cleaning 1 Wipe all SR 800R sub assemblies using a soft hairbrush 2 Clean all SR 800R subassemblies using a soft cloth soaked in authorized cleaning material IPA or similar 5 4 3 Calibration Procedures The Calibration Table of the SR 800R Blackbody family is stored in the blackbodies Therefore only the sens...

Page 95: ...12 5A size 20 5mm Procedure see Figure 5 1 1 Power off the SR 800R 2 Disconnect the power cable from mains 3 Remove the fuse housing using a Flathead screwdriver 4 Replace the fuse 5 Re install the fuse housing and tighten using a Flathead screwdriver 6 Reconnect the power cord to mains 7 Power on the SR 800R Figure 5 1 Fuse Replacement 110 230V Fuse Housing F12 5A 20 5mm 605 7040 Operation Manual...

Page 96: ...ppear on the window 6 1 Requirements 6 1 1 Electrical Interface See Section 3 2 3 6 2 Settings RS232 Serial Communications Port Asynchronous serial RS232 9600 BAUD Ethernet Port 10 BaseT GPIB IEEE 488 6 1 2 Communication Sequence Timing The Host i e the computer initiates communication with the ControlMaster by transmitting a message Each message contains command bytes and an end of message byte T...

Page 97: ...nnections 6 1 4 Naming Bits The Most Significant Bit MSB in each byte is named D7 6 1 5 Command Message Structure Each Command contains a CommandBody and a CommandOperandBody The CommandBody and CommandOperandBody are separated by a Space ASCII Text Character 0x20 Hex symbolized by Space sign The CommandOperandBody contains the command operands There may be from no operands to a few operands in th...

Page 98: ...ssage is defined as an ASCII Carriage Return Line Feed i e 0x0D0A Hex CR LF characters only for RS232 otherwise it is Empty and is symbolized by the EOM symbol The ControlMaster transmits a message to the Host it terminates the message with the End of Message EOM NOTE The EOM is required only for RS232 6 1 7 Error Messages The ControlMaster returns two types of error messages InvalidCommand This i...

Page 99: ...tion GETACTIVEAXIS Get the current Active Axis in the System GETNUMBEROFAXES Retrieve the current number of Axes and their String IDs RA2 Retrieve the current target position from the selected axis GETTARGETLIST Retrieves current Axis s Target List GETTARGETFREQUENCY Get the Spatial Frequency of the 4 Bar Target in the selected Axis GETAXISEFL Get the Effective Focal Length that the selected Targe...

Page 100: ...e Controller Replaces RG RG2 Get the Absolute and Differential Working Temperature Range of the Controller depending on the current temperature mode See GETTEMPERATURERANGE ISTEMPERATURESTABLE Monitor Whether Temperature is within stable Setpoint conditions RD2 Get Current Differential Temperature RE2 Get Current Emitter or Absolute Temperature RT2 Get Current Target Temperature See GETTARGETTEMPE...

Page 101: ...Driver SETOUTPUT Set IO Output State General ECHO Echo Command SETPRESET Set Preset Number Activates the requested preset GETMAXPRESETCOUNT Get the Current Number of Presets defined in the System IDN Identify Controller GPIB command only RV2 Retrieve the Controller SW Version GETBITERROR Get the Online BIT Error of the Controller GETSYSTEMINFO Retrieve controller SN SW Version etc Replaces RV CALI...

Page 102: ...SETPOINT Get the Current Absolute Temperature set point GETDIFFERENTIALSETPOIN T Get the Current Differential Temperature set point SETCOMPUTERNAME Computer Nickname used to identify the controller when communicating with it DM2 Display Mode 605 7040 Operation Manual Rev D 6 7 June 2013 Artisan Technology Group Quality Instrumentation Guaranteed 888 88 SOURCE www artisantg com ...

Page 103: ...ndicate movement if called immediately after calling the SetTarget AxisHoming etc commands Wait for about one 1 second before calling this command G E T A X I S S T A T U S Space nAxisNumber EOM Input Operand NAxisNumber A value from 1 to 4 representing the axis to be accessed If no Axis number is provided the command will return the status of combined axes in motion This means that if any of the ...

Page 104: ...dup for the specified axis Note you must wait till the Homing is completed before issuing new commands A X I S H O M I N G Space AxisNumber EOM Input Operand AxisNumber a value between 1 to 4 representing the axis to be accessed If no axis number is provided then the command will default to AXIS 1 Return Values None 605 7040 Operation Manual Rev D 6 9 June 2013 Artisan Technology Group Quality Ins...

Page 105: ...range will result in an invalid operand Alternate Representation TargetIDString this is the string representation of the targets There can be 3 types axes in any system They are designated T arget Wheel F ilter Wheel and S ource Stage The target position is designated from 01 to nn i e the number in the system The TargetIDString can be as follows T01 to Tnn for Axis Type Target Wheel S01 to Snn fo...

Page 106: ...command is replaced by the SetTarget Command and should be not used for new applications SR 80 command format compliance Reference Command SetTarget GetAxisStatus SetActiveAxis S A Space TargetNumber EOM Input Operand TargetNumber This is a value between 1 and the number of Targets Filters Sources on Axis1 Any value out of range will result in an invalid operand Return Values None 605 7040 Operati...

Page 107: ...d You can query the system with the GetActiveAxis command to retrieve the current active axis Reference Command GetActiveAxis SetTarget S E T A C T I V E A X I S Space AxisNumber EOM Alternate Representation S E T A C T I V E A X I S Space AxisNumberID EOM Input Operand AxisNumber this is a value between 1 and 4 Alternate Representation AxisNumberID this is a string value between Axis1 and Axis4 R...

Page 108: ... string IDs It can send up to 5 comma delimited parameters The first parameter is the number of axes in the system and the rest are the String IDs for each valid axis It will always respond with at least one parameter If there are no axes in the system then the command returns 0 Reference Command GetActiveAxis SetActiveAxis G E T N U M B R O F A X E S EOM Input Operand None Return Values Return1 N...

Page 109: ...uery for axes in the system prior to using this command SR 80 command format compliance Reference Command GetAxisStatus SetActiveAxis GetActiveAxis GetNumberOfAxes R A EOM Expanded Format R A Space AxisNumber EOM Input Operand None or 1 AxisNumber A value from 1 to 4 representing the axis to be accessed Return Values The command returns the current target position number for the requested axis Thi...

Page 110: ...lect the desired axis Reference Command GetActiveAxis SetActiveAxis G E T T A R G E T L I S T Space nOperandVal EOM Input Operand nOperandVal 1 Get number of Targets nNumberOfTargets Range 1 nNumberOfTargets Return the Target ID and then the Target Name delimited by a comma Example GetTargetList 1 Returns a value of 33 for 33 Targets in the system GetTargetList 5 Returns data for target 5 T05 T05 ...

Page 111: ... e they are in millimeters the EFL of the ControlMaster must be set different to 0 see Section 3 2 3 6 1 1 Axis Setup 6 2 12 GETAXISEFL Summary This command retrieves the selected axis s Effective Focal Length Setting This command has meaning only for axes that are defined as a Target Wheel When the EFL is defined that is greater than 0 then the Targets are defined in units of cy Mrad otherwise th...

Page 112: ... SR 80 command format compliance Input Operand Mode 1 Absolute 2 Differential 3 Differential with Radiometric Offset Correction Return Values None 6 2 14 ECHO Summary This command is used to check that the unit is communicating It echoes the received input message back to the Host E C H O Space Message String EOM Input Operand Message String to be echoed back to the Host The maximum length should ...

Page 113: ...etCount S E T P R E S E T Space PresetNumber EOM Input Operand PresetNumber A valid Preset Number that is in the system The user must know in advance the current number of presets in the system see GetMaxPresetCount Return Values None 6 2 16 GETMAXPRESETCOUNT Summary This is used to return the current number of Presets that are defined in the controller Reference Commands SetPreset G E T M A X P R...

Page 114: ...eturn Values 0 Low 1 High 6 2 18 OUTPUTENABLE Summary This command is used to enable the IO Output Driver circuitry This command must precede any activity that uses the IO Output Port See the related SETOUTPUT t command hat is used to control the state of the output Reference Command SETOUTPUT O U T P U T E N A B L E Space State EOM Input Operand State State can be either 0 for OFF Disabled or 1 f...

Page 115: ... EOM Input Operand OutputNumber can be a value of from 1 to 5 State State can be either 0 for OFF Disabled or 1 for ON Enabled Return Values None 6 2 20 GETMODE Summary This is used to get the current the current temperature control mode Reference Command SetMode G E T M O D E EOM Input Operand None Return Values 1 Absolute 2 Differential 3 Differential with Radiometric Offset Correction 605 7040 ...

Page 116: ...ot work for RS232 Ethernet communications mode Reference Command None I D N EOM Input Operand None Return Values Returns Controller Identification with its Serial Number 6 2 22 GETTARGETTEMPERATURE Summary This command is used to return the current Target Sensor Temperature When no target exists in the system then an Invalid Operand Message is returned This command replaces the RT command G E T T ...

Page 117: ...curacy 6 2 24 GETTEMPERATURE Summary This command is used to display the current temperature of the system depending on the current Temperature Control mode i e if Mode 1 then the returned temperature is the Absolute Temperature If Mode 2 then the Differential Temperature is returned G E T T E M P E R A T U R E EOM Input Operand None Return Values The Current Temperature with 3 digit accuracy 605 ...

Page 118: ...26 RD Summary This command is used to get the current differential temperature i e the difference between the emitter and the ambient Target temperature R D EOM SR 80 command format compliance Input Operand None Return Values Current Differential Temperature with 3 digit accuracy 6 2 27 RE Summary This command is used to get the current emitter temperature R E EOM SR 80 command format compliance I...

Page 119: ...y Return Values None 6 2 29 ST Summary This command is used to set the current temperature of the ControlMaster This is dependent on the current temperature operating mode i e Absolute or Differential If the temperature is out of the working range of the unit then a Operand Error will occur Note This is an old style SR 80 command It is not recommended for use in new applications It is replaced by ...

Page 120: ... 3 digit accuracy 6 2 31 SR Summary This command is used to set the radiometric offset value This value has meaning only if the SetMode is 3 i e differential with radiometric offset Reference Command SetMode GetMode S R dRadiometricOffset EOM SR 80 command format compliance Input Operand dRadiometricOffset set the current offset value with 3 digit accuracy The range is between 1 Degrees 605 7040 O...

Page 121: ...ller SN may be alphanumeric For nInfoRequest 3 String Head Model For nInfoRequest 4 String Head SN For nInfoRequest 5 String Software Version For nInfoRequest 6 String Application Name For nInfoRequest 7 String Computer Name 6 2 33 GETABSOLUTESETPOINT Summary Use this command to return the current absolute temperature set point G E T A B S O L U T E S E T P O I N T EOM Input Operand None Return Va...

Page 122: ...ter name of the ControlMaster It is used to easily identify different ControlMasters in the system It is like a nickname for the unit S E T C O M P U T R N A M E Space StringName EOM Input Operand StringName This is the alphanumeric computer name to set The name should not be longer than 20 characters It can include spaces No special characters are allowed such as or or carriage return Return Valu...

Page 123: ...s will be 0 see Return3 and Return4 This command replaces the RG command for new applications G E T T E M P E R A T U R E R A N G E EOM Input Operand None Return Values Return1 double Minimum Absolute Temperature Return2 double Maximum Absolute Temperature Return3 double Minimum Differential Temperature Return4 double Maximum Differential Temperature 605 7040 Operation Manual Rev D 6 28 June 2013 ...

Page 124: ...hat is used for backward compatibility to CI SR80 BlackBody Controllers Not recommended for use See replacement command GetTemperatureRange Reference Command GETTEMPERATURERANGE R G EOM SR 80 command format compliance Input Operand None Return Values Return1 Integer Maximum Absolute Differential Temperature Return2 Integer Minimum Absolute Differential Temperature 605 7040 Operation Manual Rev D 6...

Page 125: ...ee replacement command GetSystemInfo Reference Command GETSYSTEMINFO R V EOM SR 80 command format compliance Input Operand None Return Values Returns a string with the following information Company Name Controller Model Software Version Controller Serial Number e g CI SR 800R V2 01 05SSR 800RC123451 605 7040 Operation Manual Rev D 6 30 June 2013 Artisan Technology Group Quality Instrumentation Gua...

Page 126: ...requires some attention and that the temperature control mechanism has been turned Off The BIT Error Messages includes the error number that can be used for troubleshooting see Section 5 3 Troubleshooting The BIT Error Messages also includes system warning messages with their message ID that can be used for troubleshooting see Section 5 3 Troubleshooting G E T B I T E R R O R EOM Return Values BIT...

Page 127: ...cations type between the Host Computer and the ControlMaster Note After sending this command wait at least 5 seconds and then reboot the ControlMaster for the changes to take effect S E T R E M O T E T Y P E Space strRemoteType EOM Input Operand strRemoteType Can be either Ethernet GPIB or RS232 Return Values None 605 7040 Operation Manual Rev D 6 32 June 2013 Artisan Technology Group Quality Inst...

Page 128: ...t Significant Bit Bit 0 gives an indication of the Targets Wheel RAD status A value of 0 means that the wheel is rotating A value of 1 means that the wheel has reached its final position Bits 1 2 and 4 are useable on the CTS 1 only Bit 3 gives temperature status a value of 1 means that the set point temperature has been reached All other bits are set to 0 LSB 0 Target Wheel 0 Rotating 1 RAD SYNC 1...

Page 129: ...Artisan Technology Group Quality Instrumentation Guaranteed 888 88 SOURCE www artisantg com ...

Page 130: ...of the Sensor Update of the Calibration Table a must The following sections provide the procedures Section 7 2 Emitter Sensor Replacement Section 7 3 Target Sensor Replacement Section 7 4 Updating the Calibration Tables CAUTION Shut down the power supply prior to any action taken Allow adequate time for the Emitter to cool down Avoid bending the sensor wire and the connections between wire to sens...

Page 131: ...s 4 20 Blackbodies see Section 7 2 1 2 Blackbodies see Section 7 2 2 7 2 1 4 20 Blackbodies 7 2 1 1 Removal 1 Remove the screws securing the Sensor Cover Figure 7 1 Typical Sensor Cover Removal Installation 1 of 2 4 7 12 20 605 7040 Operation Manual Rev D 7 2 June 2013 Artisan Technology Group Quality Instrumentation Guaranteed 888 88 SOURCE www artisantg com ...

Page 132: ...al Sensor Cover Removal Installation 2 of 2 4 7 12 20 3 Disconnect the Sensor male connector from the Blackbody Figure 7 3 Sensor Cable connector typical 7 20 4 605 7040 Operation Manual Rev D 7 3 June 2013 Artisan Technology Group Quality Instrumentation Guaranteed 888 88 SOURCE www artisantg com ...

Page 133: ...e inserted sensor is held in place by way of a built in magnet therefore a reasonable force is required to separate the sensor from its port 5 Remove the sensor and store it in its package to avoid damage 605 7040 Operation Manual Rev D 7 4 June 2013 Artisan Technology Group Quality Instrumentation Guaranteed 888 88 SOURCE www artisantg com ...

Page 134: ...straw into the Sensor port b Rotate the plastic straw several times in the Sensor port c Remove the plastic straw from the Sensor port Figure 7 5 Sensor Port Cleaning typical 605 7040 Operation Manual Rev D 7 5 June 2013 Artisan Technology Group Quality Instrumentation Guaranteed 888 88 SOURCE www artisantg com ...

Page 135: ...res it 3 Connect the Sensor male connector to the Blackbody see Figure 7 3 4 Arrange the sensor s wiring so that the installing the cover will not damage it 5 Place the Sensor Cover and tighten the cover fasteners see Figure 7 1 NOTE When placing the sensor cover ensure that there is no obstruction and the cover closes easily Do not use excessive force 605 7040 Operation Manual Rev D 7 6 June 2013...

Page 136: ...ble connector marked as EMT Figure 7 7 Emitter Sensor Cable Connector 2 Blackbodies Emitter Sensor Cable connector EMT Target Sensor Cable connector TRG 605 7040 Operation Manual Rev D 7 7 June 2013 Artisan Technology Group Quality Instrumentation Guaranteed 888 88 SOURCE www artisantg com ...

Page 137: ...quired to separate the sensor from its port 4 Remove the Emitter Sensor using the Sensor Extractor Jig the jig is supplied with the new sensors Figure 7 8 Emitter Sensor Replacement 2 Blackbodies Sensor Extractor Jig Sensor Locker 2 4 Fastening Screw x2 3 5 Store the sensor in its package to avoid damage 605 7040 Operation Manual Rev D 7 8 June 2013 Artisan Technology Group Quality Instrumentation...

Page 138: ...plied with the new sensor on the bottom section of the sensor approx 1 cm on the free end of the sensor using a toothpick see Figure 7 6 3 Insert the sensor into the port until the magnet secures it see Figure 7 8 4 Place the Sensor Locker and secure using the two screws see Figure 7 8 5 Connect the Sensor cable connector marked as EMT see Figure 7 7 6 Arrange the sensor cable 605 7040 Operation M...

Page 139: ...ct the Sensor male connector from the Blackbody Figure 7 9 Sensor Cable Connector typical 7 12 20 4 2 Hold the sensor itself and carefully pull it out do not pull it by its cable NOTE The inserted sensor is secured to the emitter by way of a built in magnet Therefore a reasonable force is required to separate the sensor from the emitter 605 7040 Operation Manual Rev D 7 10 June 2013 Artisan Techno...

Page 140: ... from the Sensor port 7 3 1 2 Installation 1 Apply a thin layer of thermal grease supplied with the kit on the bottom section of the sensor approx 1cm on the free end of the sensor using a toothpick see Figure 7 6 2 Insert the sensor into the Emitter port until the magnet secures it 3 Connect the Sensor male connector to the Blackbody see Figure 7 9 605 7040 Operation Manual Rev D 7 11 June 2013 A...

Page 141: ...ors Figure 7 10 Target Sensor Replacement 2 Blackbodies Sensor Extractor Jig Target Sensor NOTE The inserted sensor is held in place by way of a built in magnet therefore a reasonable force is required to separate the sensor from its port 3 Store the sensor in its package to avoid damage 605 7040 Operation Manual Rev D 7 12 June 2013 Artisan Technology Group Quality Instrumentation Guaranteed 888 ...

Page 142: ... 2 Apply a thin layer of thermal grease supplied with the new sensor on the bottom section of the sensor approx 1cm on the free end of the sensor using a toothpick see Figure 7 6 3 Insert the sensor into the port until the magnet secures it see Figure 7 10 4 Connect the Sensor cable connector see Figure 7 7 5 Arrange the sensor cable 605 7040 Operation Manual Rev D 7 13 June 2013 Artisan Technolog...

Page 143: ...ities installation CD 2 Follow the prompts do not change all default settings At the end of installation the Removable Sensor Utilities icon is added to your Desktop 7 4 3 Procedure 1 Preparations a Pending on your preferable communication protocol RS232 Ethernet or GPIB connect the SR 800R Controller to the PC b Switch ON the SR 800R Controller see Figure 3 1 and wait until the completion of the ...

Page 144: ...vable Sensor Utilities program opens with the last selections Ethernet in this example Figure 7 11 Removable Sensor Utilities Main Window 605 7040 Operation Manual Rev D 7 15 June 2013 Artisan Technology Group Quality Instrumentation Guaranteed 888 88 SOURCE www artisantg com ...

Page 145: ...PC cable connection a Ethernet From the ComType dropdown list select Ethernet The following opens Enter the Controller IP Address in the IP ADDRESS field the address can be viewed in the Controller About window 605 7040 Operation Manual Rev D 7 16 June 2013 Artisan Technology Group Quality Instrumentation Guaranteed 888 88 SOURCE www artisantg com ...

Page 146: ...ollowing opens Select the Controller GPIB Address from the DEVICE drop down list the address can be viewed in the Controller About window 605 7040 Operation Manual Rev D 7 17 June 2013 Artisan Technology Group Quality Instrumentation Guaranteed 888 88 SOURCE www artisantg com ...

Page 147: ...troller COMM Address from the COM drop down list the address can be viewed in the Controller About window 4 Select the connected controller from the Control Master list 605 7040 Operation Manual Rev D 7 18 June 2013 Artisan Technology Group Quality Instrumentation Guaranteed 888 88 SOURCE www artisantg com ...

Page 148: ...lect the Emitter Sensor S N and or the Target Sensor S N from the dropdown lists the S Ns are found in the supplied Removable Sensor Kit Examples of the lists Upon selection the becomes active 605 7040 Operation Manual Rev D 7 19 June 2013 Artisan Technology Group Quality Instrumentation Guaranteed 888 88 SOURCE www artisantg com ...

Page 149: ...n completion the following opens prompting to restart the Controller 10 Switch the Controller OFF and then ON This completes the process 11 Open the About window and check that the Te S N and or the Tt S N values are updated according to the S N of the new sensors 605 7040 Operation Manual Rev D 7 20 June 2013 Artisan Technology Group Quality Instrumentation Guaranteed 888 88 SOURCE www artisantg ...

Page 150: ...rculation system The chapter is comprised of the following sections Section 8 1 Deliverables Section 8 2 Safety Precautions Section 8 3 Overview Section 8 4 Assembling the System Section 8 5 Disassembling the System Section 8 6 Hood optional 605 7040 Operation Manual Rev D 8 1 June 2013 Artisan Technology Group Quality Instrumentation Guaranteed 888 88 SOURCE www artisantg com ...

Page 151: ...mage to equipment Always follow your local safety precautions Note that the refrigerator s total power consumption is 3 100W use a suitable plug and power outlet Exercise care never to spill cooling fluid on the Blackbody Before starting the circulator check the cooling fluid level It must be higher than the heater refrigerator coils After running the circulator for a short time check the cooling ...

Page 152: ... order to cool heat it to temperatures selected using the SR 800R Controller The Low Temperature Blackbody includes the following Julabo Circulation System see Section 8 3 1 Blackbody see Section 8 3 2 8 3 1 Julabo Circulation System For a description on the Julabo Circulation System refer to the Julabo Circulation System Operating Manual 605 7040 Operation Manual Rev D 8 3 June 2013 Artisan Techn...

Page 153: ...lation System Dry Nitrogen Inlet external Dry Nitrogen inlet connector 1 bar max Dry Nitrogen Exhaust Slots nipples located around the Blackbody emitter The nipples are used to spread the Dry Nitrogen in order to prevent possible condensation on the Blackbody emitter surface when reaching temperatures lower then 5 ºC NOTE The uniformity of the Blackbody could decrease when using the Dry Nitrogen 6...

Page 154: ...Cable Outlet Pipe Inlet Pipe Dry Nitrogen Inlet 1 bar max Dry Nitrogen Exhaust Slots Absolute Blackbody Differential Blackbody 605 7040 Operation Manual Rev D 8 5 June 2013 Artisan Technology Group Quality Instrumentation Guaranteed 888 88 SOURCE www artisantg com ...

Page 155: ...e Section 8 4 5 8 4 1 Unpacking the Julabo Circulation System and Low Temperature Blackbody 1 Unpack the Julabo Circulation System and place it on site refer to the Julabo Circulation System Operating Manual 2 Unpack the Blackbody and place it on site at a distance of up to 4 meters from the Julabo Circulation System A general view of the Blackbody packaging is shown in Figure 8 2 Figure 8 2 Low T...

Page 156: ...asten the Blackbody Protective Cover and remove the cover Figure 8 3 Blackbody Protective Cover Captive Screw x4 Protective Cover 605 7040 Operation Manual Rev D 8 7 June 2013 Artisan Technology Group Quality Instrumentation Guaranteed 888 88 SOURCE www artisantg com ...

Page 157: ...clamp and the left hand clamp to the blackbody and remove the clamp Figure 8 4 Connecting Pipes and Dry Nitrogen to the Low Temperature Blackbody Removal of Pipe Clamps Clamp to Blackbody Fastening Allen Screw x4 605 7040 Operation Manual Rev D 8 8 June 2013 Artisan Technology Group Quality Instrumentation Guaranteed 888 88 SOURCE www artisantg com ...

Page 158: ...them Figure 8 5 Connecting Pipes and Dry Nitrogen to the Low Temperature Blackbody Removal of Pipes Inlet Caps Clamps Caps 605 7040 Operation Manual Rev D 8 9 June 2013 Artisan Technology Group Quality Instrumentation Guaranteed 888 88 SOURCE www artisantg com ...

Page 159: ...oper pipe connection Figure 8 6 Connecting Pipes and Dry Nitrogen to the Low Temperature Blackbody Fastening the Pipes 22 mm Open Wrench Head Julabo In Out Out In 605 7040 Operation Manual Rev D 8 10 June 2013 Artisan Technology Group Quality Instrumentation Guaranteed 888 88 SOURCE www artisantg com ...

Page 160: ... Connecting Pipes and Dry Nitrogen to the Low Temperature Blackbody Fastening the Pipe Clamps Clamp to Blackbody Fastening Allen Screw x4 5 If needed connect the Dry Nitrogen Source to the Blackbody Dry Nitrogen Inlet 1 bar max 605 7040 Operation Manual Rev D 8 11 June 2013 Artisan Technology Group Quality Instrumentation Guaranteed 888 88 SOURCE www artisantg com ...

Page 161: ...he Pipes and fasten using a 19 mm open wrench Figure 8 8 Connecting Pipes to the Julabo Circulation System Fastening the Pipes 19 mm Open Wrench 605 7040 Operation Manual Rev D 8 12 June 2013 Artisan Technology Group Quality Instrumentation Guaranteed 888 88 SOURCE www artisantg com ...

Page 162: ...y None Stop Bit 1 Data Length 8 Bit Handshake None NOTE Depending on the SR 800R Controller temperature setpoint the only way to control the Julabo Circulation System temperature is by the SR 800R Controller and via the RS 232 communication port Therefore the SR 800R Controller RS 232 port cannot be used for other purposes b Connect the Julabo Control Cable between the Julabo Controller and the AL...

Page 163: ... System Cables Circulator Power Cable connector Main Power Cable Inlet Pipe Outlet Pipe RS 232 Cable Julabo Control Cable Alarm 605 7040 Operation Manual Rev D 8 14 June 2013 Artisan Technology Group Quality Instrumentation Guaranteed 888 88 SOURCE www artisantg com ...

Page 164: ...Circulation System ON both switches 3 Switch the SR 800R Controller ON see Section 3 1 Figure 8 10 Operation Instructions Switching the Circulation System ON Circulator ON OFF Power Switch Julabo Controller ON OFF Power Switch 4 Wait 1 minute and refill fluid if needed 605 7040 Operation Manual Rev D 8 15 June 2013 Artisan Technology Group Quality Instrumentation Guaranteed 888 88 SOURCE www artis...

Page 165: ...temperature is set automatically by the SR 800R Controller and according to Table 8 1 Table 8 1 SR 800R to Refrigerator Temperature Range Refrigerator SR 800R Temp Range 30ºC 40ºC to 20ºC 10ºC 20ºC to 0ºC 20ºC 0ºC to 40ºC 60ºC 40ºC to 80ºC 100ºC 80ºC to 150ºC 605 7040 Operation Manual Rev D 8 16 June 2013 Artisan Technology Group Quality Instrumentation Guaranteed 888 88 SOURCE www artisantg com ...

Page 166: ...switches refer to the Julabo Circulation System Operating Manual 8 5 2 Draining the Fluid from the Blackbody 1 Drain the fluid from the Julabo Circulation System fluid tank refer to the Julabo Circulation System Operating Manual 2 Disconnect one of the pipes from the Julabo Circulation System Using a high pressurized air hose and hand piece force all the cooling fluid out of the pipes and into the...

Page 167: ...nnect the Julabo Controller Power Cable from the Circulator Power cable connector c Disconnect the Julabo Control Cable from the Julabo Controller and the ALARM cable connector d Disconnect the RS 232 Cable from the SR 800 Controller and the Julabo SERIAL cable connector 2 Disconnect the Dry Nitrogen source from either the Blackbody Dry Nitrogen Inlet see Figure 8 1 or from the optional Hood Dry N...

Page 168: ...rt to which the Dry Nitrogen is connected when using a Hood instead of using the Blackbody Dry Nitrogen Inlet Latch four latches used to attach the Hood to the Blackbody Dry Nitrogen Exhaust Slots nipples located around the Hood inner side The nipples are used to flow the Dry Nitrogen around the Blackbody Figure 8 11 The LT Blackbodies Hood Main Components Dry Nitrogen Inlet 1 bar max Latch x4 Inn...

Page 169: ...d fasten it using the four latches 3 Connect the Dry Nitrogen Source 1 bar max to the Hood Dry Nitrogen Inlet instead of connecting the Dry Nitrogen Source to the Blackbody Dry Nitrogen Inlet Figure 8 12 Mounting the Hood and Dry Nitrogen Connection Hood Blackbody Latch x4 Dry Nitrogen Inlet 1 bar max 605 7040 Operation Manual Rev D 8 20 June 2013 Artisan Technology Group Quality Instrumentation G...

Page 170: ... is installed 1 Disconnect the Gas Source from the Hood Gas Inlet see Figure 8 12 2 Release the four latches and remove the Hood from the Blackbody see Figure 8 12 605 7040 Operation Manual Rev D 8 21 June 2013 Artisan Technology Group Quality Instrumentation Guaranteed 888 88 SOURCE www artisantg com ...

Page 171: ...rotocol Control a Blackbody Temperature and Mode either Absolute or Differential Control Target Wheel or stage and select target stage Control up to seven general purpose I O ports five outputs and two inputs 9 2 Installing the SR 800R Remote Control Program 1 Launch the installation CD of the Blackbody Remote Control program 2 Follow the prompts Upon completion a shortcut is added to the Start me...

Page 172: ...ogram Click Blackbody Remote Control program icon located on your Desktop or from the Start menu The following Main Window opens Figure 9 1 Blackbody Remote Control Program 605 7040 Operation Manual Rev D 9 2 June 2013 Artisan Technology Group Quality Instrumentation Guaranteed 888 88 SOURCE www artisantg com ...

Page 173: ...ettings of the Controller default GPIB see Section 3 2 3 6 3 Communications by selecting the communication protocol of the SR 800R from the SR 800R dropdown list 4 If Ethernet is selected enter the IP Address of the SR 800R in the Ethernet Address field as shown in Figure 9 2 it should be identical to the settings you made to the SR 800R according to Section 3 2 3 6 3 Communications Figure 9 2 Eth...

Page 174: ... 6 If RS232 is selected select the COM that is hard wired from the PC to the SR 800R it should be identical to the settings you made to the SR 800R according to Section 3 2 3 6 3 Communications 7 Click to apply your changes and to perform a communication with the SR 800R A dialog box opens prompting you to re approve your settings Click OK 605 7040 Operation Manual Rev D 9 4 June 2013 Artisan Tech...

Page 175: ... following opens Note the examples of the identified Controller Head Address and RAD Figure 9 4 Main Window after Communication Setup 605 7040 Operation Manual Rev D 9 5 June 2013 Artisan Technology Group Quality Instrumentation Guaranteed 888 88 SOURCE www artisantg com ...

Page 176: ...uble click the Set Point field and type in a new value NOTE Note that you may use the keyboard arrow keys up down and left right to set the required temperature of the Blackbody 3 Click to update the Blackbody Set Point The green indicator starts to blink The green indicator stops blinking when the Blackbody has reached the desired temperature 4 You may view the on going Current Temperature as sen...

Page 177: ...gure 9 5 Blackbody Remote Control Program Version 2 Click to close and return to the Main Window 9 3 7 Exiting the SR 800R Remote Control Program Click to close the SR 800R Remote Control Program and return to the Desktop 605 7040 Operation Manual Rev D 9 7 June 2013 Artisan Technology Group Quality Instrumentation Guaranteed 888 88 SOURCE www artisantg com ...

Page 178: ...ion in a thermal bath generating a new calibration table resistance Ω vs temperature ºC The resultant calibration table is programmed into the blackbody head Because the TSC Temperature Sense Card contained in the blackbody head is a very accurate and consistent ohmmeter a calibrated sensor can be fitted into any blackbody head and maintain calibration and traceability With this method we only use...

Page 179: ...life of the test set Similarly calibration of the target sensor in differential blackbodies will be accomplished in one of two ways 1 Calibrate the target sensor in a differential manner using the CK800 calibration kit This is accomplished by inserting the probe into a supplied copper block and comparing it to the new master sensor with the copper block stabilized at ambient temperature The offset...

Page 180: ...ESETPOINT 6 26 B GETACTIVEAXIS 6 13 Blackbodies 2 3 GETAXISEFL 6 16 Absolute Mode 2 3 GETAXISSTATUS 6 8 Differential Mode 2 3 GETBITERROR 6 31 Blackbody 8 4 GETDIFFERENTIALSETPOINT 6 27 Block Diagram 2 12 GETINPUTSTATUS 6 19 GETMAXPRESETCOUNT 6 18 C GETMODE 6 20 Cable Connection 8 13 GETNUMBEROFAXES 6 13 Cables 2 7 GETSYSTEMINFO 6 26 Cables Connectors 2 6 GETTARGETFREQUENCY 6 16 Cables 2 7 GETTARG...

Page 181: ...Fluid 8 17 SETOUTPUT 6 20 SETPRESET 6 18 E SETREMOTETYPE 6 32 Effective Pages iv SETTARGET 6 10 Emitter Sensor Replacement 7 2 SETTEMPERATURE 6 24 2 7 7 SR 6 25 4 20 7 2 ST 6 24 Communication Protocol 6 1 F Command Message Structure 6 2 Features 1 3 Commands Summary 6 4 Fuse Replacement 5 8 Electrical Interface 6 1 EOM 6 3 G Error Messages 6 3 General Information 1 1 Naming Bits 6 2 Features 1 3 R...

Page 182: ...B Refrigerator 8 1 About 3 47 Julabo Assembly IO Control 3 19 Cable Connection 8 13 Mode 3 14 Mounting the Hood 8 20 Motion Control 3 18 Operation Instructions 8 15 MRTD 3 20 Pipes Connection 8 8 8 12 Options 3 27 Unpacking the Julabo 8 6 Preset Setup 3 16 Julabo Cables Disconnection 8 18 Menu Window 3 13 Julabo Circulation System 8 3 Mode 3 14 Julabo Operation Instructions 8 15 Motion Control 3 1...

Page 183: ...Settings 9 6 Powering ON 3 1 Communication Protocol Setting 9 3 Preset Setup 3 16 Exit 9 7 RC Program 9 1 I O Control Feature 9 6 Options 3 27 Installation 9 1 Communications 3 39 Launch 9 2 Motion Setup 3 28 Operation 9 2 Re store Factory 3 43 Overview 9 1 Settings 3 36 Target Selection 9 6 Temperature 3 44 Removable Sensors 7 1 Touch Panel Calibration 3 44 Calibration Tables 7 14 Overview 1 1 8 ...

Page 184: ...8 1 Storage 4 1 T Table of Contents v Target Sensor Replacement 7 10 2 7 12 4 20 7 10 Technical Support ii Transportation 4 1 Troubleshooting 5 2 U Unpacking 4 2 Unpacking the Julabo 8 6 V Visual Inspection 5 7 605 7040 Operation Manual Rev D 10 5 June 2013 Artisan Technology Group Quality Instrumentation Guaranteed 888 88 SOURCE www artisantg com ...

Page 185: ...l service in house repair center WE BUY USED EQUIPMENT Sell your excess underutilized and idle used equipment We also offer credit for buy backs and trade ins www artisantg com WeBuyEquipment REMOTE INSPECTION Remotely inspect equipment before purchasing with our interactive website at www instraview com LOOKING FOR MORE INFORMATION Visit us on the web at www artisantg com for more information on ...

Reviews: