background image


In this menu,  


Current user settings can be saved. 


The unit can be reset to the saved user settings. 


The unit can be reset to the factory default settings. All recorded Looks are 
erased. 

 
To save the current user settings, 
Review all settings. 

1.  On the Main Menu, tap 

Setup Menu


2.  On the Setup screen, tap 

Reset


3.  On the Reset Setting screen, press and hold 

Save User

 for 10 seconds to 

save the current settings. (Follow the text prompt that appears on the 
screen.) 

The screen goes to the Setup screen. 
 
To reset to the saved user settings, 

1.  On the Main Menu, tap 

Setup Menu


2.  On the Setup screen, tap 

Reset


3.  On the Reset Setting screen, tap 

User


4.  Press and hold 

Apply

 for 3 seconds to restore the saved user settings 

The screen reboots to the opening screen and Main Menu. 
 
To reset to the factory default settings, 

1.  On the Main Menu, tap 

Setup Menu


2.  On the Setup screen, tap 

Reset


3.  On the Reset Setting screen, tap 

Default


4.  Press and hold 

Apply

 for 3 seconds to restore the factory default settings. 

The screen reboots to the opening screen and Main Menu. 

 
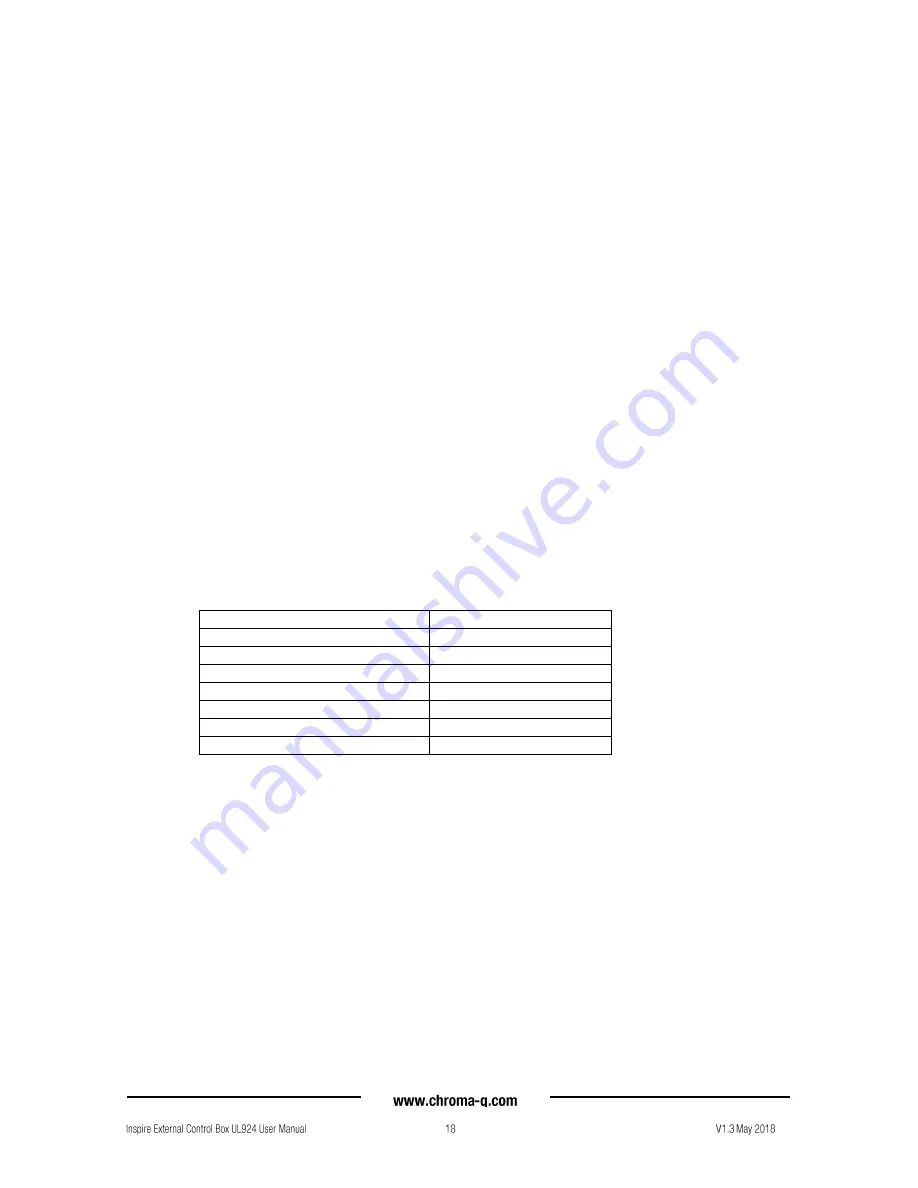
Factory Default Settings: 

DMX Address 

Port1:1, Port2: 2, Port3:3 

Mode 

RGBW single 

DMX Lost 

Last data 

Frequency 

1200Hz 

Reset 

Default 

Mains power output colour 

White at 100% intensity 

Emergency Power output colour  White at 100% intensity 
Alarm state output colour 

White at 100% intensity 


Summary of Contents for Inspire UL924

Page 1: ...Chroma Q Inspire External Control Box UL924 User Manual Version 1 3 May 2018 Software Version 1 04 PN 632 5010...

Page 2: ...air or service by anyone other than Chroma Q who has not applied for and been approved by Chroma Q to do such modification repair or service unless the Customer provides acceptable proof to Chroma Q t...

Page 3: ...he lighting industry Regular maintenance should be performed to ensure that the products perform well in the entertainment environment If you experience any difficulties with any Chroma Q products ple...

Page 4: ...Table of Contents...

Page 5: ...g in Terminal Block connectors for AC power input Emergency power input control data output signals and XLR DMX In and Thru connections Unpacking the Units The Inspire External Control Box UL924 packa...

Page 6: ...r up to 128 daisy chained Inspire Mini Terminal Strip fixtures The maximum length of the DMX cable from each data output of the External Control Box to the first Terminal Strip fixture must not exceed...

Page 7: ...Terminal Block Plug into the Terminal Block Header 8 Fasten the AC grounding wire onto the stud for grounding connections 9 Fasten cable strain relief 10 Proceed to wire the Emergency power input cabl...

Page 8: ...cable strain relief corresponding adjacent to each Terminal Plug location 4 Unplug each Terminal Block Plug from the Header 5 Connect the wiring for each of the data cable into the Terminal Block Plug...

Page 9: ...l N Neutral Silver Brown Black Live L Hot Gold EU North America Connections Green and Yellow Green Earth Ground Brown Black Line 1 Phase A Black Red Line 2 Phase B Gray Blue Line 3 Phase C Blue White...

Page 10: ...ip fixtures cannot be changed to any other colour than white Alarm In the alarm situations the building control panel sends a short signal to the alarm port on the UL924 box which closes the dry conta...

Page 11: ...Figure 6 Alarm and 0 10v Bus 0 10v Control Bus Alarm Pin 1 ve Pin 2 ve Dry contact...

Page 12: ...n Data Signal Indicator DMX DMX signal from a remote DMX control console is present or No Data if there is no DMX signal present AC Power Indicator AC power is connected on each of the 3 phases L1 L2...

Page 13: ...ions available in the Change Mode screen Command Button Description RGBW single 4 channels for Red Green Blue White per fixture in a single output 512 channels for a maximum of 128 fixtures per single...

Page 14: ...ing is white at 100 intensity Setup screen The table shows the fixture setup options available in the Setup screen Command Button Description DMX Data Displays the DMX start address and the levels for...

Page 15: ...e front of the Inspire External Control Box To access the control options From the Main Menu tap the command buttons to access menu screens In the Menu screens select and tap a command option Tap Appl...

Page 16: ...Store RGBW single This mode assigns 4 channels for Red Green Blue White for each individual fixture in each output To set the RGBW single mode 1 On the Main Menu tap Mode 2 On the Mode screen tap RGBW...

Page 17: ...event of DMX loss Note All looks are programmed in default with all DMX values to 80 A Look or preset can be created with a DMX controller and played back using Look Store To save a Look 1 Create a Lo...

Page 18: ...uency 1 On the Main Menu tap Setup Menu 2 On the Setup screen tap Frequency 3 On the PWM Frequency screen select and tap a Frequency option then tap Apply to save The screen goes to the Setup screen D...

Page 19: ...On the Setup screen tap Reset 3 On the Reset Setting screen tap User 4 Press and hold Apply for 3 seconds to restore the saved user settings The screen reboots to the opening screen and Main Menu To...

Page 20: ...les and power supplies For technical support and or parts please contact your selling dealer or the offices listed in this manual Symptom Possible Cause Solution Fixture does not respond to DMX contro...

Page 21: ...0V AC 9W 230V AC Typical Power Current Measurements done with all LEDs at maximum intensity Measurements made at nominal voltage Allow for a deviation of 10 Power connector In Out Input only Internal...

Page 22: ...s little maintenance However as the unit is likely to be used in a stage environment we recommend periodic inspection and cleaning of any accumulated debris Do not spray liquids on the front or rear p...

Reviews: