background image

13

FIRMWARE UPDATE

The console can be updated through your WI-FI network. If new firmware is available, a 

notification or pop up message will be shown on your mobile when you open the App. Follow the 

instruction in the App to do the update.

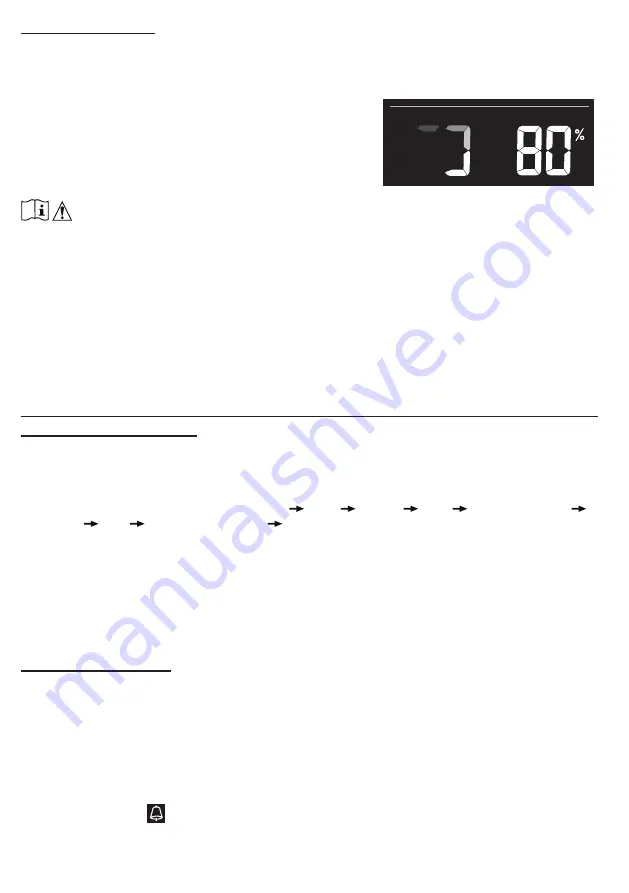
During the update process, the console will show the 
progress status percentage at the bottom of the screen. 
Once the update complete, the console screen will reset 
and back to normal mode. 

Please ignore App update 

fail message

, if the console can restart and show the 

normal screen after the update process completed.


 IMPORTANT NOTE: 


-

Please keep connecting the power during the firmware update process.


- Please make sure your console WI-FI connection is stable.


-

When the update process start, do not operate the console until the update is finished.


- Settings and data maybe lost during update.


-

During firmware update the console will stop upload data to the cloud server. It will reconnect to your 

WI-FI router and upload the data again once the firmware update succeed. If the console cannot 

connect to your router, please enter the SETUP page to setup again.


- Firmware update process have potential risk, which cannot guarantee 100% success. If the update 

fail, please redo the above step to update again.


-

If firmware update fail, press and hold the 

[C/F]

 and 

[REFRESH]

 key at the same time with 10 

seconds to back to original version, then redo the update procedure again.

OTHER SETTING & FUNCTIONS OF THE CONSOLE

MANUAL CLOCK SETTING

This console is designed to obtain the local time by synchronizing with your local time. If you 

want to use it off line, you can set the time and date manually. During the first time startup, press 

and hold the 

[ SENSOR / WI-FI ] 

key for 6 seconds and let the console back to normal mode.

1.  In normal mode, press and hold 

[ TIME SET ]

 key for 2 seconds to enter setting.

2. 

The setting sequence: 12/24 hour format 

 Hour 

 Minute 

 Year 

 M-D/D-M format 


Month 

 Day 

 Time sync ON/OFF 

 weekday Language.

3.  Press 

[ + ]

 or 

[ - ]

 key to change the value. Press and hold the key for quick-adjust.

4.  Press 

[ TIME SET ]

 key to save and exit the setting mode, or it will automatically exit the 

setting mode 60 seconds later without pressing any key.

NOTE: 


- In normal mode, press 

[ TIME SET ]

 key to switch between year and date display.


- During the setting, you can back to normal model by press and hold 

[ TIME SET ]

 key for 2 

seconds.

SETTING ALARM TIME

1.  In normal time mode, press and hold 

[ MODE / ALARM ]

 key for 2 seconds until the alarm 

hour digit flashes to enter alarm time setting mode.

2.  Press 

[ + ]

 or 

[ - ]

 key to change the value. Press and hold the key for quick-adjust.

3.  Press 

[ MODE / ALARM ]

 key again to step the setting value to Minute with the Minute digit 

flashing.

4.  Press 

[ + ]

 or 

[ - ]

 key to adjust the value of the flashing digit.

5.  Press 

[ MODE / ALARM ]

 key to save and exit the setting.

NOTE:


- In alarm mode, the “ 

 ” icon will display on the LCD.


- The alarm function will turn on automatically once you set the alarm time.

Summary of Contents for C3126A

Page 1: ...Smart multi channel weather station with wireless sensor Model C6082A C3126A User Manual Smart phone not included...

Page 2: ...and can radiate radio frequency energy and if not installed and used in accordance with the instructions may cause harmful interference to radio communications However there is no guarantee that inter...

Page 3: ...TION 14 BACK LIGHT 14 SET LCD DISPLAY CONTRAST 15 MAINTENANCE 15 BATTERY REPLACEMENT 15 TROUBLESHOOT 15 SPECIFICATION 15 CONSOLE 15 WIRELESS THERMO HYGRO SENSOR 16 ABOUT THIS USER S MANUAL This symbol...

Page 4: ...torage or transportation if not it may result in an explosion or the leakage of flammable liquid or gas Disposal of a battery into fire or a hot oven or mechanically crushing or cutting of a battery t...

Page 5: ...ANNEL key 4 MODE ALARM key 5 MAX MIN key 6 HI LO slide switch 7 CAL key 8 TIME SET key 9 Table stand 10 Battery door 11 Wall mounting hole 12 C F key 13 Refresh key 14 RESET key 15 SENSOR WI FI key 16...

Page 6: ...tered to the console within the next few minutes The transmission status LED will begin to flash every 1 minute NOTE If you need to re assign the sensor channel slide the channel slide switch to the n...

Page 7: ...router Stable Connected to router Stable Connected to router and synchronized to local time Flashing Console currently in Access Point AP mode Blinking Sensor synchronization process 4 The wireless s...

Page 8: ...from the console 1 Press the CHANNEL key until the console shows the display of the selected sensor 2 Press and hold REFRESH key for 10 seconds until its readings are reset C is shown SMART LIFE APP...

Page 9: ...n and you can customize its information Step 4 Confirm your device is in AP mode and tap Next Step 3 Make sure you select the 2 4G network and enter your Wi Fi password then tap the Next Step 7 The co...

Page 10: ...d access to graphs alert setting alert history and unit conversion 1 Temperature and humidity reading with max min records for INDOOR 2 Temperature and humidity reading with max min records for wirele...

Page 11: ...e Screen Step 2 Tap the Temperature Alarm or Humidity Alarm Step 3 Tap the INDOOR or CH 1 7 Step 4 Set the High Low trigger values and slide the switch to activate the alert AUTOMATION WITH OTHER DEVI...

Page 12: ...ap one of below tag to set different trigger condition NOTE Any tasks required or performed by third party devices are at user s own choice and risk Please note no guarantee can be assumed regarding t...

Page 13: ...iginal version then redo the update procedure again OTHER SETTING FUNCTIONS OF THE CONSOLE MANUAL CLOCK SETTING This console is designed to obtain the local time by synchronizing with your local time...

Page 14: ...he signal does not recover within 48 hours the Er display will become permanent You need to replace the batteries and then press SENSOR WI FI key to pair up the sensor again VIEW THE OTHER CHANNELS OP...

Page 15: ...k records of different sensor by pressing CHANNEL key TO RESET THE MAX MIN RECORDS Press and hold MAX MIN key for 2 seconds to reset the current on display MAX or MIN records NOTE The LCD will also di...

Page 16: ...emperature or humidity not accurate 1 Do not place your console or sensor close to the heat source 2 If the sensor still not accurate adjust the value in calibration mode SPECIFICATIONS CONSOLE Genera...

Page 17: ...with batteries Main power 2 x AA size 1 5V batteries Lithium batteries recommended Weather data Temperature and Humidity RF transmission range 150m RF frequency depend on country version 915Mhz US 86...

Reviews: