95
Using the Setup Menu
Configuring Custom Logo Capture Settings
Before capturing a custom logo, configure the following settings to control its position,
zoom, and other parameters when it is projected.
z
The “Logo Vertical”, “Logo Horizontal”, and “Background Color” settings are not used
when the zoom setting is “Fit To Screen”.
z
Note that you cannot change the above settings for a custom logo after you capture it.
z
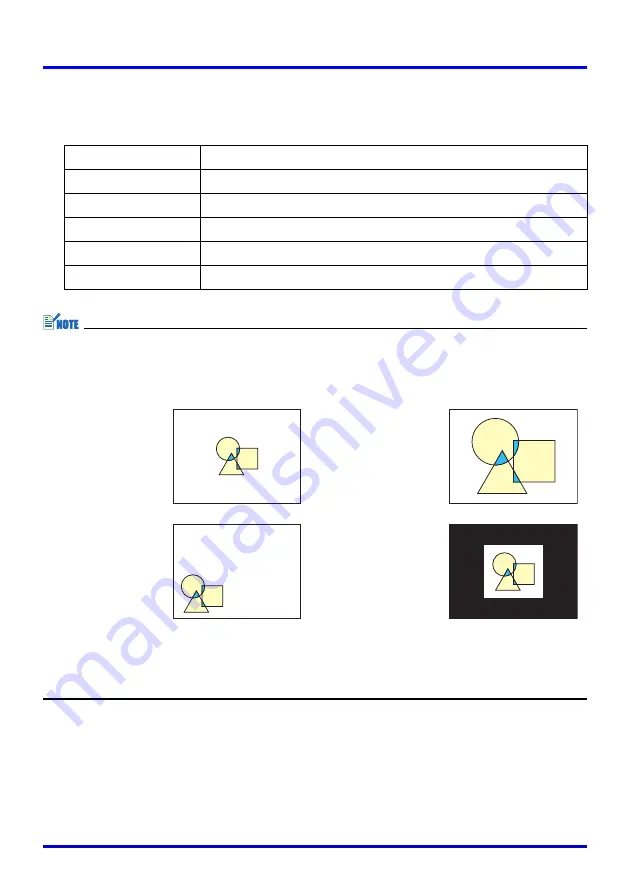
The following are some examples of how the above settings affect the custom logo.
z
If an error occurs with the “High” resolution setting, try changing the resolution setting to
“Normal”. This will increase the chance of a successful capture. If you experience
problems capturing with the “Normal” setting, it may also mean that the area you are
trying to capture is too large. Try selecting a smaller area.
Setting
Available Items (Parentheses indicate defaults.)
Logo Vertical
Top, (Center), Bottom
Logo Horizontal
Left, (Center), Right
Custom Logo Zoom
(100%), 200%, Fit To Screen
Background Color
(White), Black
Resolution
(Normal), High
Logo Vertical: Center
Logo Horizontal: Center
Custom Logo Zoom: 100%
Background Color: White
Logo Vertical: Center
Logo Horizontal: Center
Custom Logo Zoom: 200%
Background Color: White
Logo Vertical: Bottom
Logo Horizontal: Left
Custom Logo Zoom: 100%
Background Color: White
Logo Vertical: Center
Logo Horizontal: Center
Custom Logo Zoom: 100%
Background Color: Black


