10
EN
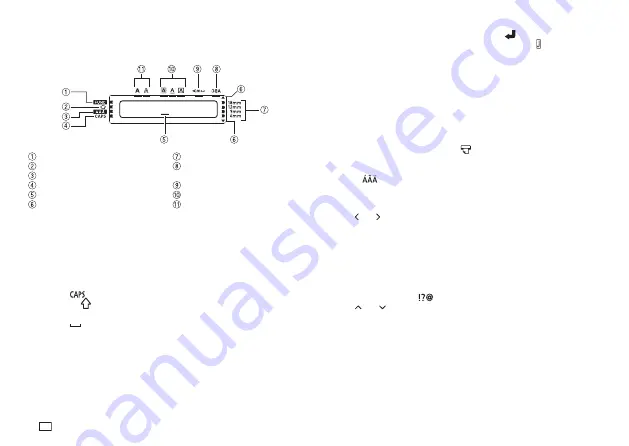
Display Symbols and Indicators
Before getting into actual input, you should fi rst become acquainted with the
symbols and indicators used on the printer display.
Function indicator
Shift indicator
Accent indicator (page 10)
Caps indicator (page 10)
Cursor
Scroll indicator
Tape indicators
Mirror image printing indicator
(page 16)
Vertical text indicator (page 16)
Effect indicators (page 14)
Style indicators (page 13)
C A S O
• • • • • • •
I
Basic Alpha-Numeric Input
To input alpha-numeric characters
1. Turn on the printer (page 7).
2. Specify the tape width.
3. Input the fi rst line of characters.
x
Press
to toggle between upper case and lower case input.
x
Pressing
will toggle input of the next character only from upper case
to lower case, or from lower case to upper case.
x
Press
to input spaces.
4. When you reach the end of a line of text, press
to input a newline mark.
x
A newline operation is indicated on the display by the symbol. This
shows where you changed lines.
x
The maximum number of lines you can input depends on the width of
the tape you have loaded in the Label Printer.
Tape Width
Number of Maximum Lines
x
6mm ......................... 1
x
9mm ......................... 1
x
12mm ....................... 2
x
18mm ....................... 3
5. Input the characters in the second line.
6. To print the text that you input, press
. For details on printing, see page 14.
To input accented characters
1. Press
.
2. Press the key that corresponds to the accented character you want to
input.
x
This will display a menu of accented characters.
3. Use and to select the accented character you want and then press
OK
.
Symbols and Illustrations
The printer has a collection of built-in symbols divided among six groups. For
information about available symbols and their groups, see the symbol table
(page APP-3).
To input symbols and illustrations
1. Press
FUNC
and then
.
2. Use and to select the group that contains the symbol you want to
use, and then press
OK
.
x
This displays a selection screen for the group you selected.
3. Use the cursor keys to select the symbol or illustration you want to input
and then press
OK
.
Summary of Contents for KL-130
Page 1: ...User s Guide KL 130 EN RJA533401 001V01 Supported Tape Widths 6 mm 9 mm 12 mm 18 mm...
Page 2: ...Important Be sure to keep all user documentation handy for future reference...
Page 28: ...26 EN Built in Logos PRICE Labels SIGN Labels...
Page 29: ...27 EN WORK Labels ATTENTION...
Page 31: ...APP 1 Accented Characters A C D E G H I J K L N O R Appendix S T U Y Z...


