120
Attaching
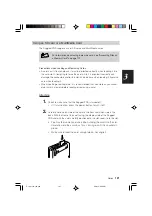
1.
Check to make sure that the Rugged PDA is turned off.
•
If it is turned on, press the power button to turn it off.
2.
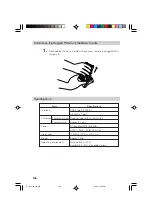
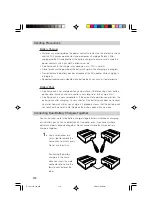
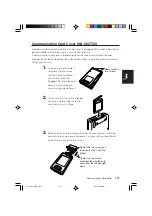
Carefully note which side of the card is the front and which side is the
back. With the front of the card facing the display side of the Rugged
PDA and with the card carefully positioned in the slot, load it into the slot.
•
You may feel some resistance when sliding the card into the slot.
Carefully slide the card along the grooves on both sides of the slot
as far as it will go, until it is securely in place.
After loading the card, turn on the Rugged PDA and check the status of the card slot.
Removing
1.
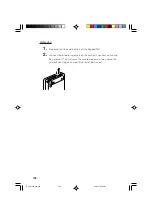
Stop access of the Compact Flash card and turn off the Rugged PDA.
2.
Use the stylus to press the eject button next to the slot where the Com-
pact Flash card is loaded.
This will cause the Compact Flash card to pop part way out of the slot.
Grasp it with your fingers and pull it the rest of the way out.
•
Never pull on a connection cable to remove a Compact Flash
card. Doing so can break the cable and cause malfunction.
•
If the eject button is not raised, press and release it.
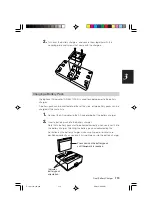
Make sure the card is not at an angle
as you load it.
IT-10_3/101-122.p65
06.6.15, 6:49 PM
120
Summary of Contents for IT-10M20BR
Page 24: ...24 IT 10 21 24 E p65 06 6 15 6 45 PM 24 ...
Page 25: ...1 Getting Ready IT 10_1 25 39 E p65 06 6 15 6 40 PM 25 ...
Page 67: ...2 Basic Operations IT 10 67 100 p65 06 6 15 6 46 PM 67 ...
Page 100: ...100 IT 10 67 100 p65 06 6 15 6 48 PM 100 ...
Page 101: ...3 Connecting Peripherals IT 10_3 101 122 p65 06 6 15 6 48 PM 101 ...
Page 123: ...Appendix IT 10 App 123 126 p65 06 6 15 6 50 PM 123 ...

