background image

WARNING:

ALWAYS pay attention to the road ahead of you. Driving with distractions on the road may 
result in penalties, accidents, or even death. 

PLEASE DRIVE CAREFULLY.

Always place the mount in a location that will not obstruct the driver's view of the road. 
We recommend you place the mount behind the rearview mirror on the passenger side, 
within the windshield wiping area.

DO NOT

 place the camera in front of the driver’s side.

DO NOT

 place the mount within the airbag deployment area or near any mirrors.

DO NOT

 operate the UltraDash C1 while driving. Remember, the camera will 

automatically record when the vehicle engine has started.

PLEASE

 place the camera where the power cable is easily concealed and will not 

distract the driver. Avoid areas such as the steering wheel, pedals, or gear shifter. 

PLEASE

 remember to clean the area where the mount’s suction cup will be placed. 

PLEASE

 adjust your camera settings before you begin driving.

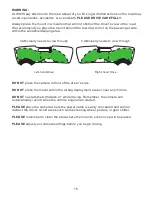
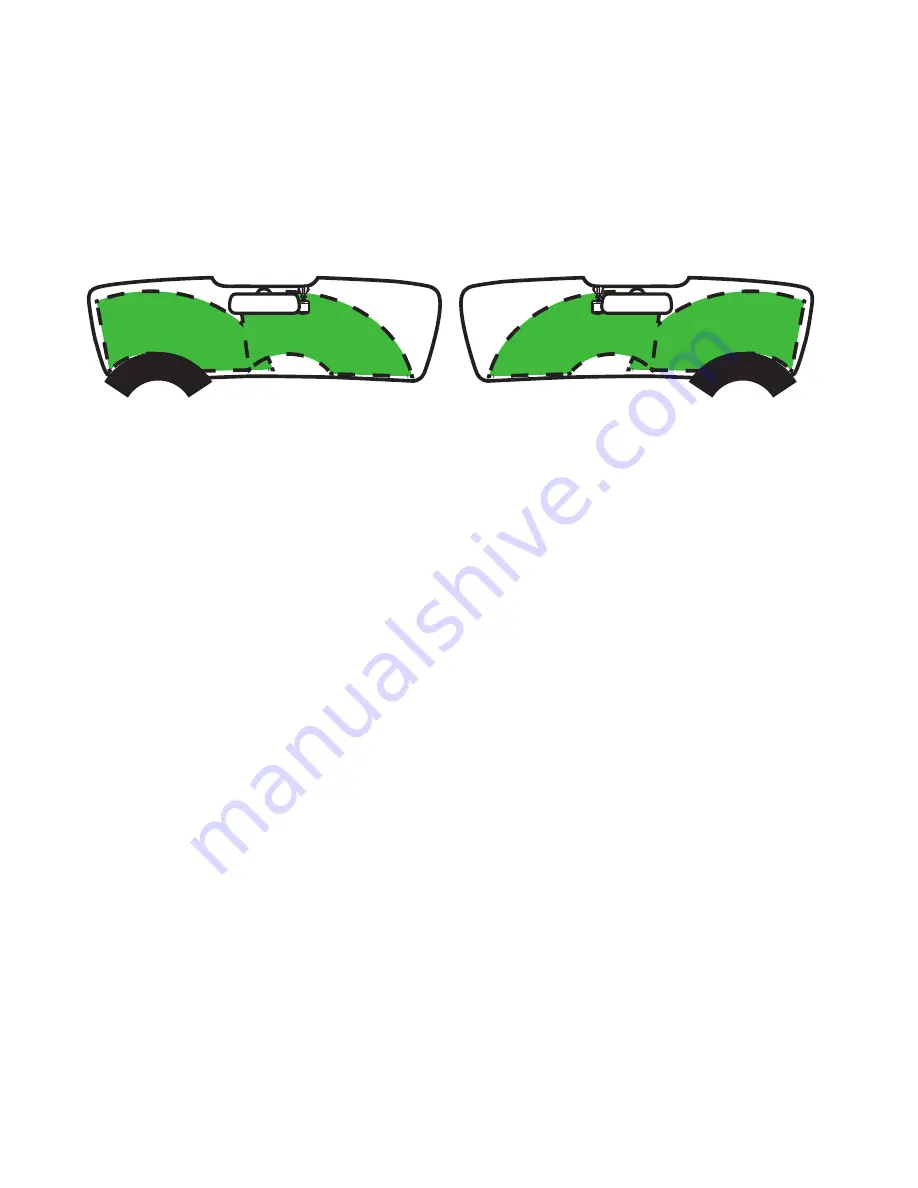
CAM clearly needs to view through

CAM clearly needs to view through

Left-hand Drive

Right-hand Drive

15

Summary of Contents for UltraDash C1

Page 1: ...1080P FULL HD DASHCAM INSTRUCTION MANUAL...

Page 2: ...1 Reduce the amount of sky in the picture By adjusting the camera towards the road the automatic exposure compensation will be focused on the road and not the light from the sky 2 Position the camera...

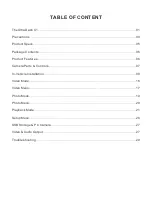
Page 3: ...ct Specs 05 Package Contents 06 Product Features 06 Camera Parts Controls 07 In Vehicle Installation 09 Video Mode 16 Video Menu 17 Photo Mode 19 Photo Menu 20 Playback Mode 21 Setup Menu 26 USB Stora...

Page 4: ...omponent that contains nearly 600 000 pixels The pixels the screen projects may fail as a result of Defective Problems or Prolonged Exposure to the sun Product life may also be a cause for screen fail...

Page 5: ...gh dirt please use a small quantity of water and a neutral detergent Clean with a soft cloth Avoid contact with the UltraDash C1 lens as damage may be caused When necessary clean the lens carefully by...

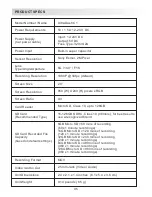
Page 6: ...e a recognized brand MOV 2 5mm Jack Video Audio 2 4 x 2 1 x 1 4 inches 6 1 x 5 4 x 3 6 cm 0 14 pounds 65 g Sensor Resolution Sony Exmor 2M Pixel Card Reader Micro SD Class 10 up to 128GB Input 12 24V...

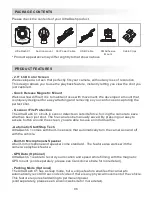
Page 7: ...ide force forcing the camera to save what has been just shot The file can also be manually saved By pressing our easy to access button around the screen you are able to save an individual file Automat...

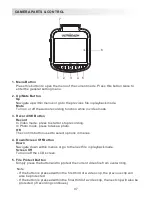
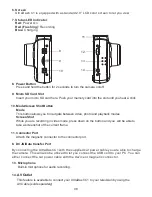
Page 8: ...to mode press to take a photo OK The confirm button used to select options in menus 4 Down Screen Off Button Down Navigate down within menus or go to the next file in playback mode Screen Off Turn on...

Page 9: ...en Shot While you are recording in video mode press down on the button and you will be able to take a screenshot of the current frame 11 Connector Port Attach the magnetic connector to the connector p...

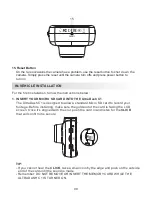
Page 10: ...UltraDash C1 is designed to allow a standard Micro SD card to record your footage Before installing make sure the gold end of the card is facing the LCD screen Once it s aligned with the slot push th...

Page 11: ...Locking lever Locking ring d Power socket e Magnetic Connector Suction Mount 3M Adhesive Mount c There are two types of mounts included in the package One is a suction cup and the other is a 3M adhesi...

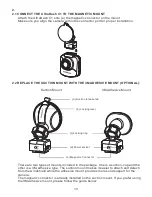
Page 12: ...windshield and peel off the plastic covering Adhere it to the windshield Loosen Tigten 3 ATTACH THE MOUNT TO THE WINDSHIELD START RECORDING Remove the protective plastic film and select a location on...

Page 13: ...suction release tab allows you to release the cup from the glass to readjust your camera placement 4 ADJUST THE ANGLE Loosen the c locking ring and adjust the camera to the angle you want When you fin...

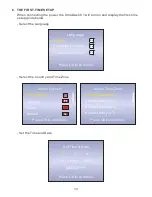
Page 14: ...Chinese Traditional Chinese En Zh Cn Select the Country and Time Zone United State Canada China Mexico United State EST United State CST United State MST United State PST 13 Set the Time and Date Lang...

Page 15: ...rette lighter for your vehicle use the included USB power cord DO NOT wire the UltraDash C1 directly to the car cigarette outlet or any 12 V outlet Doing so will result in permanent damage to the came...

Page 16: ...s side DO NOT place the mount within the airbag deployment area or near any mirrors DO NOT operate the UltraDash C1 while driving Remember the camera will automatically record when the vehicle engine...

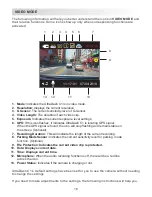
Page 17: ...con will stop flashing and remain stable on the screen Optional 7 Recording Duration This will indicate the length of the current recording 8 Parking Mode Sensor Indicates the current sensitivity leve...

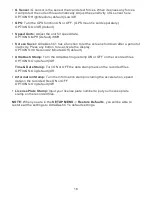
Page 18: ...it and stored as individual video clips The loop recording function will automatically overwrite the oldest and non protected video clip when the memory card is full OPTIONS 1 Minute default 3 Minutes...

Page 19: ...ess any button to re activate the display OPTIONS 30 Seconds 2 Minutes Off default UltraDash Stamp Turn the UltraDash logo stamp ON or OFF on the recorded files OPTIONS On default Off Time Date Stamp...

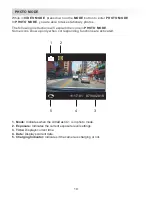
Page 20: ...icons in PHOTO MODE Some icons show up only when corresponding functions are activated 1 2 3 4 5 1 Mode Indicates when the UltraDash C1 is in photo mode 2 Exposure Indicates the current exposure leve...

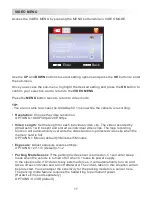
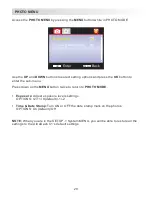
Page 21: ...button to enter the sub menu Press down on the MENU button twice to return to PHOTO MODE Exposure Adjust exposure levels settings OPTIONS 2 1 0 default 1 2 Time Date Stamp Turn ON or OFF the date stam...

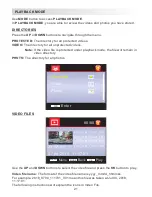
Page 22: ...ted videos VIDEO The directory for all unprotected videos PHOTO The directory for all photos Note If the video file is protected under playback mode the file will remain in video directory Use the UP...

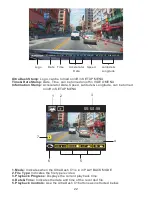
Page 23: ...1 65 30MPH N5 41 33 15 W62 42 33 15 Logo Date Time Accelerator Data Speed Latitude Longitude MODE II OK DN UP 00 00 58 1 Mode Indicates when the UltraDash C1 is in in PLAYBACK MODE 2 File Type Indicat...

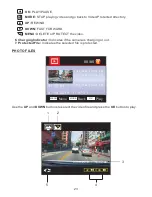
Page 24: ...f the camera is charging or not 7 Protected File Indicates the selected file is protected OK Play MENU Menu MODE Back 11 17 01 07 04 2018 11 17 01 2018_0704_111701_001 80 80 2018_0704_111815_001 2018_...

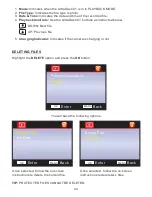
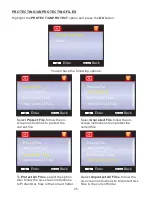
Page 25: ...e camera is charging or not DOWN Next file UP Previous file Highlight the DELETE option and press the OK button Protect Unprotect OK Enter MENU Back Delete Once selected follow the on screen instructi...

Page 26: ...nstructions to protect the current file Select Unprotect File follow the on screen instructions to unprotect the current file Protect File OK Enter MENU Back Unprotect File Protect ALL Files Unprotect...

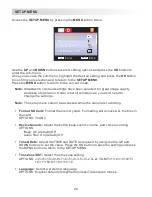
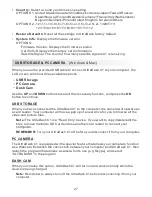
Page 27: ...hile the camera is recording the card OPTIONS Yes No Device Sounds Adjust the button beep sound volume and voice recording OPTIONS Beep On default Off Audio Rec On default Off Time Date Adjust the TIM...

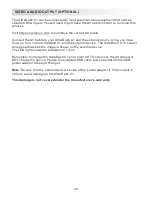
Page 28: ...and press the OK button to continue USB STORAGE When you have connected the UltraDash C1 to the computer the camera will operate a card reader Your computer will have a pop up of a new drive for you t...

Page 29: ...xternal device The UltraDash C1 s screen will appear blank as the image is shown on the external device The LED light shows the UltraDash C1 is on Remember to charge the UltraDash C1 prior to AV OUT m...

Page 30: ...ass 10 or the UHS type 1 Micro SD Card If your PC does not recognize the video files try another PC to view the recorded video Copy the video file on to the computer and allow for the PC video player...

Page 31: ...1 for first time use I cannot delete the file on UltraDash C1 Be sure the file you are trying to delete is unprotected If the file is protected please follow the instruction on page 20 to unprotect th...

Page 32: ...will not let you access the menu while it is recording To access the menu stop recording and the MENU feature will be accessible When I download files from the Cansonic website a malicious software me...

Page 33: ...Instagram cansonic_usa Facebook cansonicusa Youtube Cansonic USA Official www cansonic com...

Page 34: ...ULTRADASHC120180630V01...

Reviews: