Scan Kiosk II V2.0 User’s Guide
55
7.
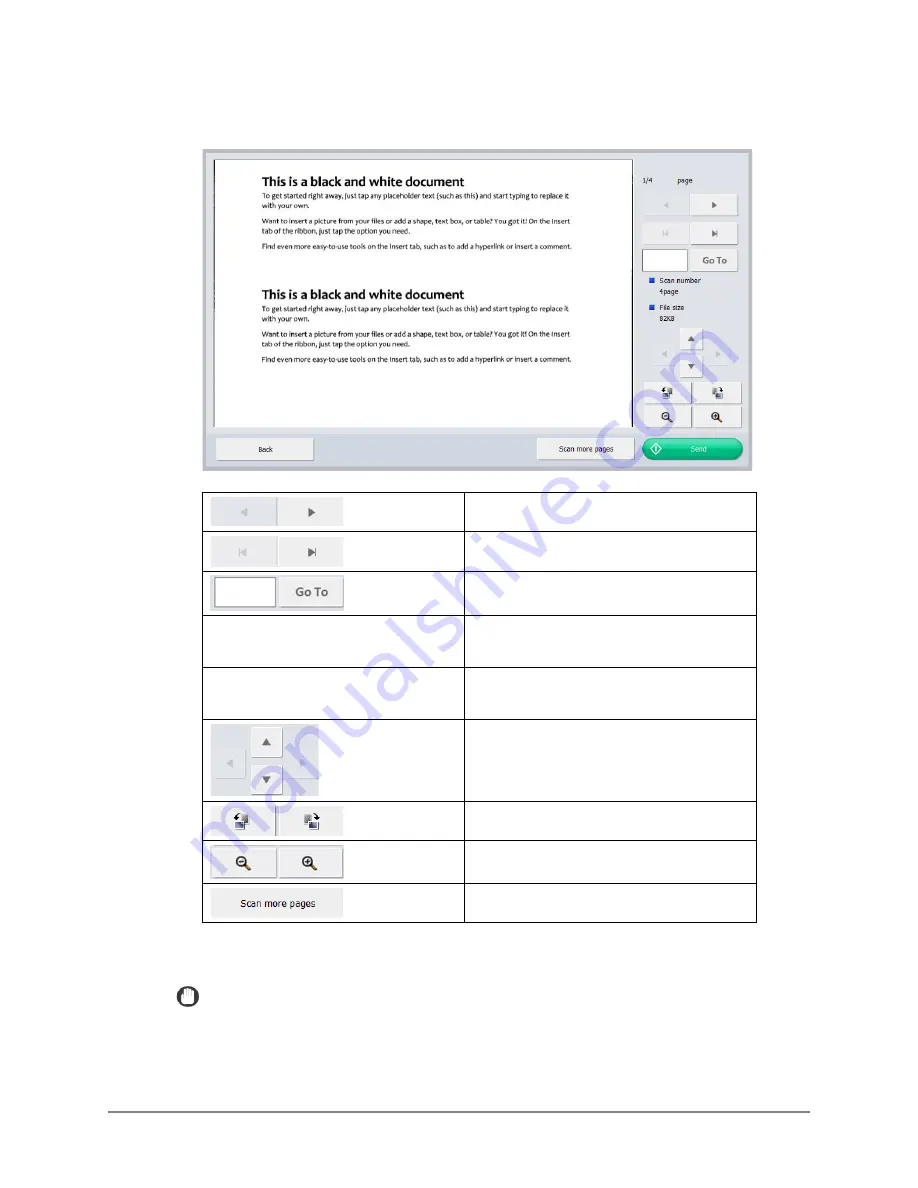
Preview and confirm the scanned images.
Press to display the previous or next
image.
Press to go to the first or last image.
Enter a specific page number, and the
press [Go To] to go directly to this page.
[Scan number]
<current number of pages>
Displays the total number of pages that
were scanned.
[File size]
<current file size in KB>
Displays the scanned file’s size in KB.
Press to view different areas of the
scanned image. If the image is enlarged,
you can use your finger to move around
the image.
Press to rotate the image 90 degrees each
time the buttons are pressed.
Press to zoom in and out of the image.
Press to go back to the Scan/Send screen,
and scan more pages to add to this file.
Press [Back] to return to the previous page.
IMPORTANT
When you press [Scan more pages], the Scan/Send Settings screen appears. You
can change the scan conditions, and then press [Check image and send] to return
to the Send screen.
Summary of Contents for Scan Kiosk II
Page 1: ...18001 20 UD2 001 Version 2 0 User s Guide...
Page 2: ...2 Scan Kiosk II V2 0 User s Guide This page is intentionally left blank...
Page 137: ...Scan Kiosk II V2 0 User s Guide 137 7 Press OK The User Administration settings are complete...
Page 175: ...Scan Kiosk II V2 0 User s Guide 175 10 Press OK The Job Button Export settings are complete...
Page 179: ...Scan Kiosk II V2 0 User s Guide 179 5 Press Edit Import The Import screen appears...
Page 184: ...184 Scan Kiosk II V2 0 User s Guide 11 Press OK The Job Button Import settings are complete...
Page 189: ...Scan Kiosk II V2 0 User s Guide 189 5 Press Edit New The New Address screen appears...