10
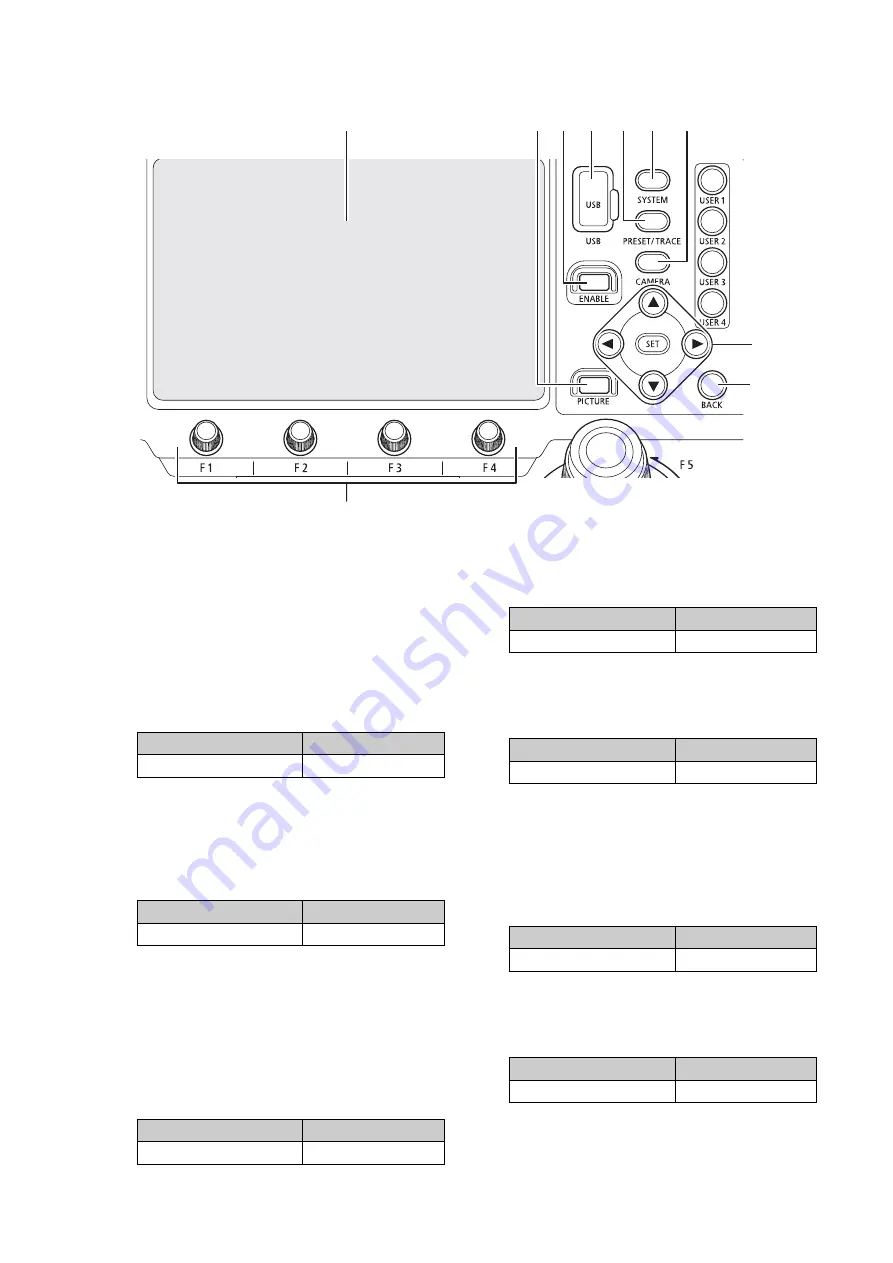
Menu Operation Area
3
LCD Panel
For display of video from the camera and menu
screens.
You can perform various operations by touching
the screen (touch panel).
4
PICTURE
Button
Displays the picture screen (P. 35). Press it again
to return to the previous screen (before pressing
the PICTURE button).
5
Menu Operation Area
ENABLE
Button
Enables or disables operation of the menu
operation area and the touch panel.
Additionally, pressing and holding down the button
turns on/off display on the LCD panel.
6
USB
Terminal (Front)
You can connect a USB memory to the terminal.
You can use a USB memory formatted with FAT32
or exFAT.
7
PRESET / TRACE
Menu Button
Displays the PRESET / TRACE menu (P. 69). Press
it again to return to the top menu.
8
SYSTEM
Menu Button
Displays the SYSTEM menu (P. 60) Press it again
to return to the top menu.
9
CAMERA
Menu Button
Displays the CAMERA menu (P. 72) Press it again
to return to the top menu.
10
/
/
/
/
SET
Buttons
These buttons are used in cases such as when
operating menus (P. 32). Press the corresponding
button to move the onscreen cursor in the desired
direction (
/
/
/
) when operating menus.
Press the SET button to confirm a selection.
11
BACK
Button
Used in cases such as when going back to the
previous menu level.
4 5 6
7
8
9
10
11
12
3
Condition
Illumination
During display
(Orange light on)
Condition
Illumination
Operation is enabled
(Orange light on)
Condition
Illumination
During display
(Orange light on)
Condition
Illumination
During display
(Orange light on)
Condition
Illumination
During display
(Orange light on)
Condition
Illumination
Button can be used
(Orange light on)
Condition
Illumination
Button can be used
(Orange light on)


