


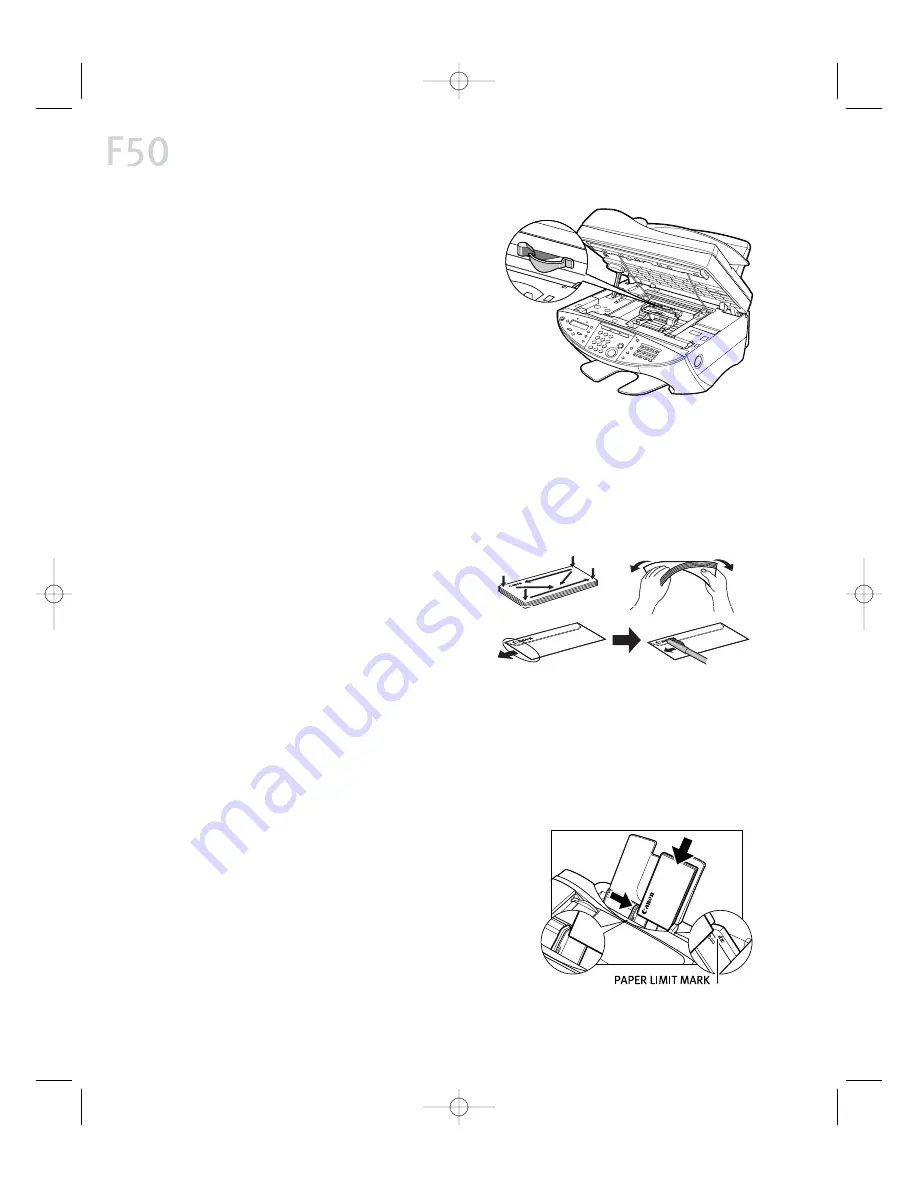
To load envelopes:
1
Open Scanning unit
Press the O
Op
pe
en
n button on the side of
the F50 MFP, then lift the scanning
unit.
2
Set paper thickness lever
Adjust the paper thickness lever to the
right, then close the scanning unit until
it clicks into place.
3
Adjust paper guide
Pinch and slide the paper guide to the left.
4
Insert envelopes
Before loading, press the corners and
sides of the envelopes to make them
as flat as possible. Insert into the
paper tray, with the print side facing
up and aligned to the right.
Make sure that none of the envelope flaps overlap. If the envelope edges are
not flat, crease them with a pen.
Insert envelopes into the multi-purpose tray, with the address side facing up
and pointed in the direction shown. Align the stack with the right side of the
paper rest.
5
Readjust paper guide
Move the guide securely to the edge of
the envelopes.
6
Replace tray cover
Place the tray cover on the multi-
purpose tray when finished.
4
4
MultiPASS F50 User’s Manual
F50 Chapter 1-33.qxd 6/20/01 5:05 PM Page 4
Summary of Contents for MultiPASS F50
Page 26: ...MultiPASS F50 User s Manual 2 20 0 F50 Chapter 3 33 qxd 6 20 01 5 08 PM Page 20 ...
Page 44: ...MultiPASS F50 User s Manual 3 38 8 F50 Chapter 4 33 qxd 6 20 01 5 11 PM Page 38 ...
Page 54: ...MultiPASS F50 User s Manual 4 48 8 F50 Chapter 5 33 qxd 6 20 01 5 13 PM Page 48 ...
Page 68: ...MultiPASS F50 User s Manual 6 62 2 F50 Chapter 7 33 qxd 6 20 01 5 16 PM Page 62 ...
Page 74: ...MultiPASS F50 User s Manual 6 68 8 F50 Chapter 8 33 qxd 6 20 01 5 18 PM Page 68 ...
Page 98: ...MultiPASS F50 User s Manual 9 92 2 F50 Chapter 10 33 qxd 6 20 01 5 21 PM Page 92 ...
Page 102: ...9 96 6 F50 User s Manual index 33 qxd 6 20 01 5 23 PM Page 96 ...


