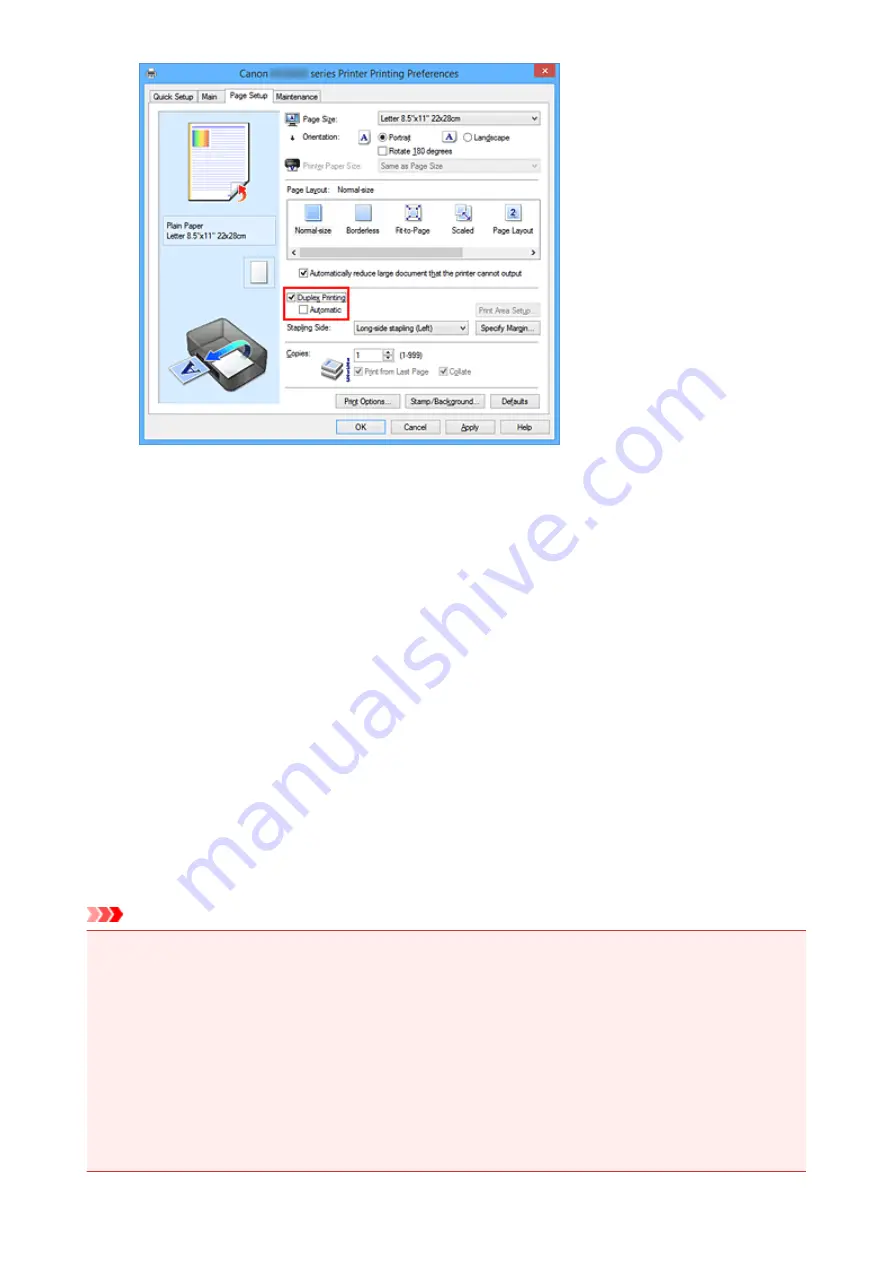
3. Select the layout
Select
Normal-size
,
Fit-to-Page
,
Scaled
, or
Page Layout
from the
Page Layout
list.
4. Specify the side to be stapled
The best
Stapling Side
is selected automatically from the
Orientation
and
Page Layout
settings. To
change the setting, select another stapling side from the list.
5. Set the margin width
If necessary, click
Specify Margin...
and set the margin width, and then click
OK
.
6. Complete the setup
Click
OK
on the
Page Setup
tab.
When you execute print, the document is first printed on one side of a sheet of paper. After one side is
printed, reload the paper correctly according to the message.
Then click
Start Printing
to print the opposite side.
Important
• When a media type other than
Plain Paper
is selected from the
Media Type
list on the
Main
tab,
Duplex Printing
appears grayed out and is unavailable.
• When
Borderless
,
Tiling/Poster
, or
Booklet
is selected from the
Page Layout
list,
Duplex Printing
and
Stapling Side
appear grayed out and are unavailable.
•
Duplex Printing
can be performed only when one of the following paper sizes is selected from
Page
Size
on the
Page Setup
tab.
•
Letter 8.5"x11" 22x28cm
,
A4
• After printing the front page, there is an ink drying wait time before starting to print the back page
(Operation stops temporarily). Do not touch the paper during this time. You can change the ink drying
wait time at
Custom Settings
on the
Maintenance
tab.
402
Summary of Contents for MG5700 Series
Page 26: ...Using the Machine Printing Photos from a Computer Copying Originals 26 ...
Page 155: ...Loading Paper Loading Plain Paper Photo Paper Loading Envelopes 155 ...
Page 172: ...Replacing Ink Replacing Ink Checking Ink Status 172 ...
Page 178: ...When an ink tank is out of ink replace it immediately with a new one Ink Tips 178 ...
Page 215: ...Safety Safety Precautions Regulatory Information 215 ...
Page 220: ...Main Components and Their Use Main Components Power Supply LCD and Operation Panel 220 ...
Page 221: ...Main Components Front View Rear View Inside View Operation Panel 221 ...
Page 223: ... 10 platen glass Load an original here 223 ...
Page 243: ...Note The effects of the quiet mode may be less depending on the print quality settings 243 ...
Page 254: ...Using Machine with Direct Connection 254 ...
Page 258: ...Language selection Changes the language for messages and menus on the LCD 258 ...
Page 265: ...Network Connection Network Connection Tips 265 ...
Page 313: ...5 Delete Deletes the selected IP address from the list 313 ...
Page 392: ...Note Selecting Scaled changes the printable area of the document 392 ...
Page 403: ...Related Topic Changing the Printer Operation Mode 403 ...
Page 425: ...Adjusting Color Balance Adjusting Brightness Adjusting Intensity Adjusting Contrast 425 ...
Page 431: ...Adjusting Intensity Adjusting Contrast 431 ...
Page 511: ...Printing Using Canon Application Software My Image Garden Guide Easy PhotoPrint Guide 511 ...
Page 544: ...Printing Using Operation Panel Printing Templates Such as Lined or Graph Paper 544 ...
Page 563: ...Two Sided Copying 563 ...
Page 669: ...669 ...
Page 687: ...687 ...
Page 726: ...Adjusting Cropping Frames ScanGear 726 ...
Page 754: ...Scanning starts then the scanned image appears in the application 754 ...
Page 761: ...Scanning Tips Resolution Data Formats Color Matching 761 ...
Page 799: ...If icon is displayed Go to check 4 Cannot Find Machine During Wireless LAN Setup Check 4 799 ...
Page 805: ...Note For Windows you can use the Setup CD ROM to redo setup 805 ...
Page 951: ...1660 Cause A ink tank is not installed What to Do Install the ink tank 951 ...


