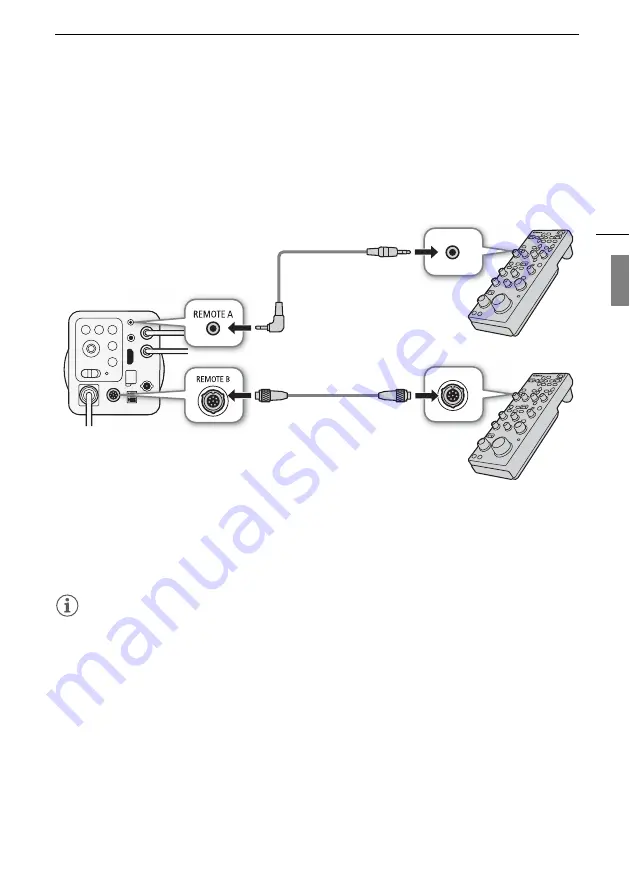
Using the Optional RC-V100 Remote Controller
49
Using the Optional RC-V100 Remote Controller
You can connect the optional RC-V100 Remote Controller to control the camera from a distance. In
addition to turning the camera on and off and navigating the menu, you can control various shooting-
related functions, such as aperture, shutter speed, and custom picture settings, like knee and
sharpness. For details on how to connect and use the remote controller, refer to its instruction manual.
Visit your local Canon Web site to download the latest version.
1 Set the
Q
switch to OFF and connect the remote controller to the camera.
• Make sure that the remote controller's terminal selection switch is set to match the terminal to be
used on the camera.
2 Set the
Q
switch to ON.
NOTES
• The following controls on the remote controller will not operate the camera: ONSCREEN button,
u
(review recording) button, SHUTTER SELECT button, AGC button, AUTO KNEE button, AF
button and AUTO IRIS button.
• The ZOOM dial on the remote controller can operate the camera only when a compatible CINE-
SERVO lens (
A
71) is attached to the camera and the lens's zoom operation change-over knob is
set to SERVO.
• If you plan on connecting the remote controller to the camera using the optional RR-10 or RR-100
8-pin Remote Cable, check the serial number of the RC-V100. If the serial number starts with "01
xxxx" (where xxxx represents other digits), you will need to update the remote controller's firmware.
Canon will perform this feature upgrade, and requires that the remote controller be sent to an
accredited Canon Service Center. Shipping and handling charges may apply. Contact a Canon
Customer Support Center for details.
RR-10 or RR-100 8-pin
Remote Cable (optional)
To the RC-V100's
REMOTE A terminal
To the RC-V100's
REMOTE B terminal
Remote cable
(supplied with the
RC-V100)


