Using the Menu
20
Using the Menu
Many of the camera's functions can be adjusted from the menu that opens after pressing the MENU
button. For details about the available menu options and settings, refer to
Menu Options
(
A
Selecting an Option from the Menu
The following is a step-by-step explanation of how to select an option from the menu. In the
procedures throughout the rest of this manual, opening and closing the menu is assumed and not
included in the procedure.
1 Press the MENU button.
• The menu opens with the orange selection frame indicating the menu item that was selected the
previous time the menu was closed (unless the camera was turned off).
2 Push the joystick up/down to select the desired submenu.
3 Push the joystick right or press SET.
• The selection frame will appear on a menu item in the submenu.
• Press the CANCEL button or push the joystick left to return to the previous submenu. For some
submenus, you can alternatively select [<].
4 Push the joystick up/down to select the desired menu item.
• If a submenu contains many items, push the joystick up/down to scroll up/down and see other
menu items.
• A [>] next to a menu item indicates another submenu. Repeat steps 3 and 4.
5 Push the joystick right or press SET.
• The selection frame will appear on a setting option.
• Press the CANCEL button to return to the previous submenu.
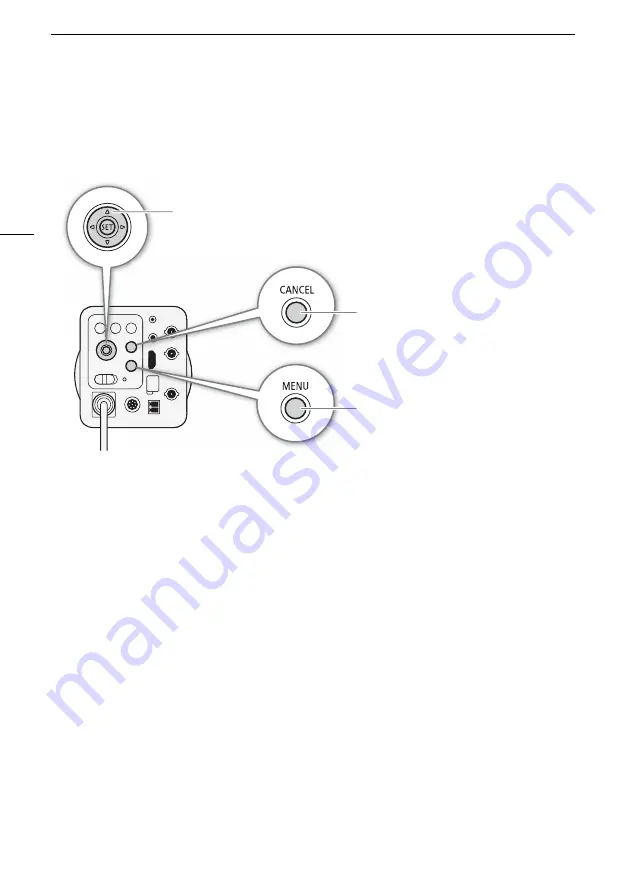
MENU button
Press to open/close the menu.
Joystick
Push the joystick up/down/left/right to move the selection frame in the menu. Then,
press the joystick itself
(in the manual, "press SET") to select the menu item indicated
by the selection frame.
CANCEL button
Press to return to the previous menu/
submenu level or to stop some operations
that are in progress. On the shooting screen,
press to hide all onscreen displays; press
again to show all onscreen displays again.


