


If the
User Account Control
screen is displayed, follow the on-screen instructions.
• In Windows 8.1 or Windows 8, select
Control Panel
from the
Settings
charm on
Desktop
>
Hardware and Sound
>
Device Manager
.
• In Windows 7 or Windows Vista, click
Control Panel
,
Hardware and Sound
, then
Device Manager
.
• In Windows XP, click
Control Panel
,
Performance and Maintenance
,
System
, then click
Device
Manager
on the
Hardware
sheet.
2. Double-click
Universal Serial Bus controllers
then
USB Printing Support
.
If the
USB Printing Support Properties
screen is not displayed, make sure that the machine is correctly
connected to the computer.
Check3
Make sure that the machine is connected to your computer properly.
3. Click the
General
tab and make sure that there is no indication of a problem with the device.
If a device error is displayed, refer to Windows help to resolve the error.
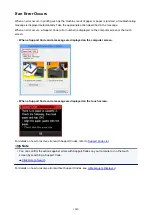
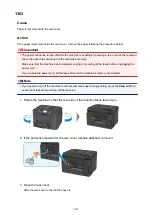
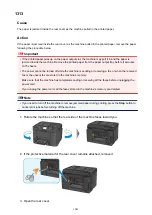
Other Error Messages
Check
If an error message is displayed outside the printer status monitor, check the
following:
• "
Could not spool successfully due to insufficient disk space
"
Delete any unnecessary files to increase the amount of free space on the disk.
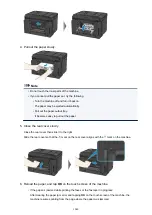
• "
Could not spool successfully due to insufficient memory
"
Quit other running application softwares to increase available memory.
If you cannot print yet, restart your computer and retry printing.
• "
Printer driver could not be found
"
Uninstall the MP Drivers following the procedure described in
Deleting the Unnecessary MP Drivers
, then
reinstall the MP Drivers with the Setup CD-ROM or reinstall them from our website.
• "
Could not print Application name
- File name"
Try printing again once the current job is complete.
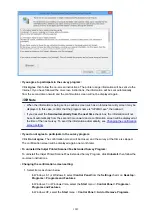
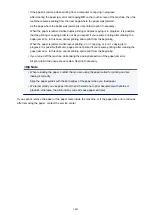
The Inkjet Printer/Scanner/Fax Extended Survey Program Screen Is
Displayed
If the Inkjet Printer/Scanner/Fax Extended Survey Program is installed, a confirmation screen asking for
permission to send the printer and application software usage information will be displayed every month
for about ten years.
Read the instructions on the screen and follow the procedure below.
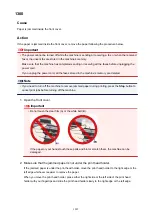
1028
Summary of Contents for MAXIFY MB2350
Page 89: ...89...
Page 118: ...Manual Online This function displays the Online Manual 118...
Page 131: ...Safety Guide Safety Precautions Regulatory and Safety Information 131...
Page 139: ...139...
Page 141: ...Main Components Front View Rear View Inside View Operation Panel 141...
Page 159: ...Loading Paper Originals Loading Paper Loading Originals Inserting the USB Flash Drive 159...
Page 177: ...Printing Area Printing Area Other Sizes than Letter Legal Envelopes Letter Legal Envelopes 177...
Page 190: ...Inserting the USB Flash Drive Inserting the USB Flash Drive Removing the USB Flash Drive 190...
Page 193: ...Replacing an Ink Tank Replacing an Ink Tank Checking the Ink Status 193...
Page 228: ...Related Topic Cleaning the Print Heads from Your Computer 228...
Page 283: ...Information about Network Connection Useful Information about Network Connection 283...
Page 330: ...5 Delete Deletes the selected IP address from the list 330...
Page 404: ...Note Selecting Scaled changes the printable area of the document 404...
Page 415: ...Related Topic Changing the Printer Operation Mode 415...
Page 439: ...Note During Grayscale Printing inks other than black ink may be used as well 439...
Page 444: ...Adjusting Intensity Adjusting Contrast 444...
Page 485: ...Printing a Color Document in Monochrome Displaying the Print Results before Printing 485...
Page 531: ...Device user settings 531...
Page 554: ...About Special Copy Menu Copying Thick Originals Such as Books 554...
Page 562: ...See Two Sided Copying for two sided copying 562...
Page 563: ...Scanning Scanning from a Computer Scanning from the Operation Panel of the Machine 563...
Page 567: ...Note Refer to Settings Dialog Box for how to set the applications to integrate with 567...
Page 577: ...Documents with colors in the background of text Documents containing multiple languages 577...
Page 604: ...Defaults You can restore the settings in the displayed screen to the default settings 604...
Page 650: ...Related Topic Scanning Items Larger than the Platen Image Stitch 650...
Page 671: ...671...
Page 694: ...Related Topic Scanning in Basic Mode 694...
Page 752: ...752...
Page 898: ...4 When a confirmation message is displayed click Yes 898...
Page 951: ...Problems with Printing Quality Print Results Not Satisfactory Ink Is Not Ejected 951...
Page 953: ...Back of the Paper Is Smudged Colors Are Uneven or Streaked 953...
Page 1057: ...1660 Cause The ink tank is not installed Action Install the ink tank 1057...
Page 1105: ...5500 Cause Ink tank has not been properly recognized Action Contact the service center 1105...
Page 1106: ...5501 Cause Ink tank has not been properly recognized Action Contact the service center 1106...
Page 1107: ...5B00 Cause Printer error has occurred Action Contact the service center 1107...
Page 1108: ...5B01 Cause Printer error has occurred Action Contact the service center 1108...


