


019A-07A
Be careful of the following points when storing a new drum cartridge or handling a drum cartridge that was taken out of the
printer for maintenance or moving the printer.
IMPORTANT
Precautions when storing drum cartridge
To use drum cartridges in a safe and trouble-free manner, store it in a place that fulfils the following conditions.
Do not store drum cartridges in a location exposed to direct sunlight.
Do not store drum cartridges in a location subject to high temperature or humidity or in a location with dramatic
changes in temperature or humidity.
Storage temperature range: 0 to 35 °C
Storage humidity range: 35 to 85% RH (no condensation)
Do not store drum cartridges in a place where corrosive gases, such as ammonia, are generated, or where a
considerable amount of salt is contained in the air, or where there is a lot of dust.
Keep drum cartridges out of the reach of small children.
Store drum cartridges in the same orientation as when they are installed in the printer.
Do not store drum cartridges vertically or upside-down.
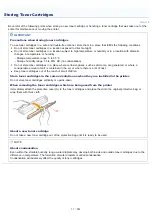
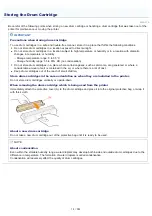
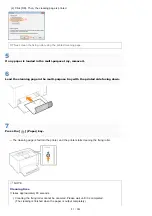
When removing the drum cartridge which is being used from the printer
Immediately attach the protective cover (A) to the drum cartridge and place it into the original protective bag, or wrap it
with thick cloth.
About a new drum cartridge
Do not take a new drum cartridge out of the protective bag until it is ready to be used.
NOTE
About condensation
Even within the storable humidity range, water droplets may develop both inside and outside drum cartridges due to the
difference in temperature. The formation of water droplets is called condensation.
Condensation will adversely affect the quality of drum cartridges.
Storing the Drum Cartridge
㻣㻥㻌㻛㻌㻟㻠㻟
Summary of Contents for LBP7018C
Page 1: ......
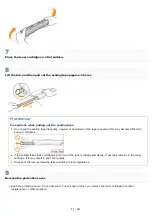
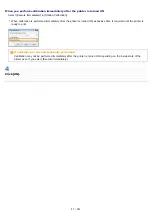
Page 19: ...7 Click Exit When the following screen appears you can remove the CD ROM...
Page 35: ...If the laser beam should escape and enter your eyes exposure may cause damage to your eyes...
Page 85: ...NOTE Calibration time It takes approximately 57 seconds...
Page 92: ......
Page 106: ...Close the covers after you finish checking Next install the printer Installing the Printer...
Page 111: ...019A 027 Installing the Printer Driver Uninstalling the Printer Driver Driver Installation...
Page 135: ...17 Click Exit When the following screen appears you can remove the CD ROM...
Page 137: ...If the User Account Control dialog box appears Click Yes or Continue...
Page 156: ......
Page 177: ...3 Click OK For details on the basic printing procedure see Basic Printing Procedure...
Page 181: ...For details on the basic printing procedure see Basic Printing Procedure...
Page 183: ...3 Click OK For details on the basic printing procedure see Basic Printing Procedure...
Page 186: ...3 Click OK Then the Page Setup sheet reappears...
Page 197: ...4 Click OK For details on the basic printing procedure see Basic Printing Procedure...
Page 201: ...3 Click OK For details on the basic printing procedure see Basic Printing Procedure...
Page 203: ...4 Click OK For details on the basic printing procedure see Basic Printing Procedure...
Page 207: ...4 Click OK For details on the basic printing procedure see Basic Printing Procedure...
Page 211: ...Low...
Page 221: ...4 Confirm the settings then click OK The printer folder reappears...
Page 273: ...4 Click OK...
Page 282: ...For details on the procedure for loading paper see Loading Paper...
Page 316: ...If you specify Special Settings C4 printing speed drops...
Page 341: ......


