background image

4

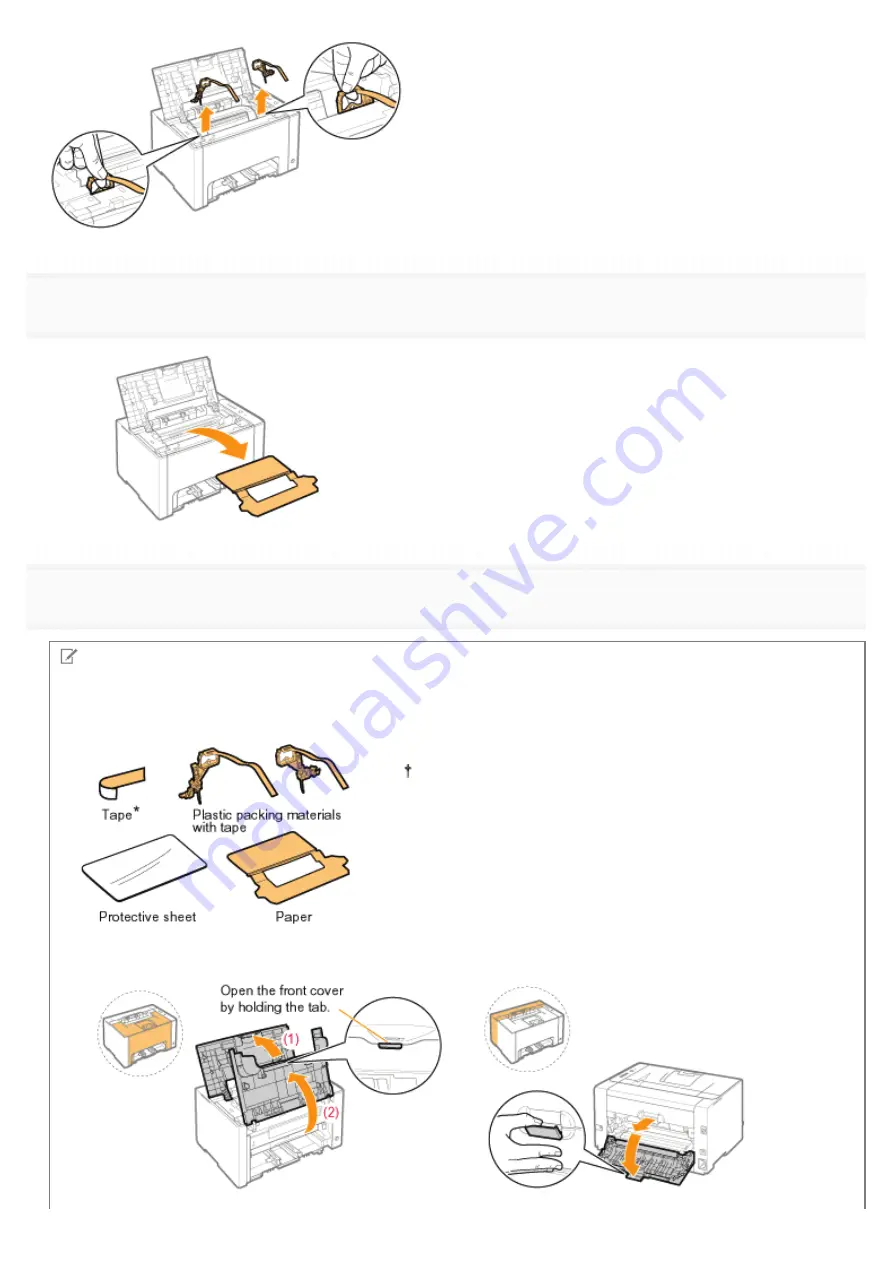
Remove the paper inside the printer.

5

Close the top cover.

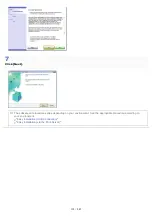
Check !

Checking if the packing materials are removed

Check that the following packing materials are completely removed.

Dispose of the left packing materials according to local
regulations.

*

Make sure that all the orange tape is completely removed.

㻝㻜㻡㻌㻛㻌㻟㻠㻟

Summary of Contents for LBP7018C

Page 1: ......

Page 2: ...About This Printer 39 Printer Specifications 40 System Requirements for Printing 42 Names and Dimensions of Each Part 43 Control Panel 45 Printer Status Window 47 Energy saving Mode 49 Sleep Mode 50 A...

Page 3: ...After Installation 125 Installing with Plug and Play 127 Uninstalling the Printer Driver 130 Starting the Uninstaller from Control Panel 136 Basic Printer Operations 138 Usable Paper 139 Precautions f...

Page 4: ...efault Values for Printing Preferences 220 Saving Frequently Used Printing Preferences Adding Editing Deleting a Profile 222 Selecting a Profile 226 Using the Printer in the Print Server Environment 2...

Page 5: ...f Register Colors 315 Thin Lines or Fill Patterns Are Not Printed with the Specified Colors or Do Not Appear At All 317 Shaded Patterns Are Not Printed in the Correct Color Specified Color 318 Photogr...

Page 6: ...019A 000 Legal Notices Legal Limitations on the Usage of Your Product and the Use of Images Using the e Manual Before You Start...

Page 7: ...laser product under IEC60825 1 2007 and EN60825 1 2007 This means that the product does not produce hazardous laser radiation Since radiation emitted inside the product is completely confined within...

Page 8: ...our household waste according to the WEEE Directive 2002 96 EC and your national law This product should be handed over to a designated collection point e g on an authorized one for one basis when you...

Page 9: ...use of the images scanned printed or otherwise reproduced you should consult in advance with your legal advisor for guidance Paper Money Travelers Checks Money Orders Food Stamps Certificates of Depos...

Page 10: ...e Search Method Viewing the e Manual To find the desired content Selecting between the category icons From the top page select a category icon you want Top Page Searching from the list of contents On...

Page 11: ...ck the following links to see the system requirements to use the e Manual and how to install uninstall the e Manual Operating Environment Installing the e Manual Uninstalling the e Manual How to Use t...

Page 12: ...the e Manual Operation of the following Web browsers is guaranteed Internet Explorer 6 0 7 0 8 0 Firefox 2 x 3 x NOTE Enabling the script function Enable the script function for a Web browser before u...

Page 13: ...ive of your computer 2 Click Custom Installation If the above screen does not appear Basic Operations Various Information for Windows If the AutoPlay dialog box appears Click Run AUTORUN EXE If the Us...

Page 14: ...4 Read the contents of License Agreement and then click Yes The installation starts Wait until the following screen disappears It may take a long time to install the e Manual 5 Click Next...

Page 15: ...CD ROM Displaying the e Manual Double click LBP7010C 7018C e Manual created on the desktop When a security protection message appears Perform the following procedure 1 Click the information bar and t...

Page 16: ...ithout installing it in the computer you are using 1 Insert the supplied CD ROM User Software into the CD ROM drive of your computer 2 Click Display Manuals 3 Click button next to e Manual Depending o...

Page 17: ...g procedure 1 Insert the supplied CD ROM User Software into the CD ROM drive of your computer 2 Click Additional Software Programs If the above screen does not appear Basic Operations Various Informat...

Page 18: ...4 Click Uninstall to start the uninstallation Please wait a moment until the uninstallation is complete It may take a long time to uninstall the printer driver 5 Click Exit 6 Click Back...

Page 19: ...7 Click Exit When the following screen appears you can remove the CD ROM...

Page 20: ...Topic Page in this section The Contents Page is displayed from Contents which is located on the upper right of the e Manual and the search dialog box is displayed from each page in another window The...

Page 21: ...er driver and so on 5 Top The top page of the e Manual is displayed 6 Contents The entire contents of the e Manual are displayed 7 Help How to use the e Manual is displayed 8 Enter keyword s here The...

Page 22: ...the menu 2 Topic page The descriptions of each item are displayed 3 Category menu You can select a different category from the pull down menu 4 Click to move to the previous or next category 5 Print P...

Page 23: ...es Shows the categories of the e Manual Click a category to view the detailed list of the category 2 Whole contents Shows the all categories and sections of the e Manual Click an item to view the cont...

Page 24: ...o or more keywords When entering keywords enter a space between the keywords Example Toner Replacement if you want to display pages which include words Toner and Replacement 2 Search result The search...

Page 25: ...or contains additional explanations for a procedure Reading these notes is highly recommended Indicates an operation that must not be performed Read these items carefully and make sure not to perform...

Page 26: ...erating system Windows 2000 Microsoft Windows XP operating system Windows XP Microsoft Windows Vista operating system Windows Vista Microsoft Windows 7 operating system Windows 7 Microsoft Windows Ser...

Page 27: ...IMPLIED EXCEPT AS PROVIDED HEREIN INCLUDING WITHOUT LIMITATION THEREOF WARRANTIES AS TO MARKETABILITY MERCHANTABILITY FITNESS FOR A PARTICULAR PURPOSE OF USE OR AGAINST INFRINGEMENT OF ANY PATENT CANO...

Page 28: ...part of this publication may be reproduced or transmitted in any form or by any means electronic or mechanical including photocopying and recording or by any information storage or retrieval system w...

Page 29: ...ademarks of Adobe Systems Incorporated Microsoft Windows Windows Vista Windows Server and Internet Explorer are either registered trademarks or trademarks of Microsoft Corporation in the United States...

Page 30: ...of rights holders of the SOFTWARE 3 You may use the SOFTWARE solely for use with the Canon product you purchased the PRODUCT 4 You may not assign sublicense market distribute or transfer the SOFTWARE...

Page 31: ...to these instructions Also as it may result in unexpected accidents or injuries do not perform any operation unless otherwise specified in the manual Improper operation or use of this machine could re...

Page 32: ...ventilation slots are provided for proper ventilation of working parts inside the printer Never place the printer on a soft surface such as a bed sofa or rug Blocking the slots can cause the printer...

Page 33: ...do so can result in a fire or electrical shock If excessive stress is applied to the connection part of the power cord it may damage the power cord or the wires inside the machine may disconnect This...

Page 34: ...ediately turn OFF the power switch and disconnect the interface cables if they are connected Then unplug the power plug from the AC power outlet and contact your local authorized Canon dealer When plu...

Page 35: ...If the laser beam should escape and enter your eyes exposure may cause damage to your eyes...

Page 36: ...mp cloth in a way that prevents inhalation Never use a vacuum cleaner that does not have safeguards against dust explosions to clean up spilled toner Doing so may cause a malfunction in the vacuum cle...

Page 37: ...sh them immediately with cold water Washing with warm water sets the toner making it impossible to remove the toner stains When removing jammed paper be careful not to allow the toner on the paper to...

Page 38: ...may cause a malfunction in the vacuum cleaner or result in a dust explosion due to static discharge CAUTION Keep the toner cartridges and other consumables out of the reach of small children If the to...

Page 39: ...Printer Specifications System Requirements for Printing Names and Dimensions of Each Part Control Panel Printer Status Window Energy saving Mode Cautions for Handling the Printer Consumables About Thi...

Page 40: ...e Standard sizes A4 B5 A5 Legal Letter Executive Statement Envelope Monarch Envelope No 10 COM10 Envelope DL Envelope C5 Envelope B5 Foolscap Index Card and 16K Custom paper sizes Width 76 2 to 215 9...

Page 41: ...es Canon Toner Cartridge 729 Black Canon Toner Cartridge 729 Yellow Canon Toner Cartridge 729 Magenta Canon Toner Cartridge 729 Cyan Drum cartridge Canon Drum Cartridge 029 For details on the yield se...

Page 42: ...orming to recommended system requirements for Windows Vista 7 or Server 2008 Available memory RAM 128 MB or more Available hard disk space Free hard disk space displayed on the installation screen of...

Page 43: ...t Cover 2 Ventilation Slot 6 Control Panel 10 Power Switch 3 Lift Handle 7 Top Cover 11 Paper Guides 4 Tray Cover 8 Auxiliary Tray Rear View 1 Ventilation Slots 4 USB Connector 6 Ventilation Slot 2 Re...

Page 44: ...3 Rating Label Interior View 1 Lock Release Levers 2 Drum Cartridge Guide 3 Toner Cartridge Guide Dimensions of Each Part...

Page 45: ...in the replacement position 2 Paper Indicator On The printer is in the toner cartridge replacement mode 2 Blinking Paper needs to be checked Such as when paper runs out and when paper cannot be fed p...

Page 46: ...ner cartridge replacement mode 2 is released by pressing and holding this key for 2 seconds When the Paper indicator is off The printer enters to the toner cartridge replacement mode 2 by pressing and...

Page 47: ...inter Status Window display Consumables Information Displays the Consumables Information dialog box You can check the statuses of the toner cartridges and drum cartridge Checking the Consumables Statu...

Page 48: ...Window See Help How to Use Help Displaying the Printer Status Window Click in the Windows task tray and then select the printer name NOTE When displaying the Printer Status Window from the printer dr...

Page 49: ...d for a certain time Sleep Mode You can configure the printer to enter the sleep mode when data is not sent from the computer or when the printer status remains as it is longer than the specified time...

Page 50: ...ct the Enter Sleep Mode after Fixed Period check box 2 Specify the time until the printer enters the sleep mode in Time to Enter Sleep Mode 3 Click OK NOTE About the setting for the time to enter the...

Page 51: ...nt in which a local printer is installed 1 Insert the supplied CD ROM User Software into the CD ROM drive of your computer 2 Click Additional Software Programs If the above screen does not appear Basi...

Page 52: ...OTE About the setting for the time to execute auto shutdown When Auto Shutdown After is changed during sleep mode the specified time to execute auto shutdown is reset You can specify Auto Shutdown Aft...

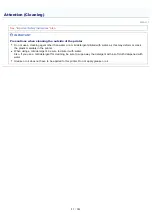
Page 53: ...osing the printer to direct sunlight or strong light may result in deterioration in print quality Do not open the covers on the printer during printing This may result in damage to the printer Handle...

Page 54: ...in paper at interval of 2 sheets printing 2 sheets intermittently Also this value is the lifetime of the drum cartridge when performing color printing The lifetime of the drum cartridge is approximate...

Page 55: ...tridge Availability Toner cartridge and drum cartridge for this machine will be available for at least seven 7 years or any such longer period as required by applicable laws after production of this m...

Page 56: ...ace the toner cartridge Print quality cannot be guaranteed due to the toner cartridge reaching the end of its life and so on Insert Cartridge The toner cartridge is not installed Wrong color toner car...

Page 57: ...NOTE Replacement procedures for the toner cartridges or drum cartridge Toner Cartridge Replacement Drum Cartridge Replacement...

Page 58: ...ement Replacing the Drum Cartridge Storing the Drum Cartridge Moving the Printer Cleaning and Maintaining the Printer Adjusting Color Calibration Cleaning the Fixing Roller of the Printer Cleaning the...

Page 59: ...ace the toner cartridge before printing a large amount of data Move the toner cartridges of the displayed color to the replacement position and then replace them Moving Toner Cartridges to Replacement...

Page 60: ...ays the color of the toner cartridge at the replacement position 3 The toner cartridges of the displayed colors move to the replacement position automatically If the multiple colors of the toner cartr...

Page 61: ...unction accident or damage caused by the use of counterfeit toner cartridge For more information see http www canon com counterfeit Hold the toner cartridge properly When handling the toner cartridge...

Page 62: ...e or humidity When moving a new toner cartridge to a location with change in temperature leave the cartridge in the protective bag at the new location for two or more hours to allow it to adjust to th...

Page 63: ...ave reached end of their life are automatically moved to the replacement position If you want to replace the toner cartridges such as before the toner cartridges have reached the end of their life you...

Page 64: ...e replacement position Moving Toner Cartridges to Replacement Position Manually 5 Take out the new toner cartridge from the protective bag You can open the protective bag with your hands from the notc...

Page 65: ...his may become difficult to pull out completely If the sealing tape stops at midpoint pull it out of the toner cartridge completely If any tape remains in the toner cartridge this may result in poor p...

Page 66: ...10 Install the toner cartridge Install the toner cartridges while aligning A on both sides of the toner cartridges with the toner cartridge guides inside the printer 11 Close the top cover...

Page 67: ...moving the toner cartridges to the replacement position by using the Paper key on the printer You can also move the toner cartridges by using the Paper key on the printer Moving Toner Cartridges by U...

Page 68: ...Replace the toner cartridges after moving is complete Replacing the Toner Cartridge 4 Click Finish Replacing after the toner cartridge replacement is complete...

Page 69: ...nt or operating Move the toner cartridges to the replacement position when the printer stops operating 1 Make sure that the Paper indicator is off When the Paper indicator is on Proceed to Step 3 beca...

Page 70: ...key each time Do not open the top cover when the toner cartridges are moving while the Toner indicator of the all colors are blinking Replace the toner cartridges after moving is complete Replacing th...

Page 71: ...ed or where a considerable amount of salt is contained in the air or where there is a lot of dust Keep toner cartridges out of the reach of small children Store toner cartridges in the same orientatio...

Page 72: ...end that you replace the drum cartridge before printing a large amount of data Replacing the Drum Cartridge Replace the drum cartridge You can continue printing as is however print quality may deterio...

Page 73: ...place it vertically or upside down Do not touch the electrical contacts A the drum cartridge memory B and the development roller C If you touch the electrical contacts A or the drum cartridge memory...

Page 74: ...The packing materials may be changed in form or placement or may be added or removed without notice...

Page 75: ...formation dialog box in the Printer Status Window Checking the Consumables Status Before replacing the drum cartridge see Attention Drum Cartridge 1 Remove the tray cover 2 Remove the paper loaded in...

Page 76: ...4 Open the top cover 5 Hold the tab A and then open the front cover 6 Lift the lock release lever on both sides 7 Remove the drum cartridge...

Page 77: ...ter maintenance or other purposes 9 Remove the protective cover Keep the protective cover Do not discard it You will need it when you remove the drum cartridge for printer maintenance or other purpose...

Page 78: ...11 Press down the lock release lever on both sides 12 Close the front cover 13 Close the top cover...

Page 79: ...ated or where a considerable amount of salt is contained in the air or where there is a lot of dust Keep drum cartridges out of the reach of small children Store drum cartridges in the same orientatio...

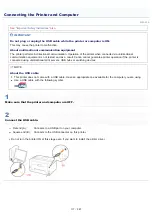
Page 80: ...urn the printer OFF then disconnect the cables or cords from the printer How to disconnect the cable or cord USB cable 2 Turn the computer off 3 Disconnect the cable from the printer Power cord 4 Disc...

Page 81: ...ocket on the printer 2 Plug the power plug into the AC power outlet When transporting the printer unit To prevent damage to the printer during transport perform the following Remove the toner cartridg...

Page 82: ...uired is displayed in the Printer Status Window Cleaning the Photosensitive Drum of the Printer Clean the photosensitive drum of the printer when you notice the following symptoms Short white streaks...

Page 83: ...Cleaning the Outside of the Printer Periodically clean the outer surfaces and ventilation slots of the printer to maintain the optimal print quality...

Page 84: ...cking the Consumables Status If you perform calibration in the state where the toner cartridges have reached the end of their life calibration may not finish properly In this case replace the toner ca...

Page 85: ...NOTE Calibration time It takes approximately 57 seconds...

Page 86: ...to calibration settings When performing calibration automatically at the designated time everyday 1 Select the Use Periodical Calibration Timer check box 2 Specify the time to perform calibration in T...

Page 87: ...n is performed immediately after the printer is turned ON excessive time is required until the printer is ready to print If calibration is not automatically performed Calibration may not be performed...

Page 88: ...er ready 1 Load A4 plain paper in the multi purpose tray Loading Paper NOTE Open the auxiliary tray before cleaning 2 Click in the Windows task tray and then select the printer name 3 4 Select Cleanin...

Page 89: ...e marks even if Fixing Unit Cleaning 1 is performed Perform Fixing Unit Cleaning 2 Performing Fixing Unit Cleaning 2 NOTE Cleaning time It takes approximately 130 seconds Cleaning the fixing roller ca...

Page 90: ...ain paper ready 1 Load A4 plain paper in the multi purpose tray Loading Paper NOTE Open the auxiliary tray before cleaning 2 Click displayed in the task tray and then select a printer name 3 4 Select...

Page 91: ...leaning page in the multi purpose tray with the printed side facing down 7 Press the Paper key The cleaning page is fed into the printer and the printer starts cleaning the fixing roller NOTE Cleaning...

Page 92: ......

Page 93: ...itive drum Drum Cleaning 1 Select when short white streaks lines appear at equal distance on the images especially in a high humidity environment Drum Cleaning 2 Select when the following circumstance...

Page 94: ...E Cleaning time Drum Cleaning 1 It takes approximately 93 seconds Drum Cleaning 2 It takes approximately 125 seconds Cleaning the photosensitive drum cannot be canceled Please wait until it is complet...

Page 95: ...3 Disconnect the cable from the printer Power cord 4 Disconnect the power plug from the AC power outlet 5 Disconnect the cord from the printer 2 Firmly wring a soft cloth dampened with water or a mild...

Page 96: ...How to connect the cable or cord USB cable Connect to the USB connector on the printer Power cord 1 Plug the power cord to the power socket on the printer 2 Plug the power plug into the AC power outle...

Page 97: ...gent diluted with water as this may deform or crack the plastic materials in the printer When using a mild detergent be sure to dilute it with water Also if you use a mild detergent for cleaning be su...

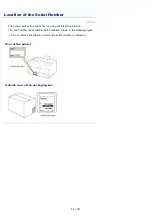
Page 98: ...ing maintenance service You can find the serial number at the location shown in the following figure Do not remove the labels on which the serial number is indicated Rear of the printer Outside view o...

Page 99: ...ed Accessories and Checking the Installation Site 2 Removing the Packing Materials Removing the Packing Materials 3 Installing the Printer Carrying the Printer to the Installation Site Connecting the...

Page 100: ...s Electrical noise or a dramatic drop in mains voltage may cause the printer or computer to operate incorrectly or lose data Do not install the printer in the following locations as this may result in...

Page 101: ...nt density setting ISO IEC 19798 is the global standard related to Method for the determination of toner cartridge yield for color printers and multi function devices that contain printer components i...

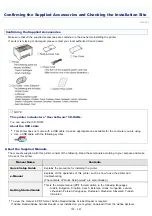
Page 102: ...rding to your purpose and make full use of this printer Manual Name Contents Quick Setup Guide Explains the procedure for installing the printer e Manual Explains all the operations of this printer su...

Page 103: ...ditions Temperature range 10 to 30 C 50 to 86 F Humidity range 20 to 80 RH no condensation Power Supply Requirements 220 to 240 V 10 50 60 Hz 2 Hz Installation Requirements A location with sufficient...

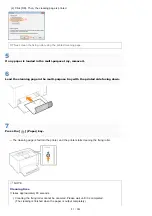
Page 104: ...ion or maintenance About the packing materials The packing materials may be changed in form or placement or may be added or removed without notice Remove all the orange tape if it is attached to the p...

Page 105: ...p cover Check Checking if the packing materials are removed Check that the following packing materials are completely removed Dispose of the left packing materials according to local regulations Make...

Page 106: ...Close the covers after you finish checking Next install the printer Installing the Printer...

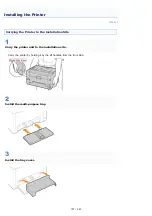
Page 107: ...to the Installation Site 1 Carry the printer unit to the installation site Carry the printer by holding it by the lift handles from the front side 2 Install the multi purpose tray 3 Install the tray...

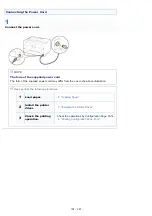
Page 108: ...supplied power cord may differ from the one in the above illustration Next perform the following procedures 1 Load paper Loading Paper 2 Install the printer driver Installing the Printer Driver 3 Chec...

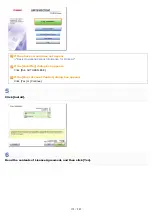
Page 109: ...n Page Print is designed to be printed on A4 paper Be sure to use A4 paper 1 Load A4 paper in the multi purpose tray Loading Paper NOTE Open the auxiliary tray before printing 2 Click in the Windows t...

Page 110: ...If Configuration Page Print is not printed Printing Cannot Be Performed USB Connection Printing Cannot Be Performed via the Print Server...

Page 111: ...019A 027 Installing the Printer Driver Uninstalling the Printer Driver Driver Installation...

Page 112: ...dows restriction even after detecting the printer with Plug and Play Easy Installation Installs the printer driver from the supplied CD ROM CD ROM Setup The e Manual is also installed simultaneously E...

Page 113: ...n Download Installation You can install the printer driver without using the supplied CD ROM but by downloading the printer driver from the print server There are the following two ways to download an...

Page 114: ...urn the computer on and then log on to Windows as a user with administrative rights If the automatic setup screen of Plug and Play appears USB connection Click Cancel turn OFF the printer and then use...

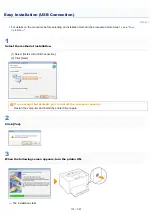
Page 115: ...perations Various Information for Windows If the AutoPlay dialog box appears Click Run AUTORUN EXE If the User Account Control dialog box appears Click Yes or Continue 5 Click Install 6 Read the conte...

Page 116: ...lick Next The subsequent procedure varies depending on your environment See the appropriate procedure according to your environment Easy Installation USB Connection Easy Installation via the Print Ser...

Page 117: ...tee printer operation if the printer is connected using unidirectional print servers USB hubs or switching devices NOTE About the USB cable This printer does not come with a USB cable Have an appropri...

Page 118: ...Select the method of installation 1 Select Install with USB Connection 2 Click Next If a message that prompts you to restart the computer appears Restart the computer and install the printer driver a...

Page 119: ...is not automatically recognized The Printer Is Not Recognized Automatically Easy Installation 4 Confirm that appears in Install and then click Next If appears You Cannot Install the Printer Driver 5...

Page 120: ...When the installation is complete an icon and folder for this printer will be created After Installation...

Page 121: ...llation method the procedure before Step 1 see Easy Installation 1 Select the method of installation 1 Select Manually Set Port to Install 2 Click Next 2 Click Add Port 3 Select a port to be added 1 S...

Page 122: ...a shared printer on the print server 2 Click OK 5 Select whether or not to use the printer as the default printer 1 If you want to use the printer as the default printer select the Set as Default che...

Page 123: ...n starts Wait until the following screen disappears It may take a long time to install the printer driver If the Printers dialog box appears Click Install driver 8 Confirm that appears in Install and...

Page 124: ...tart your computer 1 Select the Restart Computer Now check box 2 Click Restart When the following screen appears you can remove the CD ROM When the installation is complete an icon and folder for this...

Page 125: ...ar if you did not restart your computer after the printer driver installation All Programs or Programs under the Start menu Canon Printer Uninstaller Canon LBP7010C 7018C Uninstaller Use this option w...

Page 126: ...install the printer driver using a method other than Easy Installation If the icons and folders are not added The installation is not completed properly See You Cannot Install the Printer Driver and...

Page 127: ...nter ON 3 Turn the computer on and then log on to Windows as a user with administrative rights The automatic setup screen of Plug and Play appears If the printer driver is installed automatically If y...

Page 128: ...en instructions to install the printer driver NOTE When selecting the file or folder in which the printer driver is included Select one of the following file and folders Select CNACBSTK INF in the Eng...

Page 129: ...tions Various Information for Windows If the screen for selecting the printer driver appears Even if which printer driver is selected there is no problem with the installation because the same printer...

Page 130: ...indows as a user with administrative rights 3 Close the following files and programs if open Help files Printer Status Window Control Panel Other applications 4 Start the uninstaller URP WKH 6WDUW PHQ...

Page 131: ...layed Click Delete 6 Click Yes The uninstallation starts Wait until the following screen disappears It may take a long time to uninstall the printer driver When the following screen appears click Yes...

Page 132: ...n for this printer is displayed 1 Right click the icon and then select Remove device or Delete from the pop up menu 2 Click Yes If the User Account Control dialog box appears click Yes 10 Restart Wind...

Page 133: ...2 Click Additional Software Programs If the above screen does not appear Basic Operations Various Information for Windows If the AutoPlay dialog box appears Click Run AUTORUN EXE If the User Account C...

Page 134: ...14 Click Uninstall to start the uninstallation Please wait a moment until the uninstallation is complete It may take a long time to uninstall the printer driver 15 Click Exit 16 Click Back...

Page 135: ...17 Click Exit When the following screen appears you can remove the CD ROM...

Page 136: ...nel and then click Uninstall a program URP WKH 6WDUW PHQX VHOHFW RQWURO 3DQHO GG RU 5HPRYH 3URJUDPV From the Start menu select Control Panel and then double click Programs and Features 2 Perform the f...

Page 137: ...If the User Account Control dialog box appears Click Yes or Continue...

Page 138: ...02L Usable Paper Precautions for Paper Printable Area Paper Loading and Output Loading Paper Basic Printing Procedure How to Use Help Canceling a Job Checking the Printer Status Basic Printer Operati...

Page 139: ...Paper 3 4 Default A4 B5 A5 Legal Letter Executive Statement Foolscap 16K Custom Paper Size 5 Plain paper 2 60 to 69 g m Plain Paper L 3 A4 B5 A5 Legal Letter Executive Statement Foolscap 16K Custom Pa...

Page 140: ...ting only Transparency A4 Letter Label Labels A4 Letter 16K Custom Paper Size 5 Index Card Heavy Paper 2 Index Card Envelope Envelope Envelope H 7 Envelope Monarch Envelope No 10 COM10 Envelope DL Env...

Page 141: ...lope selected select Envelope H 8 If either setting causes the following problems and so on specify the other setting to print Output paper curls Residual images appear on non printed areas The toner...

Page 142: ...th surface Paper that is thicker or thinner than the specified usable paper Usable Paper IMPORTANT About paper with staples clips ribbons or tape This kind of paper may result in the printer malfuncti...

Page 143: ...itted from the printer output area Because moisture in the paper is evaporating due to the heat generated when toner fixes this is not a malfunction This is likely to occur when the room temperature i...

Page 144: ...the print data to be printed the edge of paper may be missing partly during printing or may blot during color printing Plain Paper Heavy Paper Transparency Label Index Card Coated Paper You cannot pri...

Page 145: ...tion Multi purpose Tray Output Tray Plain paper Ex 75 g m Approx 150 sheets Approx 50 sheets Heavy paper Ex 105 g m Approx 100 sheets Approx 15 sheets Heavy paper Ex 163 g m Approx 60 sheets Approx 15...

Page 146: ...both sides of the paper guides by holding the lock release lever A 3 Gently load paper with the printing side facing up until it touches the back of the tray For paper size other than A5 paper size Be...

Page 147: ...ading paper with a letterhead or logo See Paper Loading Orientation and load the paper in the correct orientation 4 Align the paper guides with the loaded paper You can slide both sides of the paper g...

Page 148: ...c Printing Procedure If printing custom size paper you need to register the custom paper size in the printer driver previously Registering a Custom Paper Size In cases such as where paper runs out dur...

Page 149: ...jams If the paper is curled or folded at corners flatten it before loading it in the printer Do not touch the loaded paper or pull it out during printing This may result in paper jams or damage to th...

Page 150: ...y differ depending on the application you are using Before printing see Attention Basic Printing 1 Load paper in the multi purpose tray Loading Paper NOTE Open the auxiliary tray before printing 2 Ope...

Page 151: ...mation for Windows 2 Configure the printing preferences 5 Click Properties 6 Specify the settings for Page Size and Output Size 1 Display the Page Setup sheet 2 Select the page size of the document cr...

Page 152: ...ng to the paper type as follows Paper Type Setting for Paper Type Plain paper 64 to 82 g m Plain Paper 1 2 Default Plain paper 60 to 69 g m Plain Paper L 1 Plain paper 76 to 100 g m Plain Paper H 2 3...

Page 153: ...ing problems and so on specify the other setting to print Output paper curls Residual images appear on non printed areas The toner does not fix onto paper well and the printing comes out faint 8 Speci...

Page 154: ...er size in the printer driver previously Registering a Custom Paper Size About the contents specified in Basic Printing Procedure The specified settings apply only to data to be printed from the same...

Page 155: ...rd list and then double click the option you would like information on Search sheet Enter an arbitrary word or phrase to search the topic Enter the word or phrase in Type in the word s to search for a...

Page 156: ......

Page 157: ...t you can cancel print jobs on the print server Selecting and Canceling a Print Job When printing multiple jobs you can select a job and cancel it using the print queue a function of Windows Canceling...

Page 158: ...hen select the printer name 2 Click Print Queue When displaying from the printer folder 1 Open the printer folder Basic Operations Various Information for Windows 2 Double click the icon for this prin...

Page 159: ...For the print server environment all print jobs are displayed on the print server NOTE For details on the print queue See Windows Help 3 Clicking Yes cancels the print job If you cannot cancel a job Y...

Page 160: ...ncel Job cancels the print job If you cannot cancel a job You cannot cancel the job whose pages are in the process of printing You cannot cancel another user s job For the print server environment you...

Page 161: ...using the Printer Status Window Printer Status Window The Printer Status Window shows the current printer status with messages animations and icons If you find any problems with the printer check the...

Page 162: ...vy Paper or Index Card Printing on Transparencies Black and White Printing Only Printing on Labels Printing on Envelopes Printing on Coated Paper Printing on Custom Size Paper Paper Loading Orientatio...

Page 163: ...TE When using custom paper sizes You need to register the custom paper sizes in the printer driver previously Registering a Custom Paper Size Loading paper Load paper in the multi purpose tray Loading...

Page 164: ...If they are not fanned enough multiple sheets of paper may be fed at once causing paper jams When fanning or aligning the transparencies try to hold the edges to avoid touching the printing surface Ta...

Page 165: ...r sizes You need to register the custom paper sizes in the printer driver previously Registering a Custom Paper Size Loading labels Load labels in the multi purpose tray Loading Paper Precautions when...

Page 166: ...hesive on the surface Wrinkled or creased envelopes Poorly manufactured envelopes in which the glued parts are uneven Irregularly shaped envelopes Loading envelopes Load envelopes in the multi purpose...

Page 167: ...en curls as shown in the figure envelopes on a flat surface Printing from an application After loading envelopes perform printing Basic Printing Procedure Do not print on the reverse side glued side o...

Page 168: ...pose tray Loading Paper Precautions when loading coated paper Fan the paper stack thoroughly and then align the edges before loading them If they are not fanned enough multiple sheets of paper may be...

Page 169: ...m paper size If printing custom size paper you need to register the custom paper size in the printer driver previously Registering a Custom Paper Size Printing from an application After loading custom...

Page 170: ...Information for Windows 2 Right click the icon for this printer then select Printing Preferences from the pop up menu 3 Display the Custom Paper Size Settings dialog box 1 Display the Page Setup shee...

Page 171: ...ight and width of the custom paper size Height Width Specify the custom paper size in portrait orientation Height Width within user definable sizes 5 Register the custom paper size 1 Click Register Th...

Page 172: ...5 paper size Portrait orientation A5 paper size Landscape orientation With the printing side facing up With the printing side facing up You can specify the feeding direction of the paper orientation f...

Page 173: ...ders the Printing Date and so on Printing a Color Document in Black and White Combining Data before Printing Changing the Output Method According to the Print Data or Number of Copies Adjusting the Im...

Page 174: ...g on the application you are using 1 Select Print from the File menu in the application 2 Select this printer and then click Properties or Preferences Displaying from the printer folder Basic Operatio...

Page 175: ...ttings See Help How to Use Help About the sheets displayed by Windows The following sheets are displayed by Windows For more details see Windows Help General sheet Sharing sheet Ports sheet Advanced s...

Page 176: ...ording to the paper size 1 Display the Page Setup sheet 2 Select the page size of the document created by an application 3 Select the size of the paper loaded in the paper source If you select a diffe...

Page 177: ...3 Click OK For details on the basic printing procedure see Basic Printing Procedure...

Page 178: ...provide a function to print a document as a collated set of copies Do not use this function when printing multiple pages on one sheet The document may not be printed properly 1 Display the setting scr...

Page 179: ...You can also specify a page layout by clicking within the document image on Preview when is selected Using Preview to be able to specify is 2 on 1 and 4 on 1 only 3 Specify the page order layout on p...

Page 180: ...uts together 1 Display the setting screen of the printer driver Displaying the Setting Screen 2 Specify the setting for poster printing 1 Display the Page Setup sheet 2 Select Poster N x N N 2 3 4 fro...

Page 181: ...For details on the basic printing procedure see Basic Printing Procedure...

Page 182: ...ter driver Displaying the Setting Screen 2 Select a watermark 1 Display the Page Setup sheet 2 Select the Watermark check box 3 Select the character string to be printed as a watermark When adding edi...

Page 183: ...3 Click OK For details on the basic printing procedure see Basic Printing Procedure...

Page 184: ...box 3 Click Edit Watermark If you cannot select the Watermark check box The Printer Driver Settings Cannot Be Changed 2 Add edit or delete a watermark When adding a watermark 1 Click Add 2 Specify ea...

Page 185: ...the default watermarks For more details on each setting see Help How to Use Help When deleting a watermark 1 Select a watermark you want to delete from Watermark List 2 Click Delete You cannot delete...

Page 186: ...3 Click OK Then the Page Setup sheet reappears...

Page 187: ...iver Displaying the Setting Screen 2 Display the Page Options dialog box 1 Display the Page Setup sheet 2 Click Page Options If you cannot click Page Options The Printer Driver Settings Cannot Be Chan...

Page 188: ...For more details on each setting see Help How to Use Help 2 Click OK Then the Page Setup sheet reappears 4 Click OK For details on the basic printing procedure see Basic Printing Procedure...

Page 189: ...screen of the printer driver Displaying the Setting Screen 2 Specify the setting for Color Mode 1 Display the Quality sheet 2 Select Black and White NOTE Using Preview to specify the setting You can a...

Page 190: ...Black and White Color 3 Click OK For details on the basic printing procedure see Basic Printing Procedure...

Page 191: ...different applications You can also preview the print data 1 Display the setting screen of the printer driver from an application Displaying the Setting Screen 2 Select Edit and Preview from Output M...

Page 192: ...on PageComposer dialog box when performing printing Set Output Method to Edit and Preview as a default value for printing preferences and then select the Lock check box For details on the procedure fo...

Page 193: ...nts and then click OK 8 Perform the following procedure 1 Enter the name of the combined print data 2 Click Combine 9 Print the combined print data 1 Select the combined print data 2 Select Print from...

Page 194: ...inted the print data is deleted from Canon PageComposer The print data is also deleted if Canon PageComposer is closed without printing the print data For more details on Canon PageComposer See Help f...

Page 195: ...a with Different Orientations in the Same Data Printing with a Gutter Selecting the Paper Output Method Printing with the Page 180 Degrees Rotated Changing the Output Method According to the Print Dat...

Page 196: ...playing the Setting Screen 2 Perform the following procedure 1 Display the Finishing sheet 2 Select the Print in Different Orientations check box 3 Specify the paper alignment and gutter settings for...

Page 197: ...4 Click OK For details on the basic printing procedure see Basic Printing Procedure...

Page 198: ...reduce the image size to fit the remaining space 1 Display the setting screen of the printer driver Displaying the Setting Screen 2 Perform the following procedure 1 Display the Finishing sheet 2 Sele...

Page 199: ...ick Gutter 2 Specify each setting For more details on each setting see Help How to Use Help 3 Click OK Then the Finishing sheet reappears 4 Click OK For details on the basic printing procedure see Bas...

Page 200: ...intouts of a complete job are collated 1 Display the setting screen of the printer driver Displaying the Setting Screen 2 Specify the setting for Finishing 1 Display the Finishing sheet 2 Select a pap...

Page 201: ...3 Click OK For details on the basic printing procedure see Basic Printing Procedure...

Page 202: ...ders that can be fed only in specific orientations 1 Display the setting screen of the printer driver Displaying the Setting Screen 2 Display the Advanced Settings dialog box 1 Display the Finishing s...

Page 203: ...4 Click OK For details on the basic printing procedure see Basic Printing Procedure...

Page 204: ...priate for Particular Print Data Correcting Rough Textured Images Adjusting the Toner Density Printing with Brightness and Contrast Adjusted Adjusting the Color Matching the Color with the Screen Adju...

Page 205: ...en of the printer driver Displaying the Setting Screen 2 Specify the setting for Objective 1 Display the Quality sheet 2 Select the appropriate mode for the contents of the document Selecting each mod...

Page 206: ...is kind of low resolution image data 1 Display the setting screen of the printer driver Displaying the Setting Screen 2 Display the Advanced Settings dialog box 1 Display the Quality sheet 2 Click Adv...

Page 207: ...4 Click OK For details on the basic printing procedure see Basic Printing Procedure...

Page 208: ...of the printer driver Displaying the Setting Screen 2 Display the Advanced Settings dialog box 1 Display the Quality sheet 2 Click Advanced Settings 3 Display the Toner Density Details dialog box 1 S...

Page 209: ...djust the toner density of each color for each density range Adjusting the Toner Density of Each Color for Each Density Range 2 Click OK Then the Advanced Settings dialog box reappears 5 Click OK Then...

Page 210: ...sheet of the colors that you want to adjust 2 Adjust the density by dragging the slider of each density range horizontally 3 Click OK Then the Toner Density Details dialog box reappears Adjusting exam...

Page 211: ...Low...

Page 212: ...n 2 Display the Color Settings dialog box 1 Display the Quality sheet 2 Select the Manual Color Settings check box 3 Click Color Settings 3 Adjust the brightness and contrast 1 Display the Color Adjus...

Page 213: ...4 Click OK Then the Quality sheet reappears 5 Click OK For details on the basic printing procedure see Basic Printing Procedure...

Page 214: ...when the colors have changed and the data is not printed in the correct colors specified colors Adjusting Color Calibration 1 Display the setting screen of the printer driver Displaying the Setting S...

Page 215: ...tons of each color around the Adjustment Grid the color is deepened by one increment Click any desired color on the Adjustment Grid Preview Image is moved to the position you clicked Drag Preview Imag...

Page 216: ...of the printout to more closely match the color you see on the screen You can also correct the colors by adjusting brightness without performing matching 1 Display the setting screen of the printer dr...

Page 217: ...rkest parts of the image data Use this option when the printout result is brighter than the original image or when you want to change the brightness of the image Using the Matching Function to Correct...

Page 218: ...k OK For details on the basic printing procedure see Basic Printing Procedure Correcting Color by Adjusting Brightness Gamma Adjustment 1 Specify the setting for Matching Mode 1 Display the Matching s...

Page 219: ...each time you print by changing the default values for Page Layout Saving Frequently Used Printing Preferences Adding Editing Deleting a Profile You can save frequently used multiple printing prefere...

Page 220: ...the Page Setup Finishing Paper Source and Quality sheets The settings changed here become the default values For more details on the settings see Help How to Use Help IMPORTANT The setting options tha...

Page 221: ...4 Confirm the settings then click OK The printer folder reappears...

Page 222: ...ttings see Help How to Use Help IMPORTANT The setting options that are not adding to a Profile The settings for the following options are not added to a Profile Sheet Dialog Box Option Quality sheet A...

Page 223: ...og box You can check the current printer driver settings 5 Click OK to register the Profile The setting screen of the printer driver reappears Make sure that the name of the added Profile is in Profil...

Page 224: ...information about a Profile For more details on the settings see Help How to Use Help 4 Click OK The setting screen of the printer driver reappears Deleting an Added Profile 1 Display the setting scr...

Page 225: ...Delete a Profile 1 Select a Profile you want to delete 2 Click Delete You cannot delete the default Profiles or a Profile which is being selected in the setting screen of the printer driver 3 Click Y...

Page 226: ...cannot select a Profile Profiles Cannot Be Selected or Edited NOTE When selecting Default Settings Reset all the settings to the default values other than the following options Sheet Dialog Box Option...

Page 227: ...Environment Configuring the Print Server Checking the Settings of Your Network Installation on Clients Installing from the Printer Folder Installing from Windows Explorer Using the Printer in the Pri...

Page 228: ...e following tasks If your computer is the print server 1 Install the printer driver Installing the Printer Driver If the printer driver is already installed you do not need to install it 2 Configure t...

Page 229: ...32 bit operating systems is running is not supported due to the Windows restriction Windows 2000 Windows XP on which no service pack or SP1 is installed Windows Server 2003 on which no service pack is...

Page 230: ...from the pop up menu 1 Right click the icon for this printer and then select Printer properties from the pop up menu 2 Display the Sharing sheet 3 Perform the following procedure Select Share as Chang...

Page 231: ...en click Additional Drivers If CD ROM Setup appears click Exit NOTE When updating an additional driver replacement driver Perform the following procedure 1 Uninstall the printer driver on the print se...

Page 232: ...ta 7 and Server 2008 Select the check box for x86 in the Processor column If you are not sure whether you are using a 32 bit operating system or 64 bit operating system Windows Vista 7 and Server 2008...

Page 233: ...he additional driver Wait a moment until the Sharing sheet automatically reappears It may take a long time to install the additional driver If the User Account Control dialog box appears Click Yes 10...

Page 234: ...Clear it using the following procedure Select Not shared in the Sharing sheet Select Do not share this printer in the Sharing sheet Clear the Share this printer check box in the Sharing sheet If Chang...

Page 235: ...Q FOLFN 9LHZ QHWZRUN VWDWXV DQG WDVNV 0DQDJH QHWZRUN connections URP WKH 6WDUW PHQX VHOHFW RQWURO 3DQHO DQG WKHQ FOLFN 9LHZ QHWZRUN VWDWXV DQG WDVNV KDQJH DGDSWHU VHWWLQJV URP WKH 6WDUW PHQX VHOHFW RQ...

Page 236: ...for Microsoft Networks check box is selected If the check box is not selected select it 2 Click OK NOTE If you are using Windows XP You cannot configure the print server with the operating system def...

Page 237: ...r Folder Installing from Windows Explorer NOTE Precautions when downloading and installing the printer driver If a 64 bit operating system is running on the print server the download installation for...

Page 238: ...r operating system Windows Vista 7 and Server 2008 Windows XP and Server 2003 Windows 2000 Windows Vista 7 and Server 2008 1 Turn the computer on and then log on to Windows 2 Open the printer folder B...

Page 239: ...5 Click The printer that I want isn t listed 6 Perform the following procedure 1 Select Select a shared printer by name 2 Click Next 7 Select a shared printer...

Page 240: ...th as the print server name the computer name of the print server the printer name 8 Click Install driver If the User Account Control dialog box appears Click Yes or Continue 9 Click Next When Set as...

Page 241: ...select whether or not to use the printer as the default printer Windows 7 and Server 2008 R2 Windows XP and Server 2003 1 Turn the computer on and then log on to Windows 2 Open the printer folder Basi...

Page 242: ...4 Click Next 5 Select a printer type 1 Select A network printer or a printer attached to another computer 2 Click Next 6 Perform the following procedure 1 Select Connect to this printer 2 Click Next...

Page 243: ...ions in the message NOTE Specifying the network path directly Specify the network path as the print server name the computer name of the print server the printer name 8 When the following screen appea...

Page 244: ...9 Click Finish Windows 2000 1 Turn the computer on and then log on to Windows 2 Open the printer folder Basic Operations Various Information for Windows 3 Double click Add Printer...

Page 245: ...4 Click Next 5 Select a printer type 1 Select Network printer 2 Click Next 6 Perform the following procedure 1 Select Type the printer name or click Next to browse for a printer 2 Click Next 7...

Page 246: ...ing the network path directly Specify the network path as the print server name the computer name of the print server the printer name 8 Select whether or not to use the printer as the default printer...

Page 247: ...PV RU 3URJUDPV FFHVVRULHV LQGRZV SORUHU 3 Perform the following procedure 1 Select the print server from Network or My Network Places 2 Double click the shared printer icon or drag and drop the icon i...

Page 248: ...ted from the Printer Output Area The Adobe Type Manager ATM Font Cannot Be Used Driver Problems You Cannot Install the Printer Driver You Cannot Uninstall the Printer Driver The Printer Driver Setting...

Page 249: ...ou Are Using the Printer by Direct Connection Printing Cannot Be Performed USB Connection If You Are Using the Printer in the Print Server Environment If your computer is the print server Printing Can...

Page 250: ...Power indicator on ON To Question 2 OFF Turn the printer ON Cannot be turned ON You Cannot Turn the Printer ON Question 2 Is the Toner indicator or the Paper indicator on blinking On Blinking Indicat...

Page 251: ...ions Various Information for Windows Printable There is no problem with the printer and driver Check the printing preferences in the application Not printable To Question 5 Question 5 Is the port to b...

Page 252: ...install those unneeded Connect the USB cable to another USB port on your computer Connect the printer to another computer with a USB cable If printing does not work proceed to Question 8 Question 8 In...

Page 253: ...e Printer ON Question 2 Is the Toner indicator or the Paper indicator on blinking On Blinking Indicators on the Printer Are On Blinking Off Not blinking To Question 3 Question 3 Is the printer connect...

Page 254: ...can be performed from the print server If printing does not work proceed to Question 6 Question 6 Can you print a test page in Windows Basic Operations Various Information for Windows Printable There...

Page 255: ...PHWKRG WR WKH GRZQORDG LQVWDOODWLRQ LQVWDOOLQJ WKH SULQWHU GULYHU ZLWKRXW WKH 520 If you performed the download installation installing the printer driver without the CD ROM KDQJH WKH LQVWDOODWLRQ PHW...

Page 256: ...cess the print server or printer Solution Ask your network administrator to change the user permissions Cause 5 Network discovery is not enabled Windows Vista 7 and Server 2008 Solution Perform the fo...

Page 257: ...Information for Windows If the icon for this printer is not displayed Ask your network administrator about the problem If the icon for this printer is displayed You can install the printer driver by p...

Page 258: ...ications depending on the processing type of the print data Solution Performing the following procedure in the printer driver may be able to solve the problem 1 Display the Finishing sheet 2 Click Adv...

Page 259: ...umes If the internal temperature of the printer has not decreased sufficiently the safety mechanism is reactivated and printing is paused temporarily When the inside temperature cools down sufficientl...

Page 260: ...extension cord or multiple power strip Solution Plug the power plug directly into an AC power outlet Cause 3 The breakers have tripped Solution Reset the breakers on the switch board Cause 4 There is...

Page 261: ...es particularly when the room temperature is low Solution Although this is not a malfunction you can prevent the steam emission by replacing the paper with new paper in an unopened package Also store...

Page 262: ...019A 05A Cause The printer does not support the Adobe Type Manager ATM font Solution Use a font which this printer supports The Adobe Type Manager ATM Font Cannot Be Used...

Page 263: ...not Be Found The Shared Printer Cannot Be Accessed If the printer driver is not installed properly Perform the following procedure Solution 1 Install the printer driver again Uninstalling the Printer...

Page 264: ...nstalled Solution Perform the following procedure 1 Turn the printer OFF 2 Disconnect the USB cable 3 Connect the USB cable again 4 While the following screen appears turn the printer ON Cause 4 An in...

Page 265: ...s installed the printer driver You may not be able to uninstall the printer driver successfully depending on your operating system In this case uninstall the printer driver using the following procedu...

Page 266: ...creen appears click Exit If the AutoPlay dialog box appears Select Open folder to view files and then proceed to Step 4 2 Display Computer or My Computer Basic Operations Various Information for Windo...

Page 267: ...4 Open the folder in which the uninstaller is included For a 32 bit operating system Open the English 32bit MISC folders For a 64 bit operating system Open the English x64 MISC folders...

Page 268: ...5 Double click CNACBUN exe or CNACBUND exe If the User Account Control dialog box appears Click Yes or Continue For details on the uninstallation see Uninstalling the Printer Driver...

Page 269: ...the following procedure URP WKH 6WDUW PHQX VHOHFW 6HWWLQJV RQWURO 3DQHO DQG WKHQ GRXEOH FOLFN GG 5HPRYH 3URJUDPV From the Start menu select Control Panel and then click Add or Remove Programs From th...

Page 270: ...he Start menu select Control Panel 2 OLFN DUGZDUH DQG 6RXQG RU DUGZDUH HYLFH 0DQDJHU 1 URP WKH 6WDUW PHQX VHOHFW RQWURO 3DQHO 6 VWHP 2 OLFN WKH DUGZDUH WDE HYLFH 0DQDJHU 1 From the Start menu select C...

Page 271: ...to close the Device Manager dialog box If the USB class driver is under Other Devices Select the USB class driver which is displayed as Unknown device and then uninstall it 7 Click OK 8 Click to clos...

Page 272: ...pen the printer folder Basic Operations Various Information for Windows 2 Right click the icon for this printer and then select Printer properties or Properties from the pop up menu 3 Change the setti...

Page 273: ...4 Click OK...

Page 274: ...following procedure 1 Open the printer folder Basic Operations Various Information for Windows 2 Right click the icon for this printer and then select Printer properties or Properties from the pop up...

Page 275: ...If you cannot change the setting You need administrator rights to change the setting Contact your system administrator 4 Click OK...

Page 276: ...us Window Remove the jammed paper for each area in display order of the message Message and clearance procedure Paper jam area 1 Clearing Paper Jams Multi purpose Tray 2 Clearing Paper Jams Output Are...

Page 277: ...printed will be deleted Do not remove the jammed paper forcefully Removing jammed paper with excess force may cause the paper to tear or damage the inside of the printer Remove the paper by pulling i...

Page 278: ...procedure for another area which is displayed in a message 3 Install the tray cover Next proceed to the procedure for clearing the paper jam which is occurred in another area displayed in the message...

Page 279: ...rm a procedure for another area which is displayed in a message Next proceed to the procedure for clearing the paper jam which is occurred in another area displayed in the message 1 Clearing Paper Jam...

Page 280: ...jammed paper 1 Hold both sides of the paper and slowly pull them down 2 Remove the paper by pulling it gently 3 Close the rear cover The paper jam message disappears and the printer is ready to print...

Page 281: ...s in the Printer Status Window Example Black Blinking The toner cartridges are in the replacement position 2 Paper Indicator On The printer is in the toner cartridge replacement mode 2 Blinking Paper...

Page 282: ...For details on the procedure for loading paper see Loading Paper...

Page 283: ...ck the Toner Cartridges Check the Printed Output Replace Toner Cartridges Cover Open No Drum Cartridge Paper Jam inside Printer Check the Drum Cartridge Calibration Error Replace Drum Cartridge Cleani...

Page 284: ...Connect the LAN cable to the network adaptor Solution 2 Turn ON the printer and the network adaptor Cannot Communicate with Printer Cause 1 Because the bi directional communication function is not ena...

Page 285: ...Solution 2 Cancel the print job and then print again Canceling a Job Cover Open Cause The top cover or rear cover is open Solution Close the top cover and rear cover Paper Jam inside Printer Cause A...

Page 286: ...se wrong color toner cartridges are installed at the loading position for the displayed colors Solution Install the toner cartridges to the appropriate positions for each color Replacing the Toner Car...

Page 287: ...Resolve Error however as this may result in damage to the printer Cause 2 Print quality cannot be guaranteed due to the toner cartridges of the displayed colors reaching the end of their life and so o...

Page 288: ...e that the Power indicator is off remove the packing material sheet and then turn it ON again Removing the Packing Materials Insufficient Memory Cause The memory on the computer or server is insuffici...

Page 289: ...Resolve Error or press the Paper key on the printer Loading Paper Start Cleaning Cause The printer is waiting for that the cleaning page is loaded Solution Load the cleaning page in the multi purpose...

Page 290: ...s or longer and then turn it ON again If the message does not reappear the printer is ready If the message reappears you need to request service Follow the procedure below and then contact your local...

Page 291: ...nect the power plug from the AC power outlet 5 Disconnect the cord from the printer 4 Contact your local authorized Canon dealer to request service When contacting your Canon dealer please report also...

Page 292: ...Printed Transparencies Printing is faint is faded has a problem with color and so on The Overall Print Result Is Faint Printing Is Faded Colored Text Appears Blurred Data Is Not Printed in the Correc...

Page 293: ...tion on Paper NOTE Contacting your local authorized Canon dealer If a problem that is not indicated in the e Manual occurs if none of the suggested measures solve the problem or if you cannot determin...

Page 294: ...specially in a high humidity environment the paper may curl as either of the following Side View Front View Solution 1 Perform the following procedure in the printer driver 1 Display the Paper Source...

Page 295: ...ck Advanced Settings 3 Set Special Print Mode to Special Settings C3 If the problem is not improved specify Special Settings D2 Normally use the printer with Special Print Mode set to Off Change the s...

Page 296: ...4 There is a foreign object inside the printer Solution Remove the foreign object inside the printer Cause 5 Depending on the paper type or the operating environment especially in a high humidity env...

Page 297: ...in the printer driver 1 Display the Finishing sheet 2 Click Advanced Settings 3 Set Special Print Mode to Special Settings D1 Normally use the printer with Special Print Mode set to Off Change the set...

Page 298: ...ending on the operating environment especially in a high humidity environment Solution Clean the photosensitive drum of the printer Cleaning the Photosensitive Drum of the Printer Cause 2 The photosen...

Page 299: ...points may appear on the images depending on the operating environment especially in a high humidity or low temperature environment Solution Clean the photosensitive drum of the printer Cleaning the P...

Page 300: ...trip shaped unevenness may appear Solution Perform the following procedure in the printer driver 1 Display the Finishing sheet 2 Click Advanced Settings 3 Set Special Print Mode to Special Settings J5...

Page 301: ...the described problems occur If you specify Special Settings J6 unevenness or a phenomenon of Out of Register Colors may occur on the overall printed images or the data may not be printed in the corr...

Page 302: ...r Cause 3 The photosensitive drum of the printer is deteriorated Solution Replace the drum cartridge with a new one Drum Cartridge Replacement Cause 4 Printed pages may have white specks depending on...

Page 303: ...he following procedure in the printer driver 1 Display the Finishing sheet 2 Click Advanced Settings 3 Set Special Print Mode to Special Settings G2 Normally use the printer with Special Print Mode se...

Page 304: ...019A 066 Perform the following procedure Cause The fixing roller is dirty Solution Clean the fixing roller Cleaning the Fixing Roller of the Printer The Printed Paper Has Smudge Marks...

Page 305: ...on Perform the following procedure in the printer driver 1 Display the Finishing sheet 2 Click Advanced Settings 3 Set Special Print Mode to Special Settings A5 If the problem is not solved specify Sp...

Page 306: ...following procedure Cause The size of the print data was larger than that of the loaded paper Solution Check if the size of the print data matches that of the loaded paper The Back of the Printed Pap...

Page 307: ...ting for the toner density is not appropriate Solution Adjust the toner density for printing to a lighter setting Adjusting the Toner Density Cause 2 The printer is exposed to direct sunlight or stron...

Page 308: ...lain Paper L Plain Paper H Plain Paper Heavy Paper 1 Plain Paper H Heavy Paper 2 Heavy Paper 1 Envelope H Envelope Coated Paper 2 Coated Paper 1 Coated Paper 3 Coated Paper 2 If you change the setting...

Page 309: ...specify Special Settings D1 Cause 4 Depending on the paper type images on a previous page may be printed faintly on continuous printing For example images on the fourth page are printed faintly on th...

Page 310: ...ollowing procedure Cause You print transparencies after printing paper other than transparency continuously Solution Wipe and remove the chipped paper with a soft cloth White Dust Is Attached to the P...

Page 311: ...not appropriate Solution Adjust the toner density for printing to a darker setting Adjusting the Toner Density Cause 2 Toner Save is enabled Solution Perform the following procedure in the printer dri...

Page 312: ...e Checking the Consumables Status Toner Cartridge Replacement Cause 4 When coarse paper is used the toner does not fix onto paper well and the print may come out faint Solution Perform the following p...

Page 313: ...Solution 2 Click Advanced Settings 3 Set Special Print Mode to Special Settings B4 Normally use the printer with Special Print Mode set to Off Change the settings only if the described problems occur...

Page 314: ...ity sheet 2 Select the Manual Color Settings check box 3 Click Color Settings 4 Display the Matching sheet 5 Set Matching Method to Perceptual Monitor Color Matched Cause 2 Colored text appears blurre...

Page 315: ...d Solution Replace the drum cartridge with a new one Drum Cartridge Replacement About Out of Register Colors Laser printers are manufactured with technology of high precision A phenomenon of Out of Re...

Page 316: ...If you specify Special Settings C4 printing speed drops...

Page 317: ...cation Solution 2 Change the patterns in the application and print again See the instruction manual supplied with the application Cause 2 The colors may appear different depending on the halftone patt...

Page 318: ...again without specifying a shaded pattern in the application See the instruction manual supplied with the application Solution 2 Perform the following procedure in the printer driver 1 Display the Qua...

Page 319: ...s check box 3 Click Color Settings 4 Display the Matching sheet 5 Set Matching Method to Perceptual Monitor Color Matched Solution 2 Perform the following procedure in the printer driver 1 Display the...

Page 320: ...printer driver 1 Display the Quality sheet 2 Select the Manual Color Settings check box 3 Click Color Settings 4 Display the Matching sheet 5 Select Gamma Adjustment in Matching Mode 6 Change the gam...

Page 321: ...wing adjustments and corrections Correcting Rough Textured Images Adjusting the Toner Density Printing with Brightness and Contrast Adjusted Adjusting the Color Matching the Color with the Screen Adju...

Page 322: ...e printer driver 1 Display the Finishing sheet 2 Click Gutter 3 Set Gutter to 0 Cause 2 Top Margin and Paper Position in the application are not specified properly Solution Specify the settings for To...

Page 323: ...he Manual Scaling check box then specify an appropriate scale factor according to the paper size to be used Cause 2 The position of the paper is incorrect Solution Load the paper properly Loading Pape...

Page 324: ...lear the Manual Scaling check box If the Manual Scaling check box is cleared the scale factor will be set according to Page Size and Output Size automatically Solution 2 Perform the following procedur...

Page 325: ...ation is not specified properly Solution Specify the settings for Line Spacing or Lines Page in the application so that the data fits in one page and then print again See the instruction manual suppli...

Page 326: ...olution Take the toner cartridges out of the printer pull out the sealing tape and reinstall the toner cartridges Replacing the Toner Cartridge Cause 2 Multiple sheets of paper are fed at a time Solut...

Page 327: ...ution Replace the drum cartridge with a new one Drum Cartridge Replacement Cause 2 A problem is occurring inside the printer Solution When Service Error is displayed in the Printer Status Window perfo...

Page 328: ...river may be able to solve the problem 1 Display the Finishing sheet 2 Click Advanced Settings 3 Change the EMF Spooling setting When EMF Spooling is set to On the Printer Status Window may not be dis...

Page 329: ...or the operating environment especially in a high humidity environment the flaps may stick to the body of the envelopes Solution Perform the following procedure in the printer driver 1 Display the Fi...

Page 330: ...llowing procedure Cause You are using paper which tends to be fed at a time Solution Fan the paper thoroughly and then align the edges of the stack properly on a hard flat surface Multiple Sheets of P...

Page 331: ...gs 3 Set Special Print Mode to Special Settings H2 Normally use the printer with Special Print Mode set to Off Change the settings only if the described problems occur If you specify Special Settings...

Page 332: ...ings 3 Set Special Print Mode to Special Settings I1 Normally use the printer with Special Print Mode set to Off Change the settings only if the described problems occur If you specify Special Setting...

Page 333: ...019A 071 Points to Make Full Use of the Printer Basic Operations Various Information for Windows For Windows 8 Users Appendix...

Page 334: ...o a Document to Be Printed Watermark Printing Being Particular About the Image Quality or Colors Adjusting the Image Quality or Colors Printer Status Window The Printer Status Window is software allow...

Page 335: ...r even after inserting the CD ROM perform the following procedure The CD ROM drive name is indicated as D in this manual The CD ROM drive name may differ depending on the computer you are using 1 From...

Page 336: ...perating system 32 bit Operating System is displayed For a 64 bit operating system 64 bit Operating System is displayed Printing a Test Page in Windows You can check the operations of the printer driv...

Page 337: ...playing the Printer Folder 3 Right click the icon for this printer and then select Printer properties or Properties from the pop up menu 4 Print a test page 1 Display the General sheet 2 Click Print T...

Page 338: ...isplaying the Printer Folder 2 Right click the icon for this printer and then select Printer properties or Properties from the pop up menu 3 Check the bi directional communication 1 Display the Ports...

Page 339: ...DQG 2WKHU DUGZDUH 3ULQWHUV DQG D HV From the Start menu select Control Panel and then click Printer From the Start menu select Devices and Printers From the Start menu select Control Panel and then d...

Page 340: ...nter folder Displaying the Printer Folder 2 Right click the icon for this printer and then select Printer properties or Properties from the pop up menu 3 Check a port 1 Display the Ports sheet 2 Confi...

Page 341: ......

Page 342: ...S A CANON EUROPA N V Bovenkerkerweg 59 61 1185 XB Amstelveen The Netherlands CANON CHINA CO LTD 15F Jinbao Building No 89 Jinbao Street Dongcheng District Beijing 100005 PRC CANON SINGAPORE PTE LTD 1...

Page 343: ...ad the contents described in this section carefully before using the printer Precautions for When Performing Procedures Be sure to switch to the desktop when performing the following procedures Instal...

Reviews: