


Make sure to insert the paper drawer
The machine only prints when the paper drawer is inserted, even if paper is loaded in the manual feed slot. An error message
is displayed if you attempt to print without inserting the paper drawer.
Load only one sheet of paper at a time
Only one sheet of paper can be loaded each time you print.
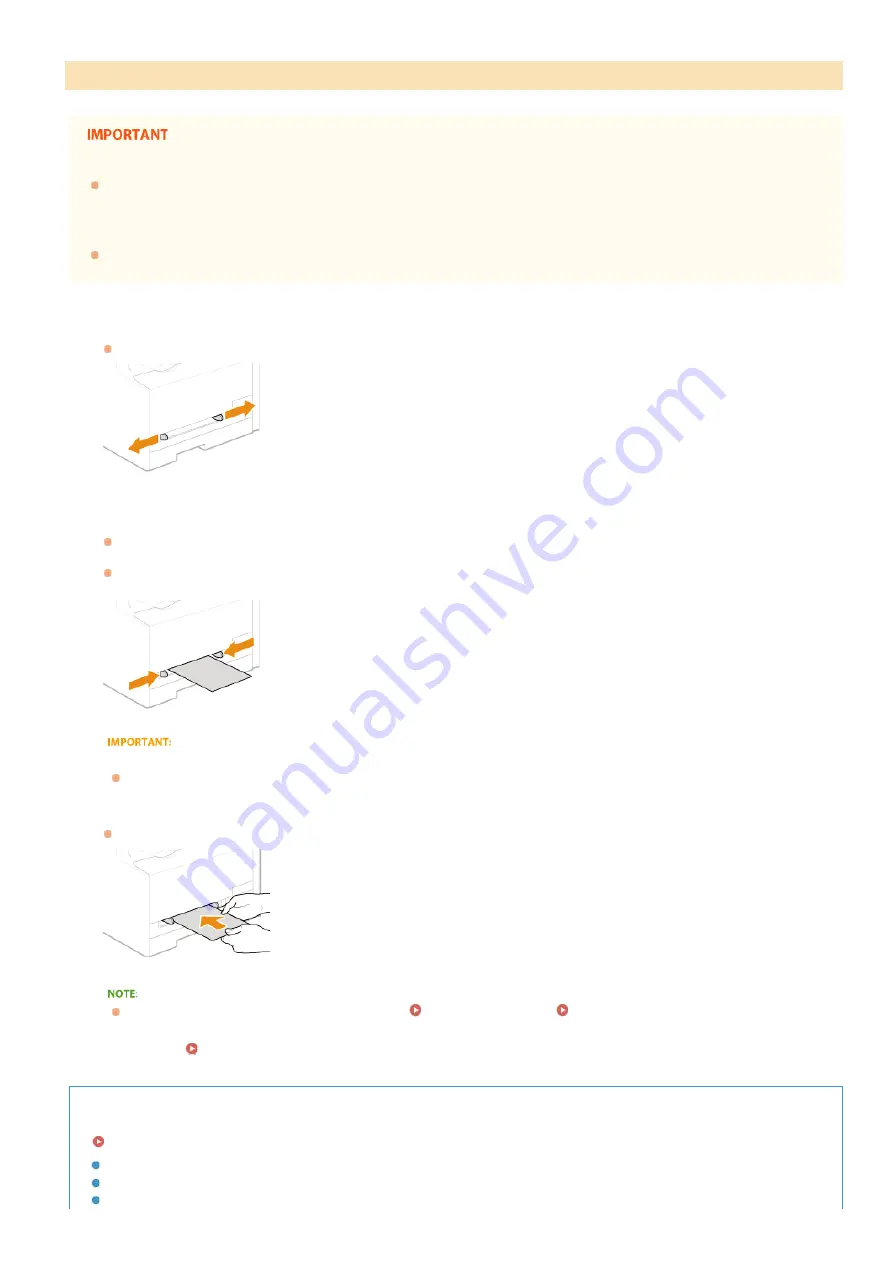
Spread the paper guides apart.
Slide the paper guides outward.
Insert the paper and align the paper guides against the width of the paper.
Load the paper in portrait orientation (with the short edge toward the feed slot), with the print side face up. Paper cannot be
loaded in landscape orientation.
Insert the paper 10 to 20 mm into the manual feed slot, and then slide the paper guides inward until they are aligned securely
against the edges of the paper.
Align the paper guides securely against the edges of the paper
Paper guides that are too loose or too tight can cause misfeeds or paper jams.
Insert the paper slowly into the rear of the manual feed slot.
The paper is pulled slightly into the machine when inserted into the slot.
When loading envelopes or paper with a logo, see
or
.
Continue to
Specifying Paper Size and Type in the Manual Feed Slot
Printing on the Back Side of Printed Paper (Manual 2-Sided Printing)
You can print on the back side of printed paper. Flatten any curls on the printed paper and insert it into the paper drawer
(
Loading Paper in the Paper Drawer
) or manual feed slot, with the side to print face up (previously printed side face down).
When using the manual feed slot, load one sheet of paper each time you print.
You can use only the paper printed with this machine.
You cannot print on the side that has previously been printed on.
For the MF628Cw / MF623Cn
1
2
3
»
㻡㻡㻌㻛㻌㻣㻟㻡
Summary of Contents for i-SENSYS MF623Cn
Page 35: ...Display 㻟㻡㻌㻛㻌㻣㻟㻡 ...
Page 43: ...LINKS Setting the Department ID Management Setting the System Manager ID 㻠㻟㻌㻛㻌㻣㻟㻡 ...
Page 52: ...LINKS Paper Notify to Check Paper Settings 㻡㻞㻌㻛㻌㻣㻟㻡 ...
Page 89: ...LINKS Basic Copy Operations 㻤㻥㻌㻛㻌㻣㻟㻡 ...
Page 94: ...LINKS Basic Copy Operations Adjusting Color Balance Adjusting Sharpness 㻥㻠㻌㻛㻌㻣㻟㻡 ...
Page 96: ...LINKS Basic Copy Operations Adjusting Density Adjusting Sharpness 㻥㻢㻌㻛㻌㻣㻟㻡 ...
Page 115: ...LINKS Receiving Faxes MF729Cx MF728Cdw MF628Cw 㻝㻝㻡㻌㻛㻌㻣㻟㻡 ...
Page 166: ...5 㻝㻢㻢㻌㻛㻌㻣㻟㻡 ...
Page 191: ...㻝㻥㻝㻌㻛㻌㻣㻟㻡 ...
Page 201: ...LINKS Printing a Document 㻞㻜㻝㻌㻛㻌㻣㻟㻡 ...
Page 208: ...LINKS Printing a Document 㻞㻜㻤㻌㻛㻌㻣㻟㻡 ...
Page 212: ...LINKS Printing a Document Printing Borders Printing Dates and Page Numbers 㻞㻝㻞㻌㻛㻌㻣㻟㻡 ...
Page 263: ...LINKS Configuring Scan Settings in Simple Mode Scanning Using an Application 㻞㻢㻟㻌㻛㻌㻣㻟㻡 ...
Page 308: ...㻟㻜㻤㻌㻛㻌㻣㻟㻡 ...
Page 348: ...LINKS Setting IPv6 Addresses Viewing Network Settings Configuring WINS 㻟㻠㻤㻌㻛㻌㻣㻟㻡 ...
Page 354: ...Configuring DNS 㻟㻡㻠㻌㻛㻌㻣㻟㻡 ...
Page 362: ...LINKS Setting Up Print Server 㻟㻢㻞㻌㻛㻌㻣㻟㻡 ...
Page 483: ...Portal Page main page will be displayed Remote UI Screens 4 㻠㻤㻟㻌㻛㻌㻣㻟㻡 ...
Page 490: ...LINKS Remote UI Screens 㻠㻥㻜㻌㻛㻌㻣㻟㻡 ...
Page 533: ...Initial Settings for Fax Functions MF729Cx MF728Cdw MF628Cw 㻡㻟㻟㻌㻛㻌㻣㻟㻡 ...
Page 707: ...When replacing toner cartridges see How to Replace Toner Cartridges 㻣㻜㻣㻌㻛㻌㻣㻟㻡 ...
Page 717: ...Click Back Exit 6 㻣㻝㻣㻌㻛㻌㻣㻟㻡 ...
Page 736: ...㻝㻌㻛㻌㻠㻣 ...
Page 768: ...㻟㻟㻌㻛㻌㻠㻣 ...


