


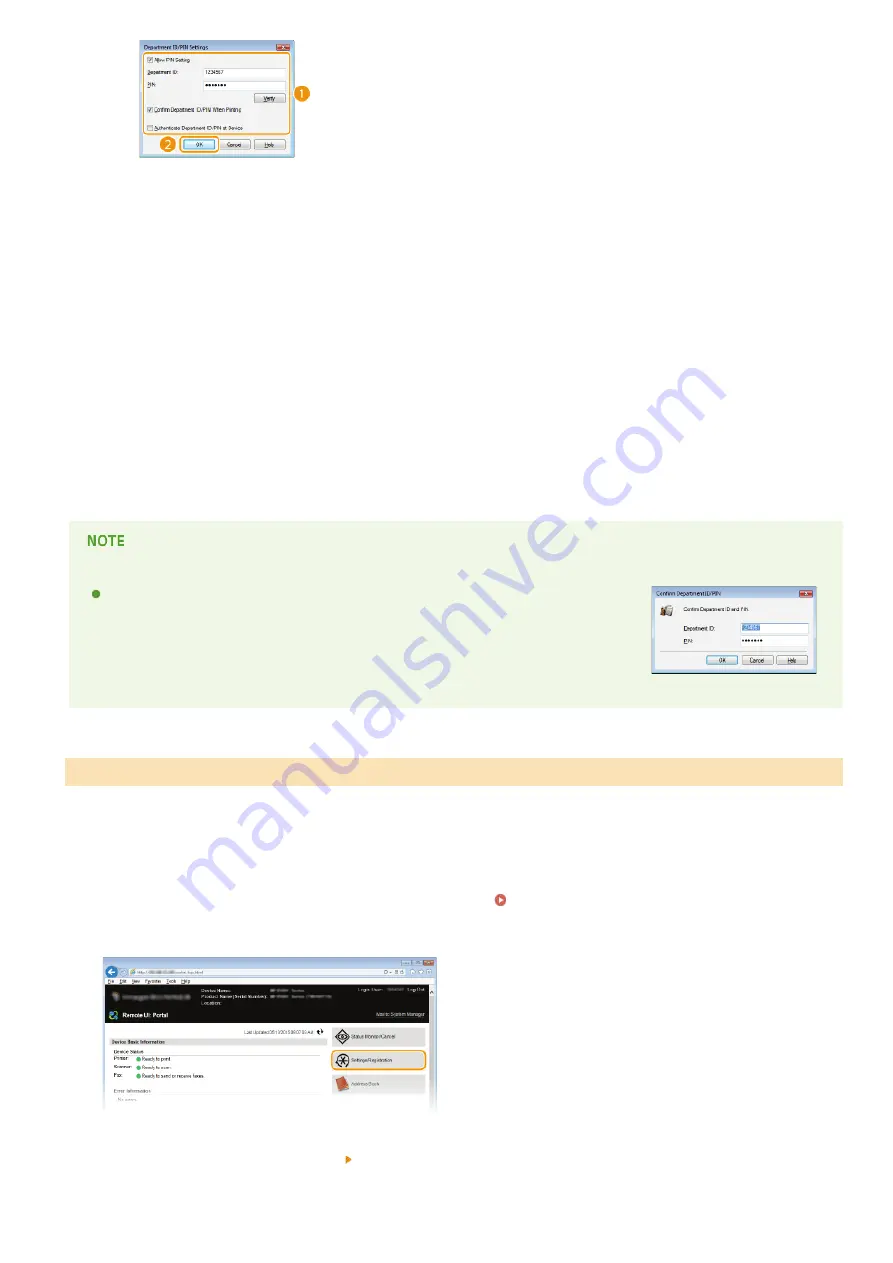
[Allow PIN Setting]
Select the check box to enable the PIN setting.
[Department ID]
Enter a number of up to seven digits for the Department ID.
[PIN]
Enter a number of up to seven digits for the PIN if it is set for the Department ID.
[Verify]
Click to verify that the correct ID and PIN are entered. This function is not available if the machine and the computer are
connected via a USB or WSD (Web Services on Devices) port.
[Confirm Department ID/PIN When Printing]/[Confirm Department ID/PIN when Sending Fax]
Select the check box to display the [Confirm Department ID/PIN] pop-up screen each time you print or fax from a
computer.
[Authenticate Department ID/PIN at Device]
Select the check box if the machine and the computer are connected via a USB or WSD port.
3
Click [OK].
Logging on to the machine
When you try to print or fax from a computer when Department ID Management is enabled,
the following pop-up screen is displayed (unless the [Confirm Department ID/PIN When
Printing]/[Confirm Department ID/PIN when Sending Fax] check box is cleared):
If you do not change the default settings, any user can print from a computer, scan (via <Computer> and <Remote Scanner>), send a
PC fax from a computer, or make black and white copies without entering an ID and PIN even when Department ID Management is
enabled for the machine. You can change the default settings so that the machine cannot be used for these functions without a correct
ID and PIN.
Start the Remote UI and log on in System Manager Mode.
Click [Settings/Registration].
Click [Department ID Management] [Edit].
Blocking Jobs When Department ID Is Unknown
1
2
3
㻠㻞㻝㻌㻛㻌㻣㻟㻡
Summary of Contents for i-SENSYS MF623Cn
Page 35: ...Display 㻟㻡㻌㻛㻌㻣㻟㻡 ...
Page 43: ...LINKS Setting the Department ID Management Setting the System Manager ID 㻠㻟㻌㻛㻌㻣㻟㻡 ...
Page 52: ...LINKS Paper Notify to Check Paper Settings 㻡㻞㻌㻛㻌㻣㻟㻡 ...
Page 89: ...LINKS Basic Copy Operations 㻤㻥㻌㻛㻌㻣㻟㻡 ...
Page 94: ...LINKS Basic Copy Operations Adjusting Color Balance Adjusting Sharpness 㻥㻠㻌㻛㻌㻣㻟㻡 ...
Page 96: ...LINKS Basic Copy Operations Adjusting Density Adjusting Sharpness 㻥㻢㻌㻛㻌㻣㻟㻡 ...
Page 115: ...LINKS Receiving Faxes MF729Cx MF728Cdw MF628Cw 㻝㻝㻡㻌㻛㻌㻣㻟㻡 ...
Page 166: ...5 㻝㻢㻢㻌㻛㻌㻣㻟㻡 ...
Page 191: ...㻝㻥㻝㻌㻛㻌㻣㻟㻡 ...
Page 201: ...LINKS Printing a Document 㻞㻜㻝㻌㻛㻌㻣㻟㻡 ...
Page 208: ...LINKS Printing a Document 㻞㻜㻤㻌㻛㻌㻣㻟㻡 ...
Page 212: ...LINKS Printing a Document Printing Borders Printing Dates and Page Numbers 㻞㻝㻞㻌㻛㻌㻣㻟㻡 ...
Page 263: ...LINKS Configuring Scan Settings in Simple Mode Scanning Using an Application 㻞㻢㻟㻌㻛㻌㻣㻟㻡 ...
Page 308: ...㻟㻜㻤㻌㻛㻌㻣㻟㻡 ...
Page 348: ...LINKS Setting IPv6 Addresses Viewing Network Settings Configuring WINS 㻟㻠㻤㻌㻛㻌㻣㻟㻡 ...
Page 354: ...Configuring DNS 㻟㻡㻠㻌㻛㻌㻣㻟㻡 ...
Page 362: ...LINKS Setting Up Print Server 㻟㻢㻞㻌㻛㻌㻣㻟㻡 ...
Page 483: ...Portal Page main page will be displayed Remote UI Screens 4 㻠㻤㻟㻌㻛㻌㻣㻟㻡 ...
Page 490: ...LINKS Remote UI Screens 㻠㻥㻜㻌㻛㻌㻣㻟㻡 ...
Page 533: ...Initial Settings for Fax Functions MF729Cx MF728Cdw MF628Cw 㻡㻟㻟㻌㻛㻌㻣㻟㻡 ...
Page 707: ...When replacing toner cartridges see How to Replace Toner Cartridges 㻣㻜㻣㻌㻛㻌㻣㻟㻡 ...
Page 717: ...Click Back Exit 6 㻣㻝㻣㻌㻛㻌㻣㻟㻡 ...
Page 736: ...㻝㻌㻛㻌㻠㻣 ...
Page 768: ...㻟㻟㻌㻛㻌㻠㻣 ...


