


COPYRIGHT © 1999 CANON INC.
CANON GP605/605V REV.0 JAN. 1999 PRINTED IN JAPAN (IMPRIME AU JAPON)
11-43
CHAPTER 11 INSTALLATION
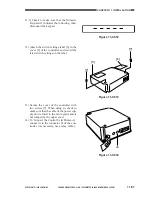
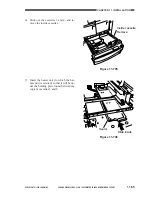
Figure 11-C603
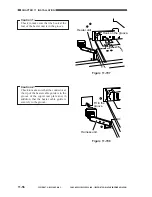
Figure 11-C604
1
6
SW4
SW1 ON
SW5 ON
LED6
LED5
LED4
LED3
LED2
LED1
SW2
SW3
JB2
JB1
JA1
JA2
EPROM
SRAM
CPU
IPC
JC9
JC6
JC5
JC8
J5
1
6
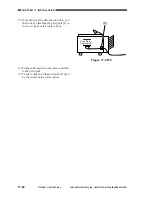
LED2 LED3
Photocoupler
3) Turn on the copier's main switch, and
check to make sure that LED2 of the con-
troller flashes.
Make a copy, and check to make sure that
LED3 flashes during copying operation.
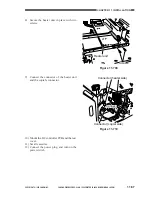
4) If the Communications Board-A1 or the
Interface Board-B1 is to be connected (re-
quiring the Power Supply-A1), go to 5).
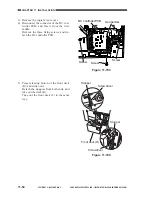
Turn on the copier's main switch, and
check to make sure that LED1 of the con-
troller turns on and LED2 turns off.
Make a copy, and check to make sure that
LED3 flashes during copying operation.
1
6
SW4
SW1 ON
SW5 ON
LED6
LED5
LED4
LED3
LED2
LED1
SW2
SW3
JB2
JB1
JA1
JA2
EPROM
SRAM
CPU
IPC
JC9
JC6
JC5
JC8
J5
1
6
LED1
LED3
LED2
Photocoupler
Summary of Contents for GP605
Page 3: ......
Page 4: ......
Page 24: ......
Page 56: ......
Page 78: ......
Page 116: ......
Page 124: ......
Page 148: ......
Page 150: ......
Page 168: ......
Page 170: ......
Page 250: ......
Page 252: ......
Page 342: ......
Page 390: ......
Page 392: ......
Page 464: ......
Page 466: ......
Page 512: ......
Page 514: ......
Page 572: ......
Page 574: ......
Page 590: ......
Page 592: ......
Page 854: ......
Page 870: ......
Page 874: ......