3
55
Recording
Recording Video
This section explains the basics of recording clips*. Before making important recordings for the first time, make
test recordings using the video configuration(s) you plan to use to check that the camera operates correctly.
Should the camera fail to operate correctly, refer to
Troubleshooting
(
A
* “Clip” refers to a single movie unit recorded with a single recording operation. Some clips can include custom picture settings
(
A
131) and metadata (
A
Recording
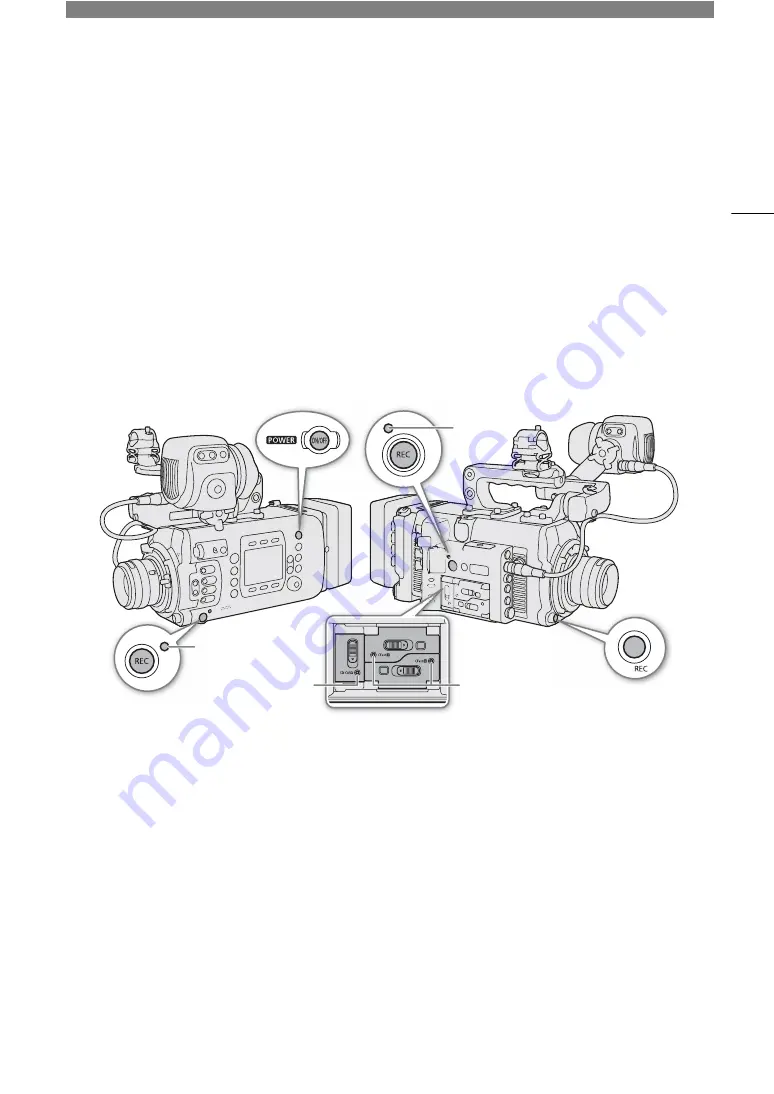
1 Press the
Q
button to turn on the camera.
• The camera turns on in record standby mode.
• The access indicators of card slots with a card inserted will illuminate momentarily in red. Then, the access
indicator of the CFast card slot selected for recording will change to green.
2 Press the REC button to begin recording.
• Recording starts. The recording indicator on the HOME screen and at the bottom of the monitoring screen
changes from [STBY] to [
Ü
REC]. While recording on a CFast card, the tally lamp will illuminate in red.
• You can also perform this function remotely using Browser Remote on a connected network device (
A
• For details about sub recordings refer to
Simultaneous Sub Recordings
(
A
3 Press the REC button to stop recording.
• The clip is recorded to the recording media and the camera returns to record standby mode. The tally lamp
will change back to green.
CFast card access
indicators
Tally lamp
SD card access
indicator
Tally lamp


